The best way to track Instagram Ads in WordPress forms
Learn how to use a tool called Attributer to capture Instagram Ads data with each submission of your WordPress forms, so you can track how many leads & customers you're getting from your ads.

Free tools like Google Analytics make it really easy to understand how many website visitors you are getting form your various Instagram Ad campaigns.
But if you're the kind of business that generates leads from your website and then sells offline (I.e. via email or a phone call), then Google Analytics can't tell you how many leads & customers you got from your ads. And that's what matters.
Fortunately, there is a solution.
In this article, we'll show you how to use a tool called Attributer to capture information on where your leads are coming from in your WordPress forms and send that data to your CRM (and/or other sales & marketing tools).
4 steps to track leads from Instagram Ads in WordPress forms
Attributer makes it easy to capture Instagram Ads data in WordPress forms. Just follow these 4 steps to get started:
1. Add UTM parameters to your Instagram Ads

The first thing you need to do is add UTM parameters behind your Instagram Ads.
If you haven't heard the term 'UTM parameters' before, they are little bits of information you put at the end of the URL you're sending people to from your ads.
So if the page you are sending someone to is attributer.io/integrations/wordpress then your final URL (with UTM parameters) might look a bit like this:
attributer.io/integrations/wordpress?utm_medium=paidsocial&utm_source=instagram&utm_campaign=brand-campaign
You can put whatever information you want in the UTM parameters, but generally the best practice for Instagram Ads is:
- UTM Medium = Paid social
- UTM Source = Instagram
- UTM Campaign = The name of your campaign
- UTM Term = The name of the ad set the ad belongs to
- UTM Content = The specific ad
Tagging URLs with UTM parameters is easy and there are free tools available on the web which can help you do it. We also have an article on our Help site that gives some recommendations on what information you should put in your UTM parameters.
2. Install Attributer and add some hidden fields

After you have added UTM parameters behind your ads, the next step is to set Attributer up on your website.
In case you haven't heard of it, Attributer is a small bit of code you place on your website that figures out where a lead has come from and passes the information through when they submit a form on your site.
To get started, sign up for a 14-day free trial and you'll be given a small snippet of code to add to your website. You can add it to your WordPress site by following these instructions.
After you've added the code, the next step is to add a series of hidden fields to your forms, including:
- Channel
- Channel Drilldown 1
- Channel Drilldown 2
- Channel Drilldown 3
- Channel Drilldown 4
Fortunately, most WordPress form builders (like Gravity Forms, Contact Form 7, WPForms, etc) make this easy and full instructions can be seen here.
3. Attributer writes Instagram Ads data into hidden fields

Now that you have it set up, Attributer will begin to track where your website visitors are coming from (including from your Instagram Ads) and store the data in a cookie in the visitor's browser (so that it is remembered as people browser your site, or if they leave and come back).
Then when the visitor completes a form on your website, Attributer will write the information on where they came from (I.e. Instagram Ads) into the hidden fields.
4. Instagram Ads data is captured in your form builder
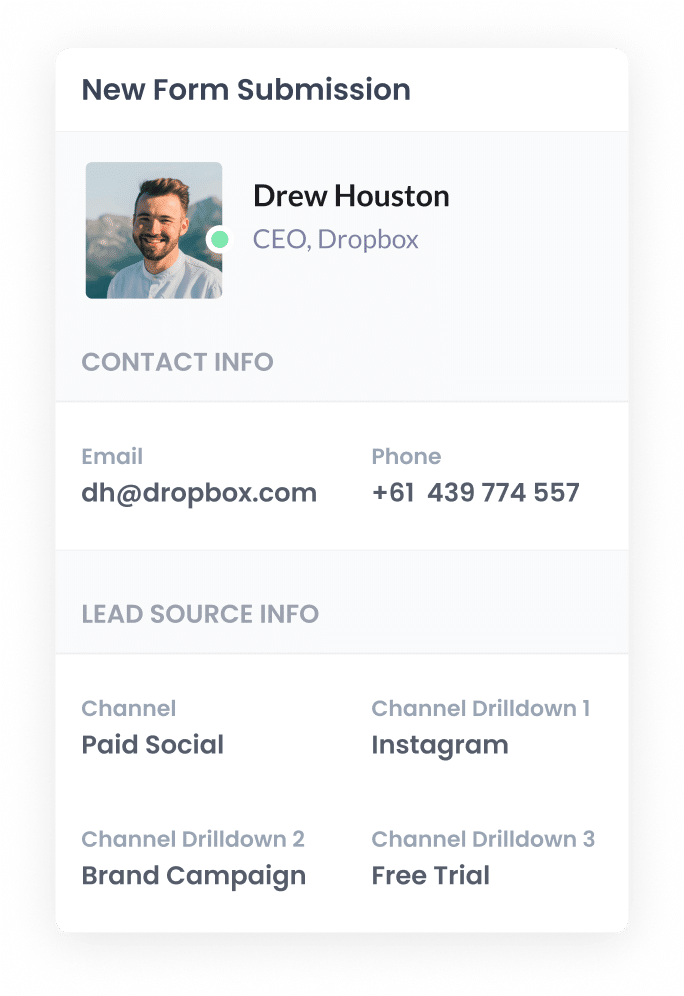
Finally, when the visitor submits a form on your website, the Instagram Ads data (like the campaign name, ad set, ad, etc) that Attributer wrote into the hidden fields is captured by your form tool alongside the lead's name, email, phone, etc.
You can then use this data in a variety of ways, including:
- See it in your WordPress Admin area - You can view this data in the Entries/Submissions table in your form tool (I.e. Gravity Forms, WPForms, etc)
- Include it in notification emails - You can include this information in the notification emails that your form tool sends, meaning you'll be able to see where each lead came from right from your inbox.
- Send it to your CRM - If you use a CRM (like Salesforce, Hubspot, Pipedrive, etc) then you can use your form tools' native integrations to send the data there and then build reports & dashboards on top of the data.
- Send it to a spreadsheet - You can use various add-ons or third-party tools (like Zapier) to send the data to a spreadsheet and then use that to run reports.
What is Attributer and why use it?
From the above steps you might have gotten a bit of an understanding of what Attributer does, but what is it and how does it work?
Attributer is essentially a small piece of code that you put on your website.
When someone lands on your site, Attributer looks at where they came from and categorizes them into different channels, (the same ones you see in Google Analytics, including Paid Social, Paid Search, Organic Search, etc). This information is then saved as a cookie in the visitor's web browser.
And when that person fills out a form on your website, Attributer writes the information on where they came from into the hidden fields and it is captured by your form tool.
Attributer is the best solution for tracking Instagram Ads in WordPress forms for the following reasons:
- Captures all sources of leads: Attributer passes through the source of ALL your leads, not just those from your Instagram ads. This means you can also track how many leads you get from other channels like organic Google searches, Google Ads, Facebook Ads, etc.
- It remembers the data: Unlike other tools, Attributer stores the attribution information in a cookie inside the visitor's web browser. This ensures that no matter which page the person submits a form on, the information on where they came from gets passed through.
- It cleans the data: Attributer was designed to expect inconsistencies in your UTM parameters (like using "instagram" in one place and "instagram.com" in another) and could still assign this to the correct channel (Paid Social) regardless.
3 example reports you can run when you capture Instagram Ads in WordPress forms
If you're using Attributer to capture Instagram Ads data in Gravity Forms and sending that information to your CRM or a spreadsheet, it's possible to run all kinds of reports to see how your ads are performing.
Before founding Attributer, I ran marketing & analytics teams for over 15 years and ran literally hundreds of reports to track how our ads are performing.
Below are the ones I found most useful:
1. Leads by channel
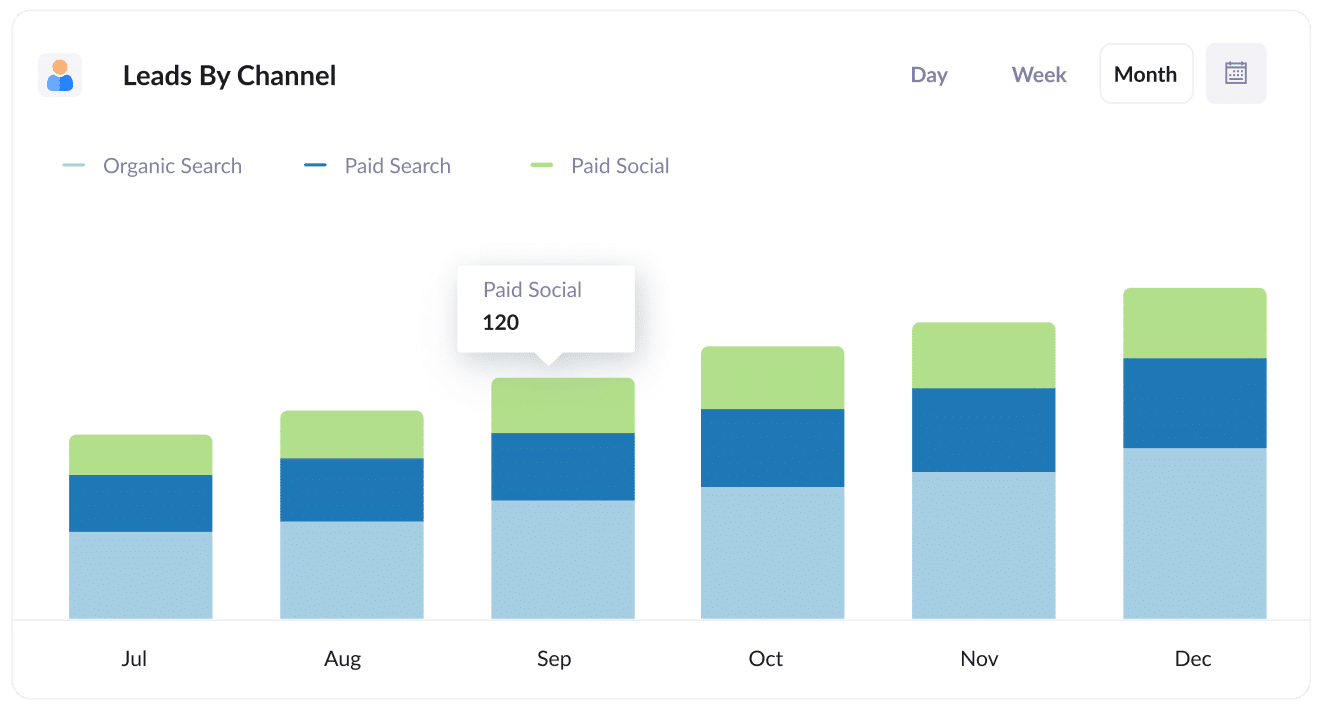
Because Attributer captures the source of ALL your leads (not just those from your Instagram Ads), then you're able to run reports like this which show how many leads you're getting each month by the channel they came from.
This chart gives you a high-level overview of which channels (I.e. Organic Search, Paid Search, Paid Social, etc) are bringing you leads, and helps you understand where you should focus your efforts to grow.
2. Leads by network
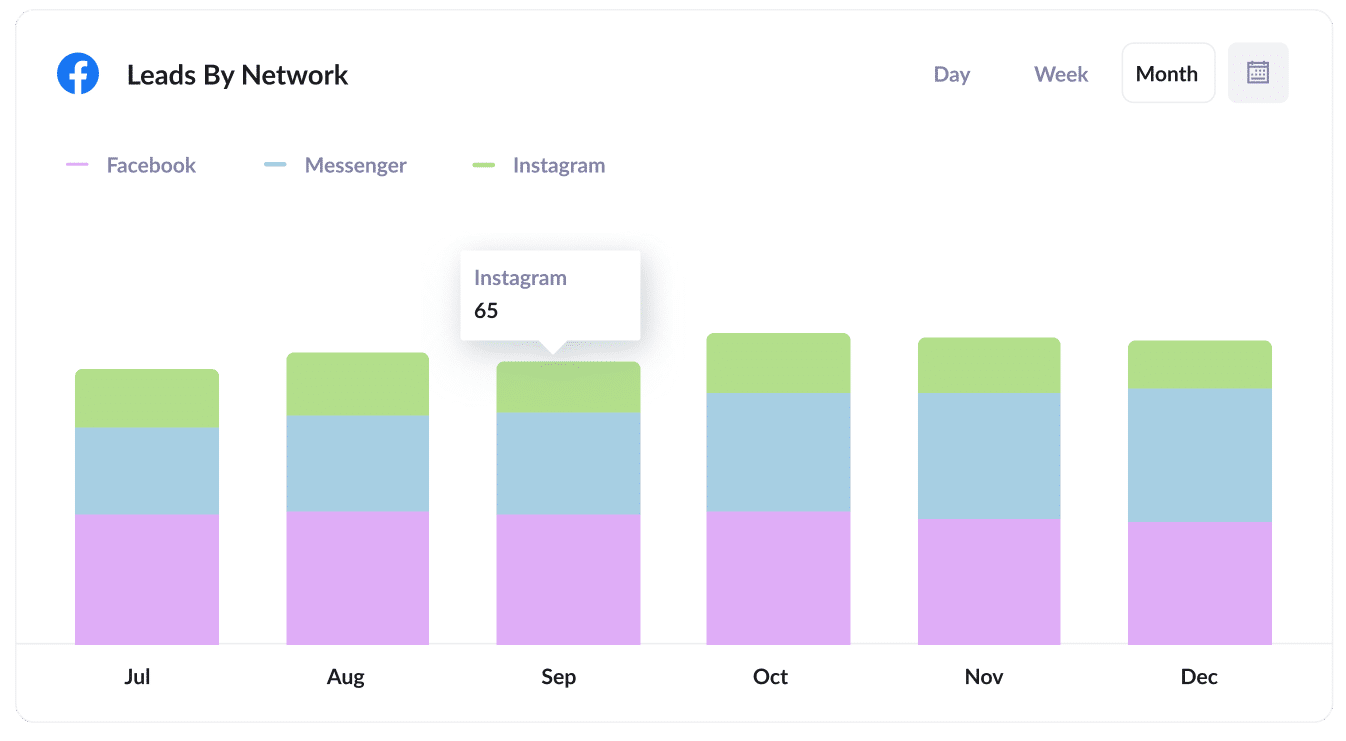
If you're running ads on Instagram, then chances ads are those ads are probably also appearing on the other networks Meta owns (like Facebook, Messenger & WhatsApp).
In that case, this report can be useful.
It shows how many leads you're getting from your ads on each network and can help you understand which one is performing best for your business (and subsequently where you should be focusing your budget).
3. Leads by campaign
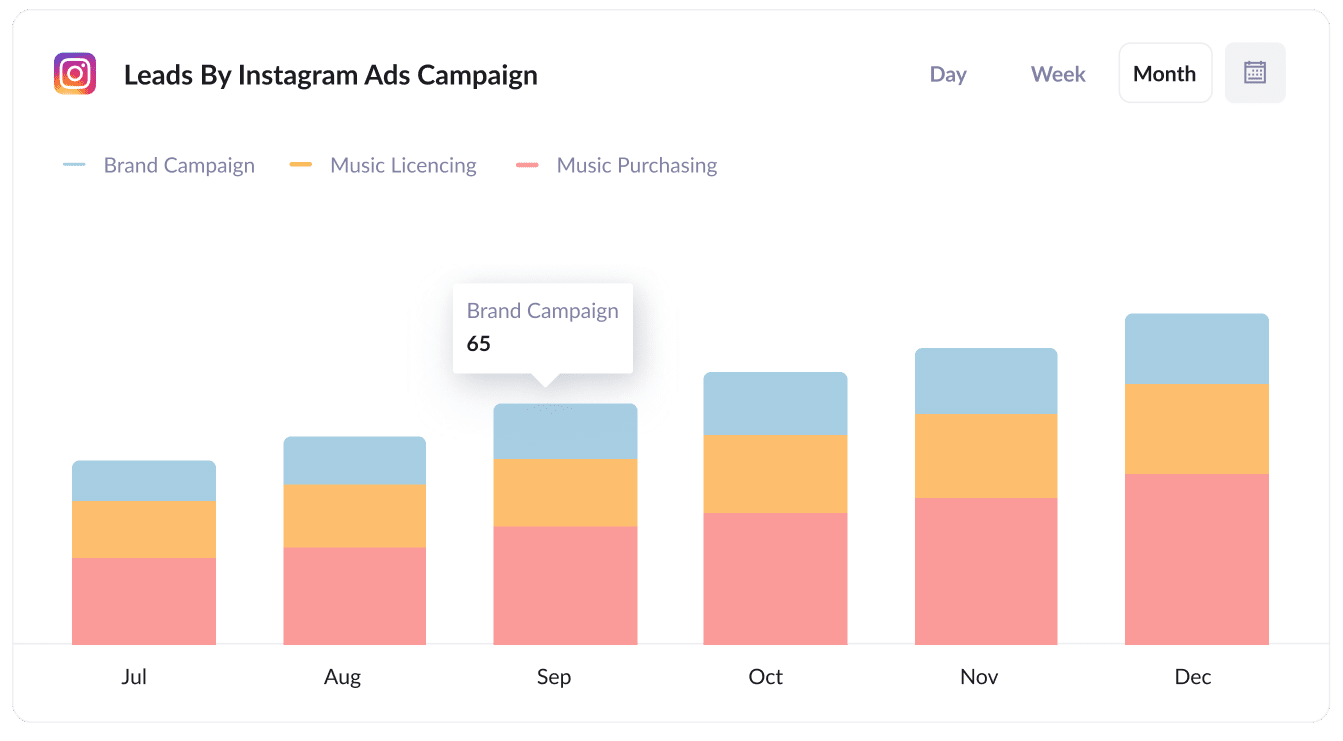
The above graph shows how many leads you're getting each month broken down by the Instagram Ads campaign they came from.
This can help you understand which campaigns are generating the most leads, and where you should be investing more of your time and budget to help grow.
Wrap up
If you've been looking for a way to track how many leads & customers you get from your Instagram Ads, then using Attributer on your WordPress website could be the answer.
It will tell you exactly where each lead came from, right down to the exact campaign, ad set, or ad they clicked. And if you send this data to a CRM or spreadsheet, you can then run all sorts of reports that show you how your various campaigns are performing.
Best of all, it's free to get started and only takes about 10 minutes to set up. So start a free 14-day trial of Attributer today to see how it can help you!
Get Started For Free
Start your 14-day free trial of Attributer today!

About the Author
Aaron Beashel is the founder of Attributer and has over 15 years of experience in marketing & analytics. He is a recognized expert in the subject and has written articles for leading websites such as Hubspot, Zapier, Search Engine Journal, Buffer, Unbounce & more. Learn more about Aaron here.
