The best way to capture UTM parameters in WS Form
Learn how to capture UTM parameters in WS Form, so you can track where your leads are coming from
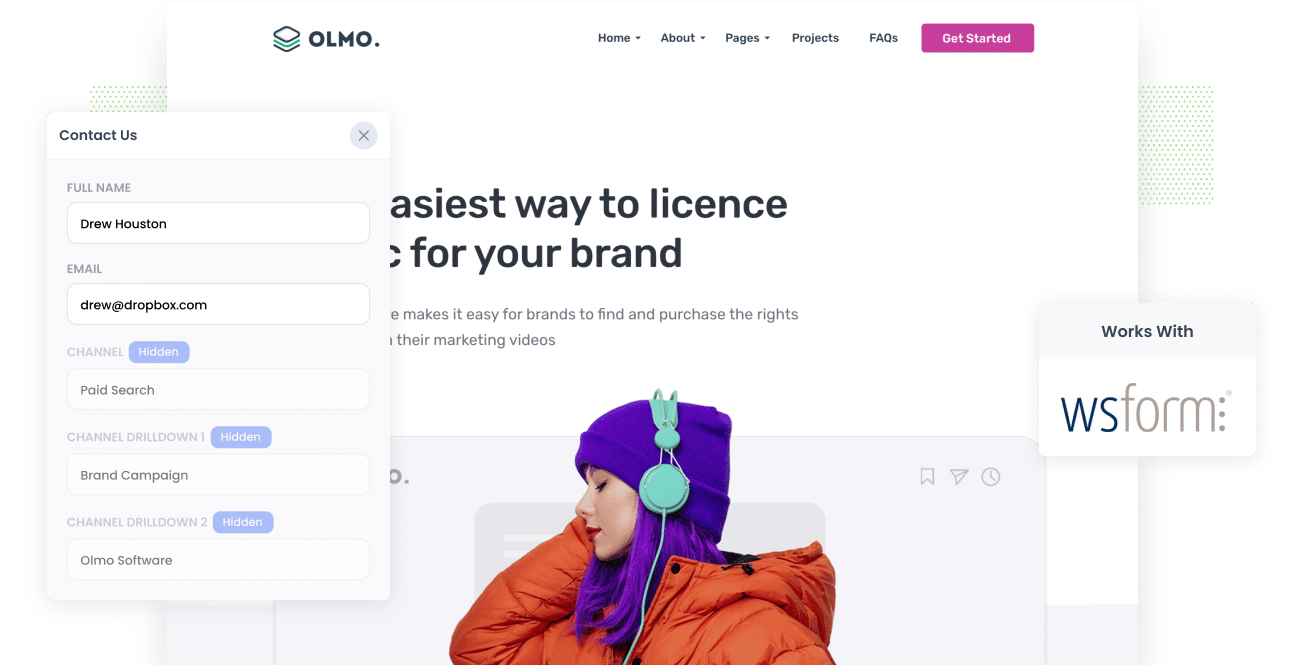
Are you trying to track which campaigns are generating leads for your business?
Tools like Google Analytics make it easy to understand how many website visitors you're getting, but they can't tell you where each lead came from.
The best way to do this is to capture UTM parameters each time a new lead completes a form on your website. That way you'll be able to see exactly where they came from and attribute that lead back to your Google Ads, Facebook Ads, etc.
In this article, we'll show you how to capture UTM parameters in WS Form and send them to your CRM & other tools, so you can see exactly where your leads & customers are coming from.
4 steps for capturing UTM parameters in WS Form
Attributer makes it easy to capture UTM parameters in WS Form. Here's how it works:
1. Add the Attributer code to your website

The first thing you need to do is add the Attributer code to your site.
When you first start a 14-day free trial, you'll get a given a snippet of code in your account.
Simply copy this code and add it to your site, either directly or through a tag management tool like Google Tag Manager.
Full step-by-step instructions can be found here.
2. Add hidden fields to your forms

The next thing you need to do is add a series of hidden fields to your forms.
If you're not familiar with them, hidden fields are form fields that are technically on your form but are not visible to users. They allow tools like Attributer to write information into them without anyone seeing.
Here are the hidden fields you need to add to your forms:
- Channel
- Channel Drilldown 1
- Channel Drilldown 2
- Channel Drilldown 3
- Landing Page
- Landing Page Group
WS Form makes it easy to add hidden fields and step-by-step instructions can be found here.
3. Attributer automatically completes the hidden fields with UTM data

Attributer will track where your website visitors are coming from and write the UTM parameters into the hidden fields when they complete a form.
To illustrate, let's imagine you work for a company called Olmo Software and someone complete a form after clicking one of your Google Ads.
Depending on the UTM parameters you put behind you ad, Attributer would complete the hidden fields as follows:
- Channel = Paid Search
- Channel Drilldown 1 = Google
- Channel Drilldown 2 = Brand Campaign
- Channel Drilldown 3 = Olmo
Furthermore, Attributer would also write the landing page and landing page group into the hidden fields. For example:
- Landing Page = www.olmo.com/features/music-licencing
- Landing Page Group = Features
4. UTM parameters are captured by WS Form

Finally, when the user submits a form with their details (name, email, number, etc.), the UTM parameters are captured in WS Form.
You can then:
- See the data in the Submissions section of your WordPress dashboard
- Include the data in the new lead notification emails that WS Form sends
- Send the data to CRM tools like Salesforce, Hubspot, Pipedrive, Zoho CRM and more.
- Sync the data to Google Sheets or Microsoft Excel
- And much more!
What is Attributer?
Attributer is a little snippet of code that you place on your company's website.
When a person lands on your site, it looks at a bunch of technical information about how they got there (including any UTM parameters in the URL) and categorises the visitor into a series of Channels (I.e. Paid Search, Organic Search, Paid Social, etc).
It then stores the data in a cookie in the visitor's browser, so it's remember as they browse your site (or even if they leave and come back again later).
Then when that visitor completes a form on your website, Attributer writes the UTM parameters into the hidden fields in your form and they are captured by WS Form alongside the details the lead entered into the form (I.e. their name, email, phone, etc).
You can then use WS Forms native integrations (or a 3rd party tool like Zapier) to send the data to your CRM and other sales & marketing tools.
Why using Attributer is better than capturing raw UTM parameters
There are some other ways of capturing UTM parameters in WS Form, so why use Attributer?
Here are the 4 main reasons why using Attributer is better:
1. Captures all traffic
With Attributer, you get information on the source of ALL your leads, not just those that come from your paid ads with UTM parameters.
This means you'll also be able to track how many leads you get from organic channels like Organic Search, Organic Social, Referral, Direct Traffic and more.
2. Remembers the data as visitors browse your site
Other tools can only capture UTM parameters if the person completes the form on the same page they originally landed on.
To illustrate why this is a problem, imagine someone clicks one of your Google Ads, is taken to your homepage, clicks through to the 'Contact Us' page and completes the form there. This would mean that the page they complete a form on is not the same page they originally landed on, so the UTM parameters are lost.
But because Attributer stores the UTM parameters in a cookie in the user’s browser, they'll always be passed through regardless of what page the visitor completes a form on.
3. Provides cleaner data
Other tools will just capture the raw UTM parameters straight from the URL, which often results in messy data.
As an example, imagine some of your Google Ads campaigns are tagged with UTM_Source=google, others with UTM_Source=google.com, and others with UTM_Source=adwords.
When you pass this data into your CRM and try to use it to see how many leads your Google Ads have brought you, you'd get three different sources that you would then have to manually stitch together.
But Attributer takes into account these kinds of inconsistencies and would assign these leads to the 'Paid Search' channel regardless, which makes it much easier for you to understand how your Google Ads are performing.
4. Captures landing page data as well
Attributer also captures the landing page (I.e. attributer.io/blog/capture-utm-parameters) and the landing page category (I.e. /blog).
This allows you to run reports that show how many leads & customers you are getting from certain sections of content on your site (I.e. your blog), as well as drill down and see how many leads & customers you're getting from each individual content piece (I.e. each blog post).
4 example reports you can run when you capture UTM parameters in WS Form
If you use Attributer to capture UTM parameters in WS Form and then send the data into a CRM or spreadsheet, you're able to create really insightful reports that show your various marketing campaigns are performing.
I've been in marketing for over 15 years and in that time have spent millions on Google & Facebook Ads and run hundreds of reports to track how they're performing.
I've included some of my favorite reports below to help you get an understanding of what's possible with Attributer:
1. Leads by Channel
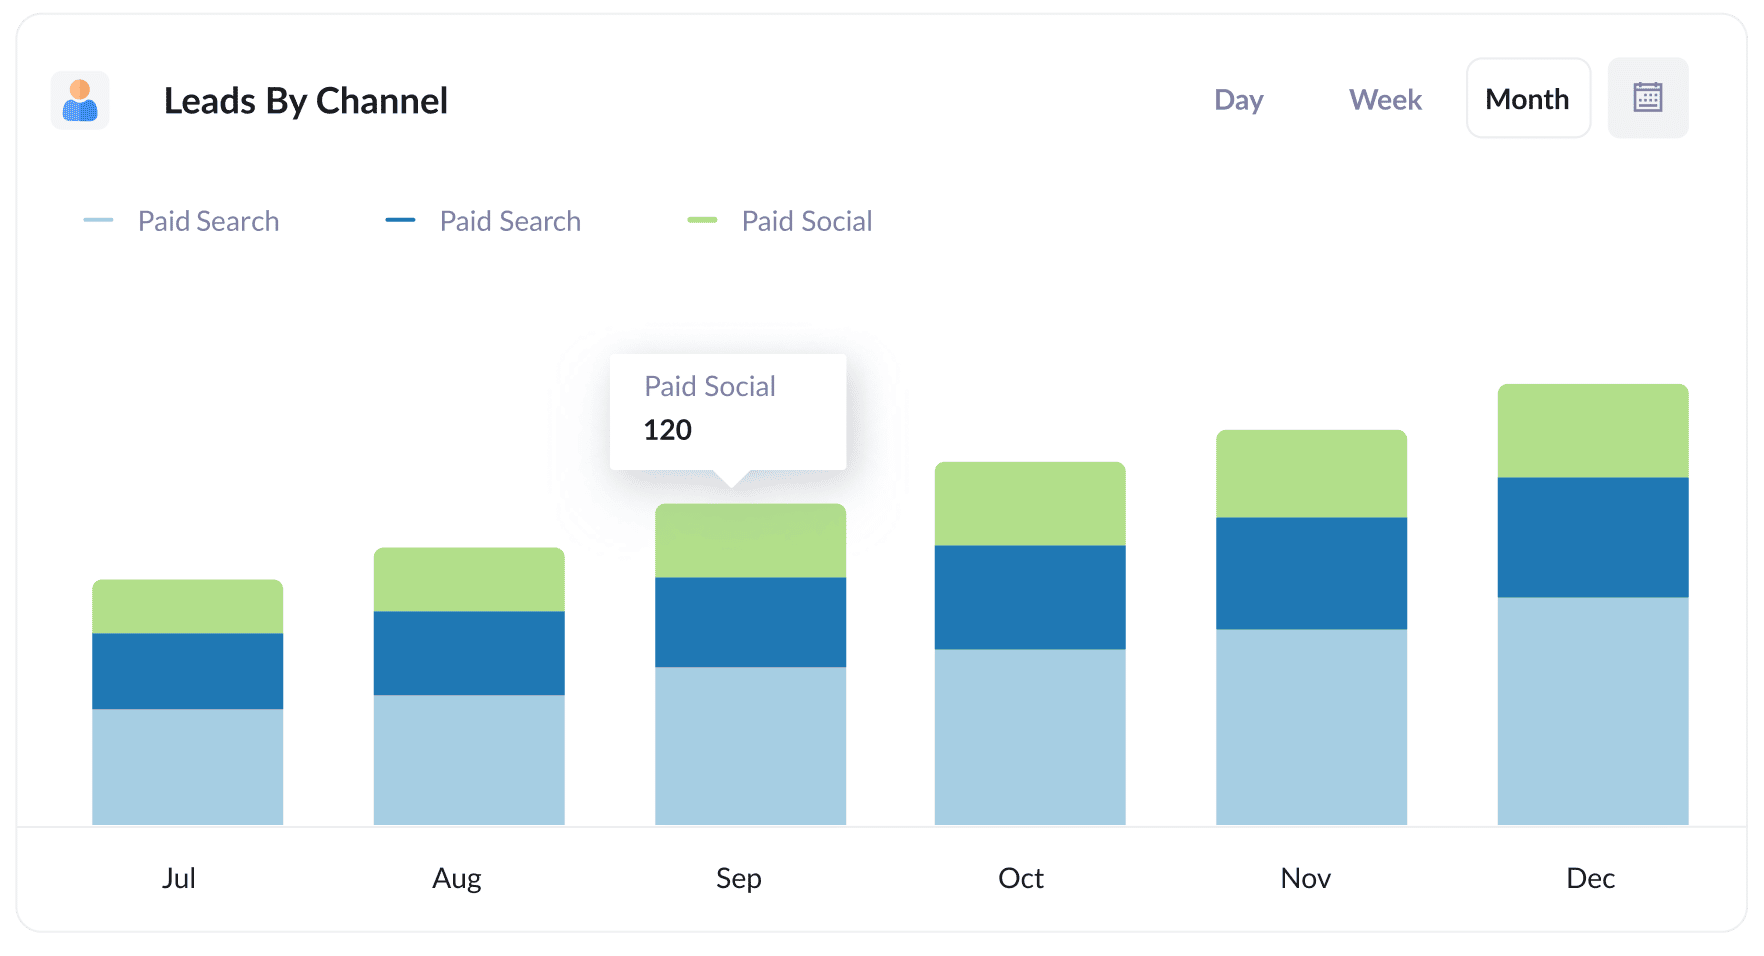
Because Attributer captures the source of all your leads (not just those from your paid ad campaigns), you're able to run reports like this that show how many leads you're getting from each channel.
Reports like this can help you understand what channels are working for your business and which ones aren't, and allow you to prioritise your efforts accordingly.
For instance, if most of your leads come from Organic Search but you're investing most of your budget in paid ads, it may be advantageous to shift some of your budget to SEO.
2. Leads by Facebook Ads Network
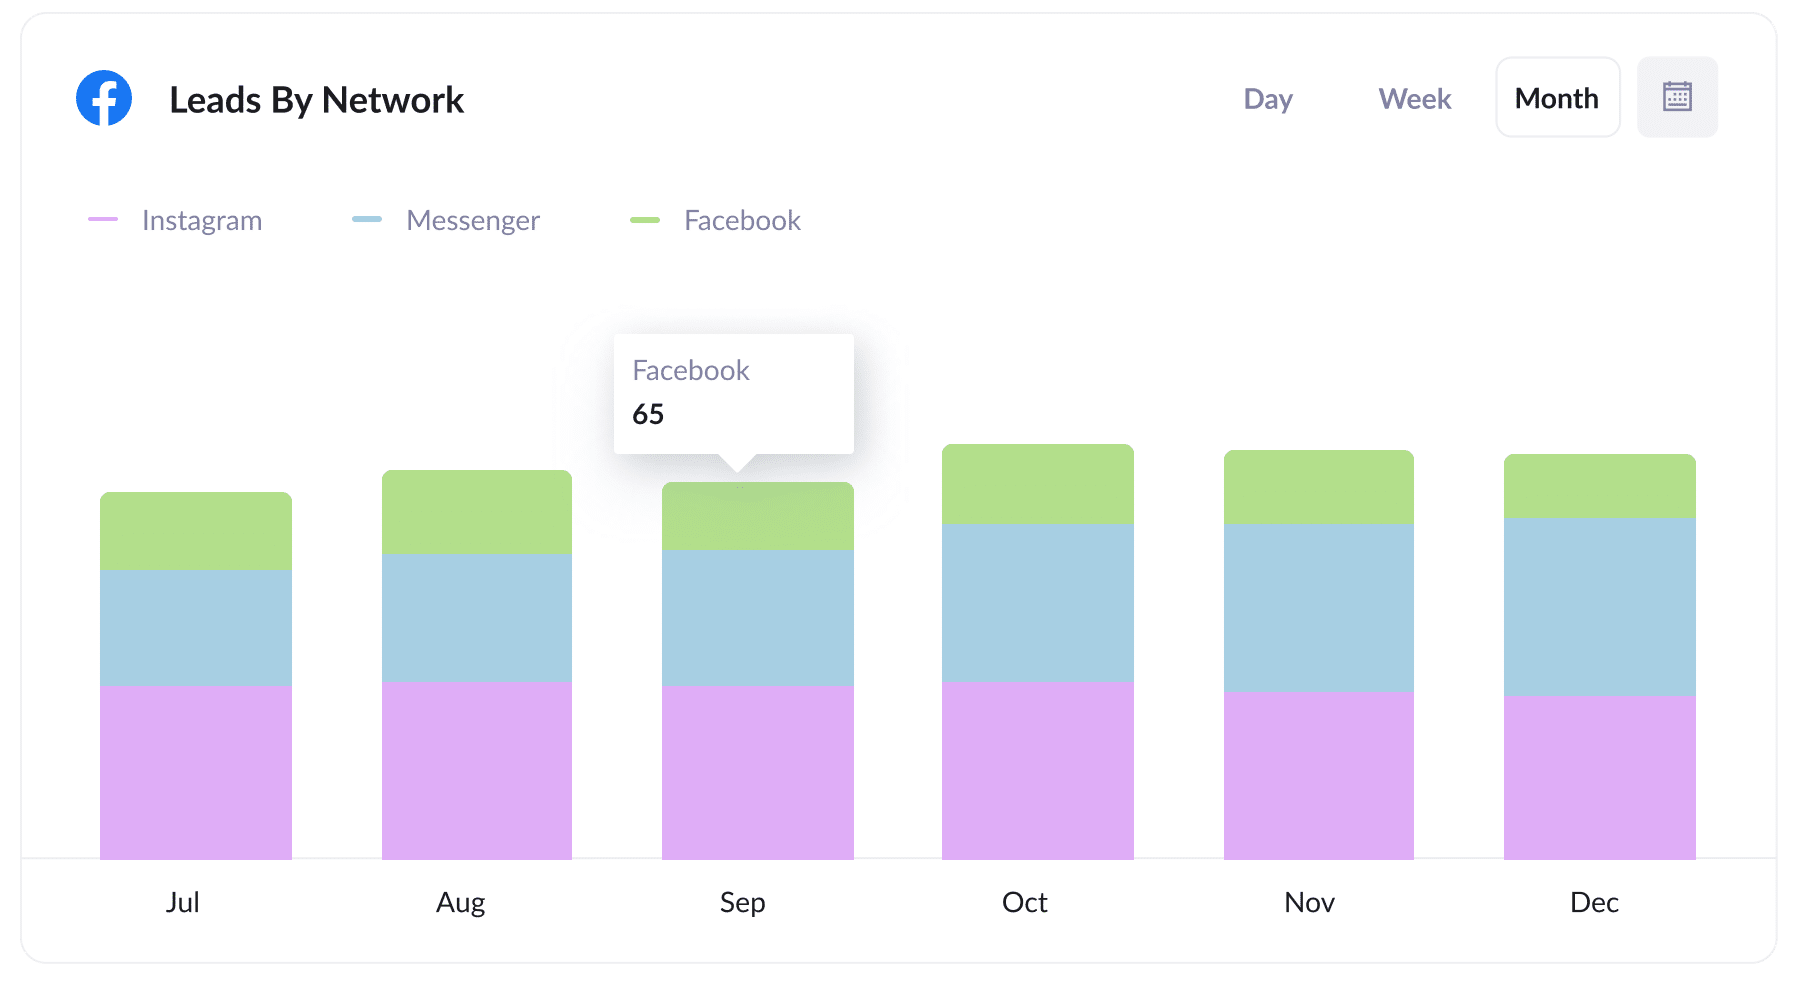
If you're running Facebook Ads, then it's highly likely your ads are appearing on the multiple social networks that Meta owns (i.e., Facebook, Instagram, Messenger, etc.).
If so, then this report can be useful. It shows how many leads you got from each network and can help you understand where your ads are performing best (which in turn enables you to optimise your targeting settings to focus more on that network and get more leads at a lower cost).
3. Customers by Google Ads campaign
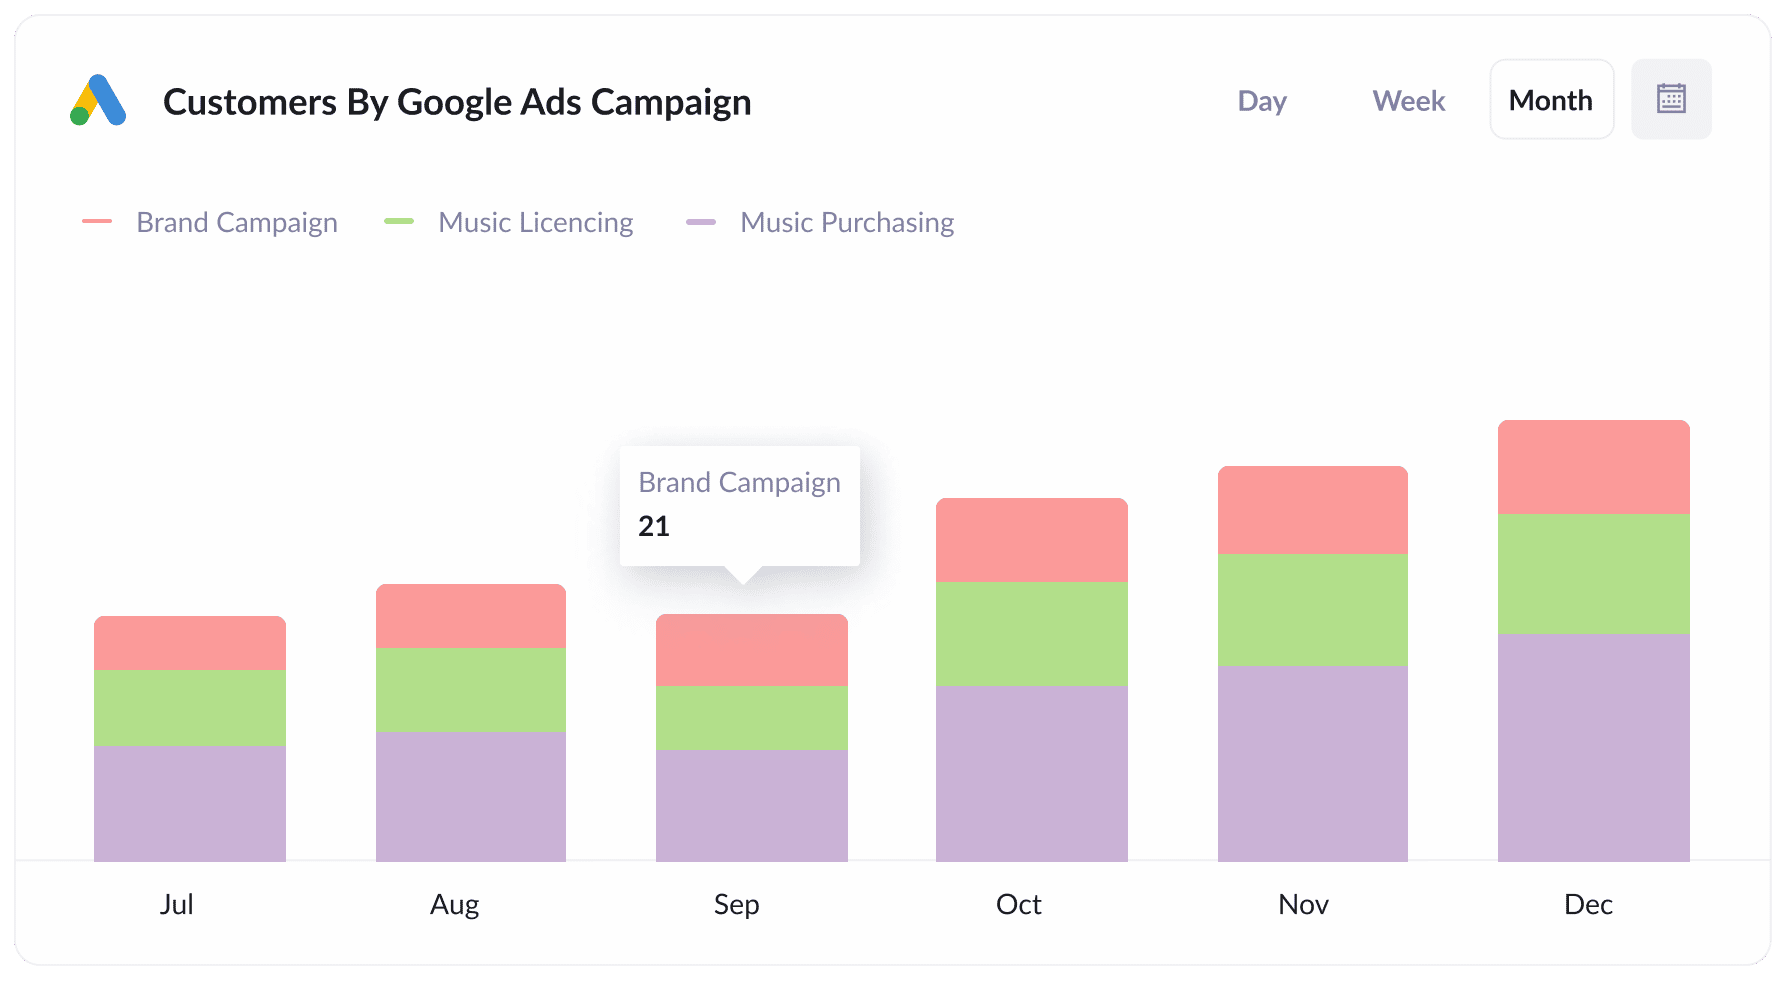
This report shows how many customers you're getting from each of the Google Ads campaigns you're running.
It can help you determine which campaigns are working best and allows you to optimize your Google Ads budget by directing your more money towards the campaigns performing best (and shutting off those that aren't working).
4. Revenue by Keyword
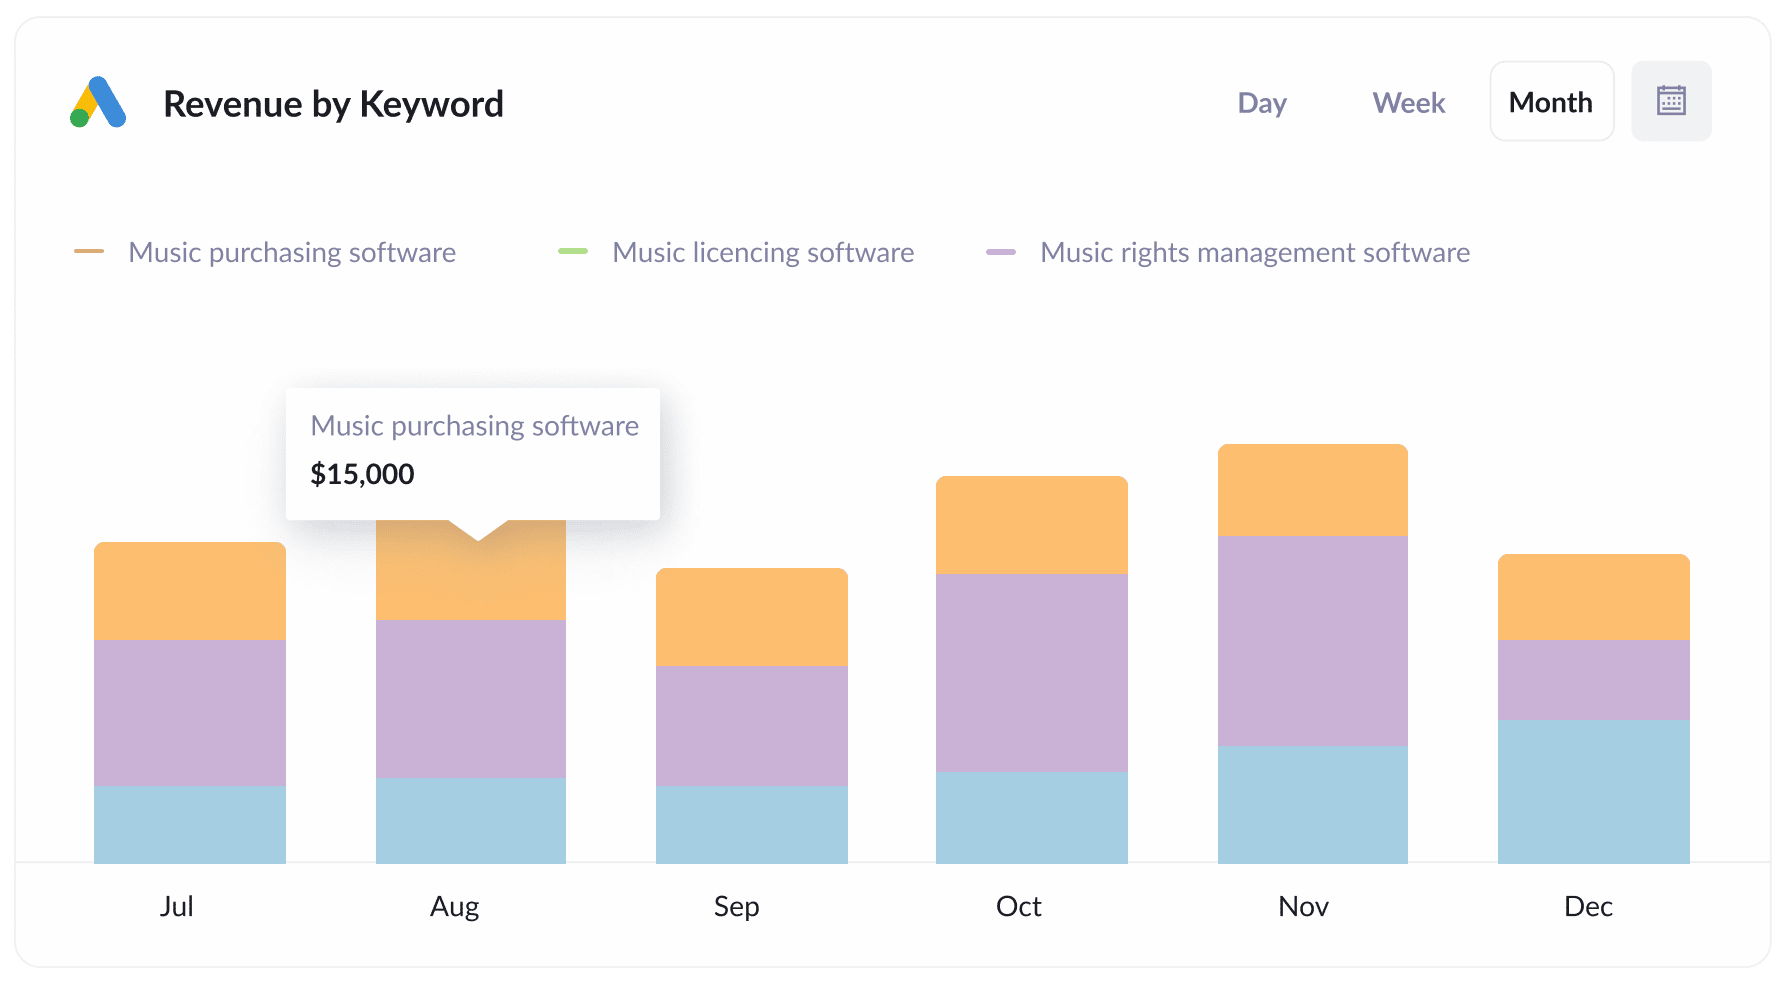
If you include the searched keyword in the UTM parameters behind your Google Ads (which can be easily achieved using tracking templates), you can capture the specific keyword each customer used to find your business and use it to run reports like the one above (which show revenue generated broken down by keyword)
This helps you understand which keywords are performing best for your business, which in turn allows you to increase bids on the best performing ones and drop the underperformers.
Wrap up
If you're wanting to capture UTM parameters with each submission of your WPForms, then Attributer is a great solution.
Unlike other tools, it will remember the UTM parameters as a visitor browses around your site and help ensure they always get passed through.
Furthermore, it will give you information on leads that come through organic channels as well, meaning you'll be able to see where ALL your leads and customers are coming from (not just those from your paid ad campaigns).
Best of all, there's a 14-day free trial and it usually only takes about 15 minutes to get set up, so get started using Attributer on your website today.
Get Started For Free
Start your 14-day free trial of Attributer today!

About the Author
Aaron Beashel is the founder of Attributer and has over 15 years of experience in marketing & analytics. He is a recognized expert in the subject and has written articles for leading websites such as Hubspot, Zapier, Search Engine Journal, Buffer, Unbounce & more. Learn more about Aaron here.
