How to capture the GCLID in Webflow forms
Learn how to capture the GCLID with each submission of your Webflow forms and send it to your CRM and other tools (and back to Google Ads as an Offline Conversion).

Google Ads can be a really effective way to bring in new leads for your business.
But if you’re not tracking how many of those leads actually turn into customers, you might be spending money on campaigns that look are getting lots of impressions and clicks, but not really generating real leads and customers.
The great thing is, there’s an easy fix for that.
In this post, we’ll show you how to use Attributer to capture the GCLID with each submission of your Webflow forms and send it straight to your CRM and other tools. We’ll also walk you through how to send that data back to Google Ads so you can track offline conversions and see which campaigns are really making an impact.
3 steps for capturing the GCLID in Webflow forms
It’s easy to capture the GCLID when you use Attributer with Webflow forms. Here’s how it works:
1. Install Attributer on your website and add a hidden field
When you start your free 14-day trial of Attributer, you’ll get a short snippet of code to place on your website.
If you’re using Webflow, then you can either add it via the Settings section of your website (instructions here) or you can add it via Google Tag Manager if that’s what you prefer.
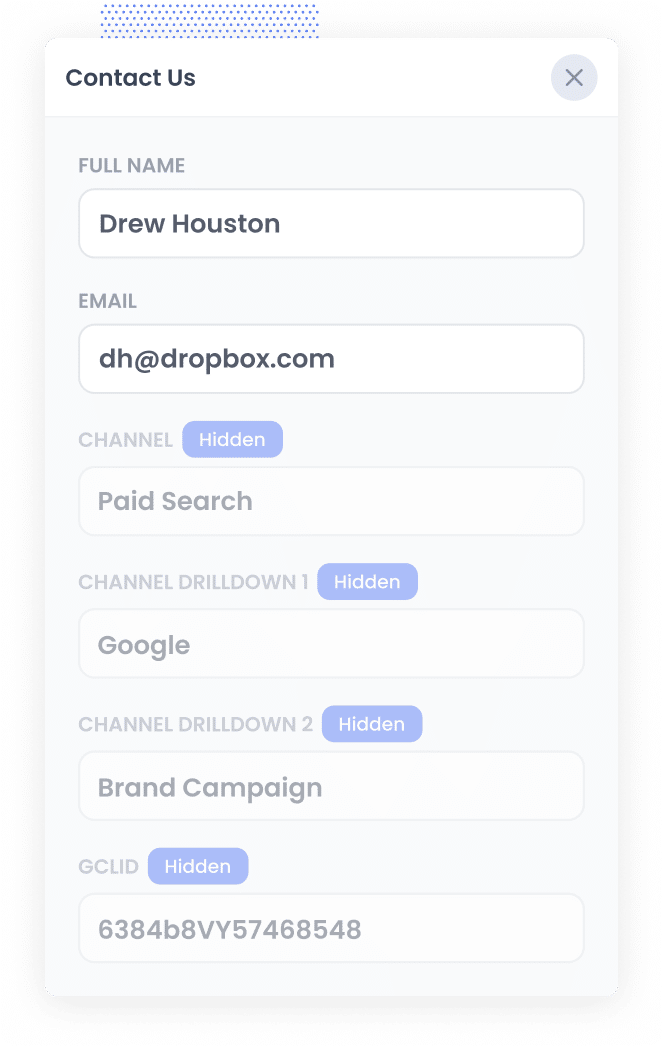
The last step is to add a hidden GCLID field to your Webflow forms. This gives Attributer a spot to store the GCLID, so it’s automatically captured whenever someone submits your form.
2. Attributer writes the GCLID into the hidden field
When someone clicks one of your Google Ads and lands on your site, Attributer automatically picks up the GCLID from the URL and stores it in their browser. This means that even if they click around your site for a while or come back later to fill out a form, their original GCLID is still saved and ready to go.
When they finally complete a form on your site, Attributer drops that GCLID into the hidden field you set up earlier, which means it gets captured with the form submission.
3. GCLID is captured with each form submission
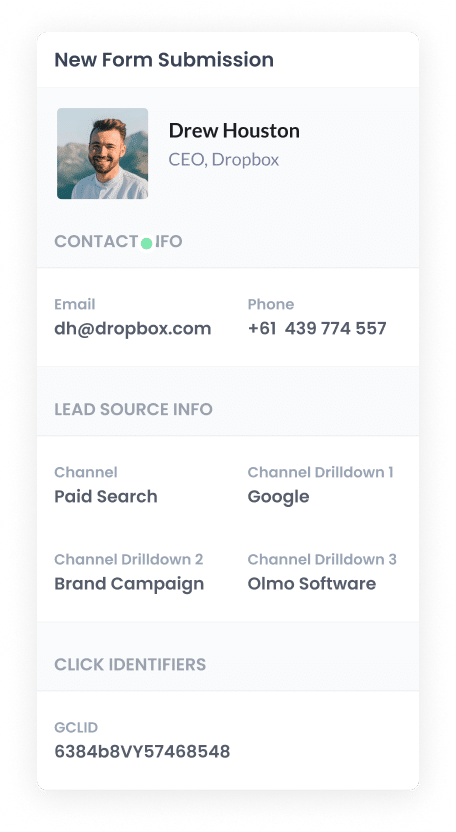
Once the form is submitted, the GCLID is captured in Webflow along with everything else the person entered, like their name, email address, and any other details.
From there, you can easily pass the GCLID into your CRM or other tools using Webflows built-in integrations or a connector like Zapier.
How to send the GCLID back to Google Ads and mark it as an offline conversion
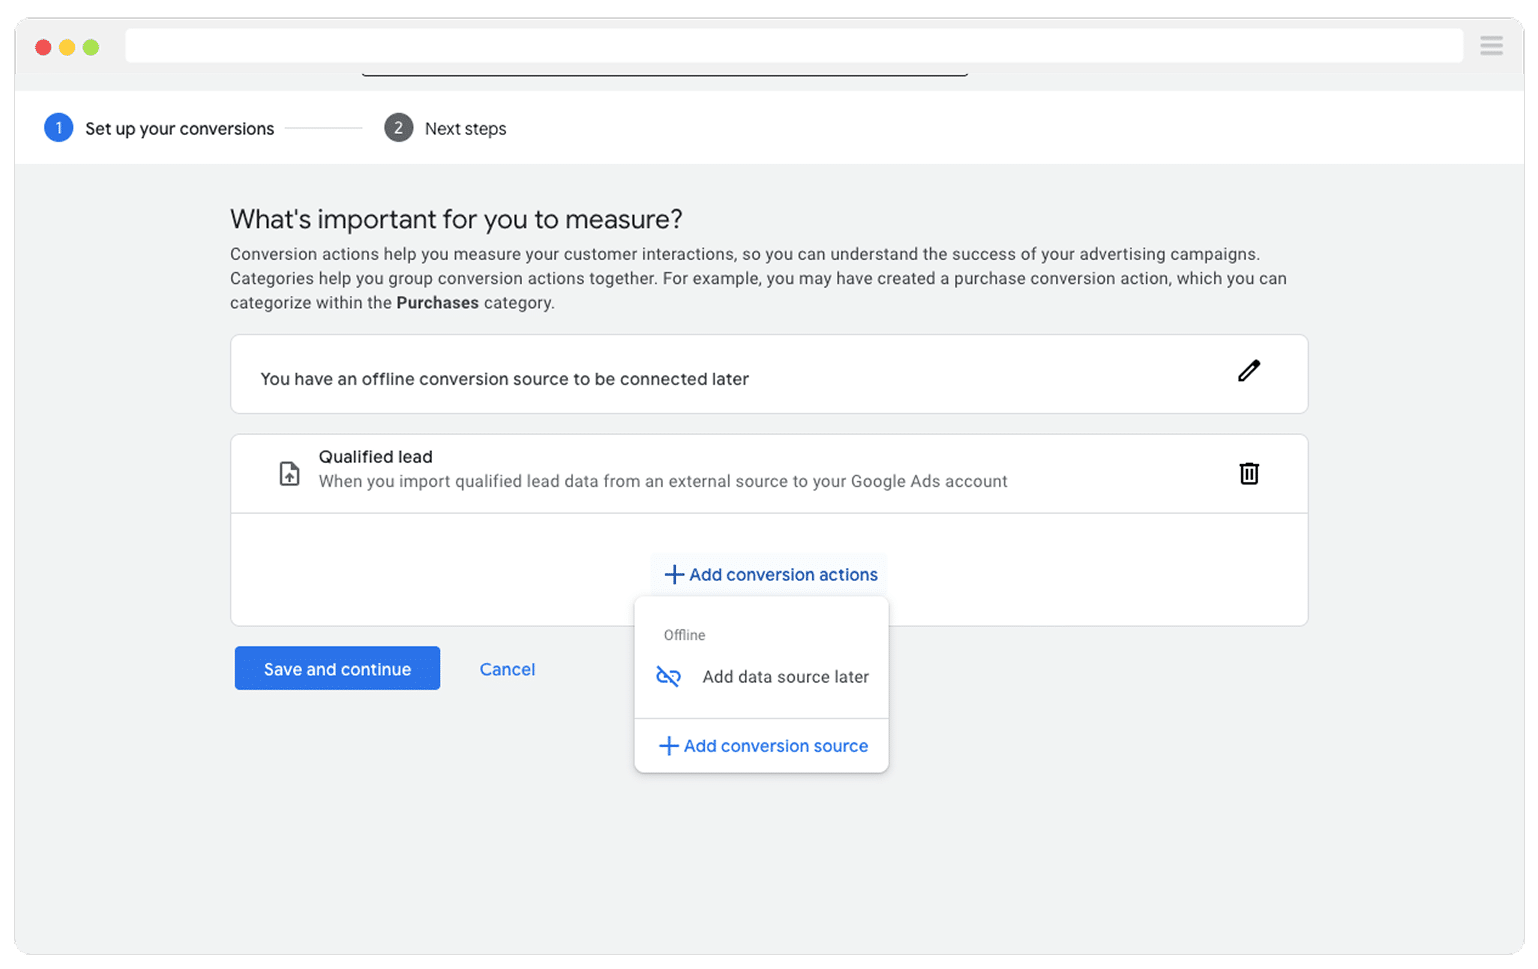
Before you can send the GCLID back to Google Ads, you’ll need to create a new conversion first.
To do this, sign in to your Google Ads account, open the sidebar, and click on Goals, then choose Conversions. On that page, click the button to create a new conversion and select Offline Conversion as the type.
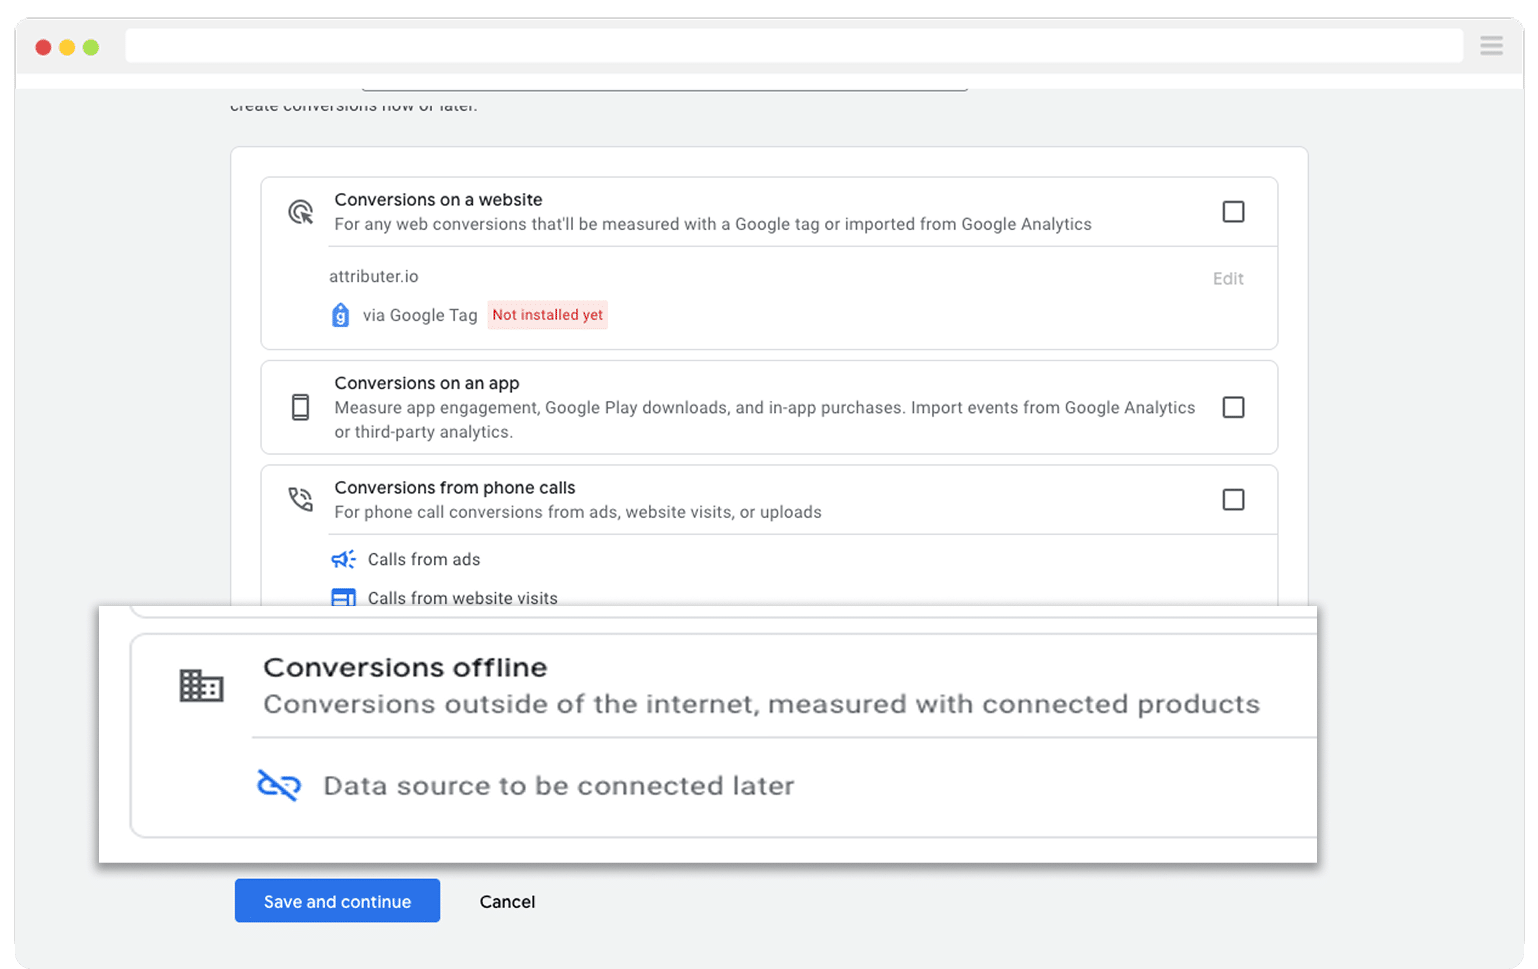
Then, in the final screen when it asks you to add a data source, select the option to ‘Add data source later’.
Now that your conversion is set up in Google Ads, you can start sending the GCLID. Before you do that, you need to pick the moment in your sales process that you want to count as the conversion.
Most people wait until a deal is fully closed and then tell Google Ads a conversion happened. That approach makes sense but it can slow things down. Google’s smart bidding strategies such as Maximise Conversions, Maximise Conversion Value, and Target CPA work best when they see around 50 conversions each month. If you close fewer than 50 deals in a typical month, choose an earlier milestone instead, like when a deal is created, so Google has enough data to optimise.
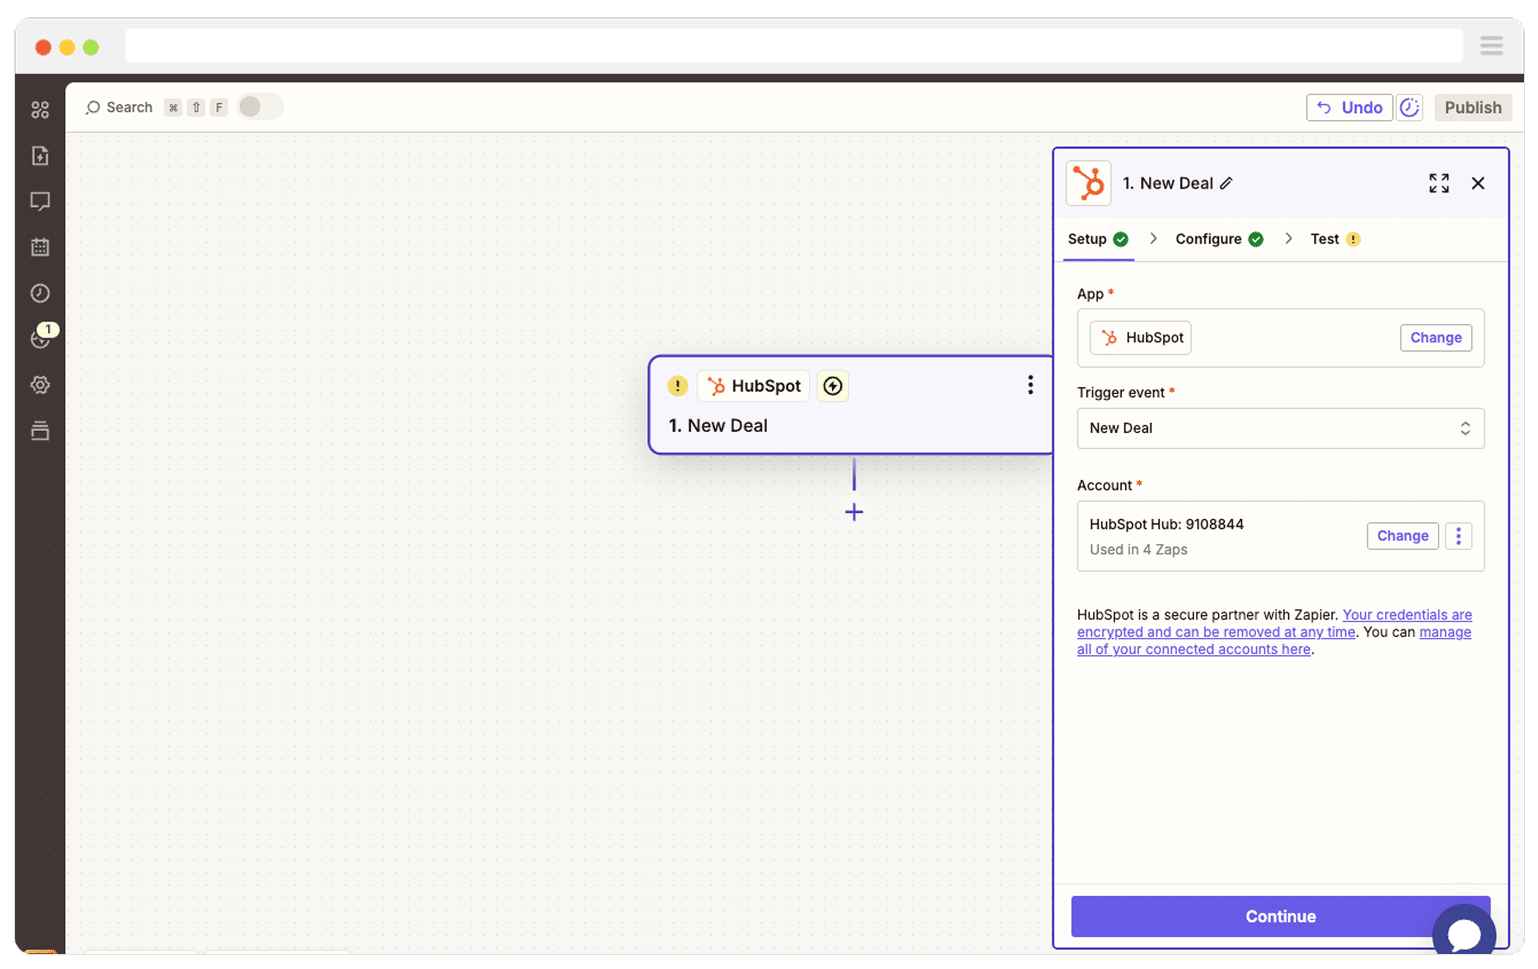
Once you have chosen that milestone, jump into your Zapier account and create a new Zap. Set the trigger to match the conversion point you picked. For example, if you decided to send the offline conversion when a deal is created for a contact, choose that event as your trigger.
Next, select Google Ads as the Action and then select the ‘Send Offline Conversion’ as the event.
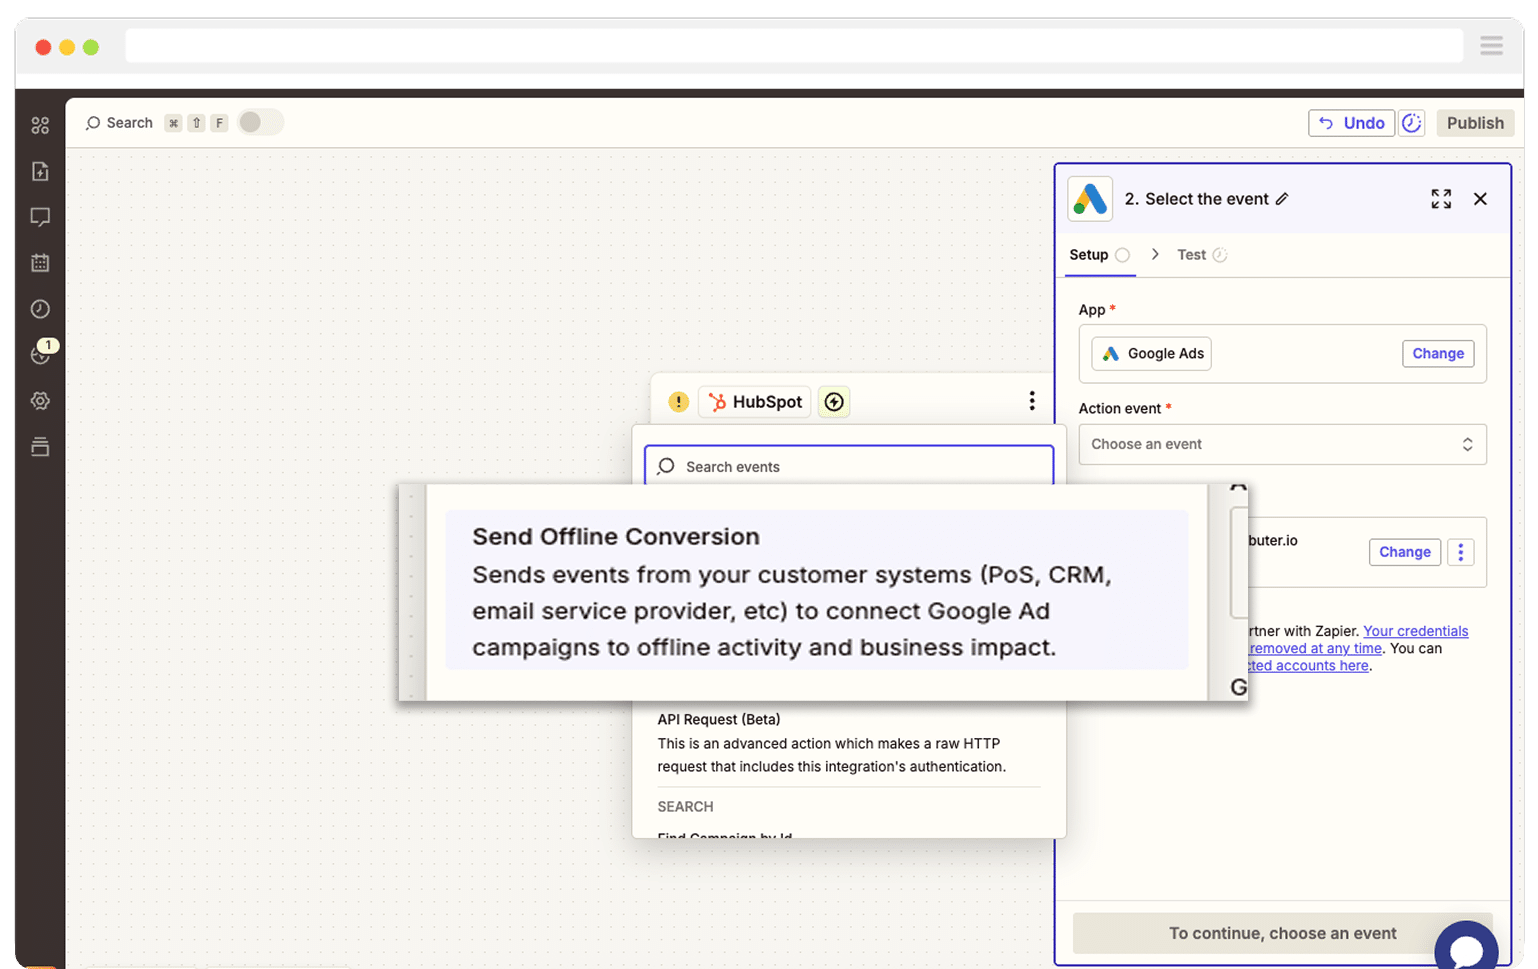
Finally, you just need to map the GCLID from your CRM (or wherever you are storing it) to the correct field in Zapier.

That’s it! You have now set up offline conversions in Google Ads. It’s a good idea to test it’s working before piling money into ads, and you can read more about how to do that here.
Why Attributer is the best way to capture the GCLID in Webflow forms
There are a few different ways to capture the GCLID in Webflow forms, so why use Attributer?
Here’s why it’s the smarter choice:
1. Remembers the GCLID as visitors browse your site
Most other methods only work when the GCLID is still sitting in the page URL at the exact moment the form is submitted.
That’s a big problem if someone clicks your Google Ad, lands on your homepage, and then moves to your Contact Us page to fill out a form as the GCLID disappears from the URL when a visitor moves between pages of your website.
Attributer takes a smarter approach. It saves the GCLID in the visitor’s browser, so even if they click around your site or leave and come back later to complete a form, that original GCLID is still remembered and passed through correctly.
2. Captures UTM parameters as well
Attributer does more than store the GCLID. It also collects any UTM parameters you add to your ad links and passes them through when someone submits a Webflow form.
Here is an example for a law firm. If a person clicks one of your Google Ads and then completes a form, Attributer can record:
- Channel: Paid Search
- Channel Drilldown 1: Google
- Channel Drilldown 2: Family Law Campaign (or the name of your campaign)
- Channel Drilldown 3: Divorce Lawyer Sydney (or the keyword you targeted)
- Channel Drilldown 4: Free Consultation Ad (or the specific ad they clicked)
With this information in your CRM and reporting tools, you can see exactly where each lead came from and which ads are driving real results.
3. Captures information on users from organic channels
Attributer also passes through information on leads who found your website through organic channels, such as Organic Search, Organic Social, Referral, Direct Traffic, etc.
Continuing the law firm example above, if a lead found your site through an organic Google search, then Attributer would pass through the following information:
- Channel = Organic Search
- Channel Drilldown 1 = Google
- Channel Drilldown 2 = www.google.com (or whatever the search engine domain was)
- Channel Drilldown 3 = Divorce Lawyer Sydney (or whatever keyword they searched for, when available)
Wrap Up
If you want to capture the GCLID in your Webflow forms and pass it into your CRM and other tools so you can send it back to Google Ads as an offline conversion, Attributer makes it simple.
It remembers the GCLID while people explore your site (and even if they leave and come back later).
And then when they submit a form on your website, that GCLID is passed through with the form submission and can be sent to your CRM and other tools.
The nicest part is that getting started is free and setup usually takes less than 10 minutes. Start your 14 day trial today and start capturing the GCLID in your Webflow forms today!
Get Started For Free
Start your 14-day free trial of Attributer today!

About the Author
Aaron Beashel is the founder of Attributer and has over 15 years of experience in marketing & analytics. He is a recognized expert in the subject and has written articles for leading websites such as Hubspot, Zapier, Search Engine Journal, Buffer, Unbounce & more. Learn more about Aaron here.