How To Send Offline Conversions to Google Ads From Your CRM
Learn how to capture the Google Click ID (GCLID) in your CRM and send it back to Google Ads to trigger an offline conversion.

Are you trying to send offline conversions back to Google Ads when a lead becomes a deal or a customer in your CRM?
It’s a smart thing to do. Although setting up things like thank you page visits as a conversion is much easier, not all leads are created equal. You don’t want to be sending conversions back to Google Ads when unqualified leads complete your form, otherwise Google Ads might start optimising for those kinds of leads.
So in this article, we’ll walk you through how to use tools like Attributer and Zapier to capture the data you need about your leads in your CRM, and send it back to Google Ads as a conversion when a specific action happens (I.e. the lead is marked as qualified, or a deal is opened against the lead).
When to send offline conversions back to Google Ads
Most people’s first impulse is to tell Google Ads a conversion happened only after a deal closes and the lead officially becomes a customer
This seems logical at first, but it may not be the best approach.
That’s because in order for Google Ad’s smart bidding strategies to work (i.e. the Maximise Conversions, Maximise Conversion Value or Target CPA bid strategies) Google says you need at least 50 conversions per month in order for there to be enough data for the system to learn.
So unless you are closing 50+ new customers each month, you are better off picking a point earlier in the sales process (like when a deal is created against the lead) and sending that back as an offline conversion. That way, you’re more likely to have enough conversions for Google’s machine learning systems to use.
You also need to take into account Google’s conversion window, which is 90 days. If you have a sales process that takes longer than 90 days, there will be too much time between when the lead initially clicks the ad and when they become a customer in your CRM, so sending the offline conversion back to Google Ads won’t have any impact.
So, before you go setting anything up, make sure you think about what point in the sales process you want to trigger the offline conversion to be sent back to Google Ads, and make sure that point happens at least 50 times per month and happens within 90 days of the lead originally clicking the ad.
3 steps to send offline conversions to Google Ads from your CRM
Now that you’ve decided the ‘conversion point’ that you are going to use to send offline conversions back to Google Ads, let’s walk you through how to set it up.
Step 1: Capture the GCLID with each lead in your CRM
The first thing you need to do is capture the Google Click ID (GCLID) for each of your leads.
If you’re not familiar with it, the GCLID is a number that is appended to the URL when someone clicks one of your ads and visits your website. It helps Google identify who clicked the ad.
So if I was running Google Ads for Attributer and someone clicked one of my ads, instead of landing on https://attributer.io they would actually get sent to:
https://attributer.io?gclid=735785837
This GCLID number is what you need to send back to Google Ads to tell it which person converted.
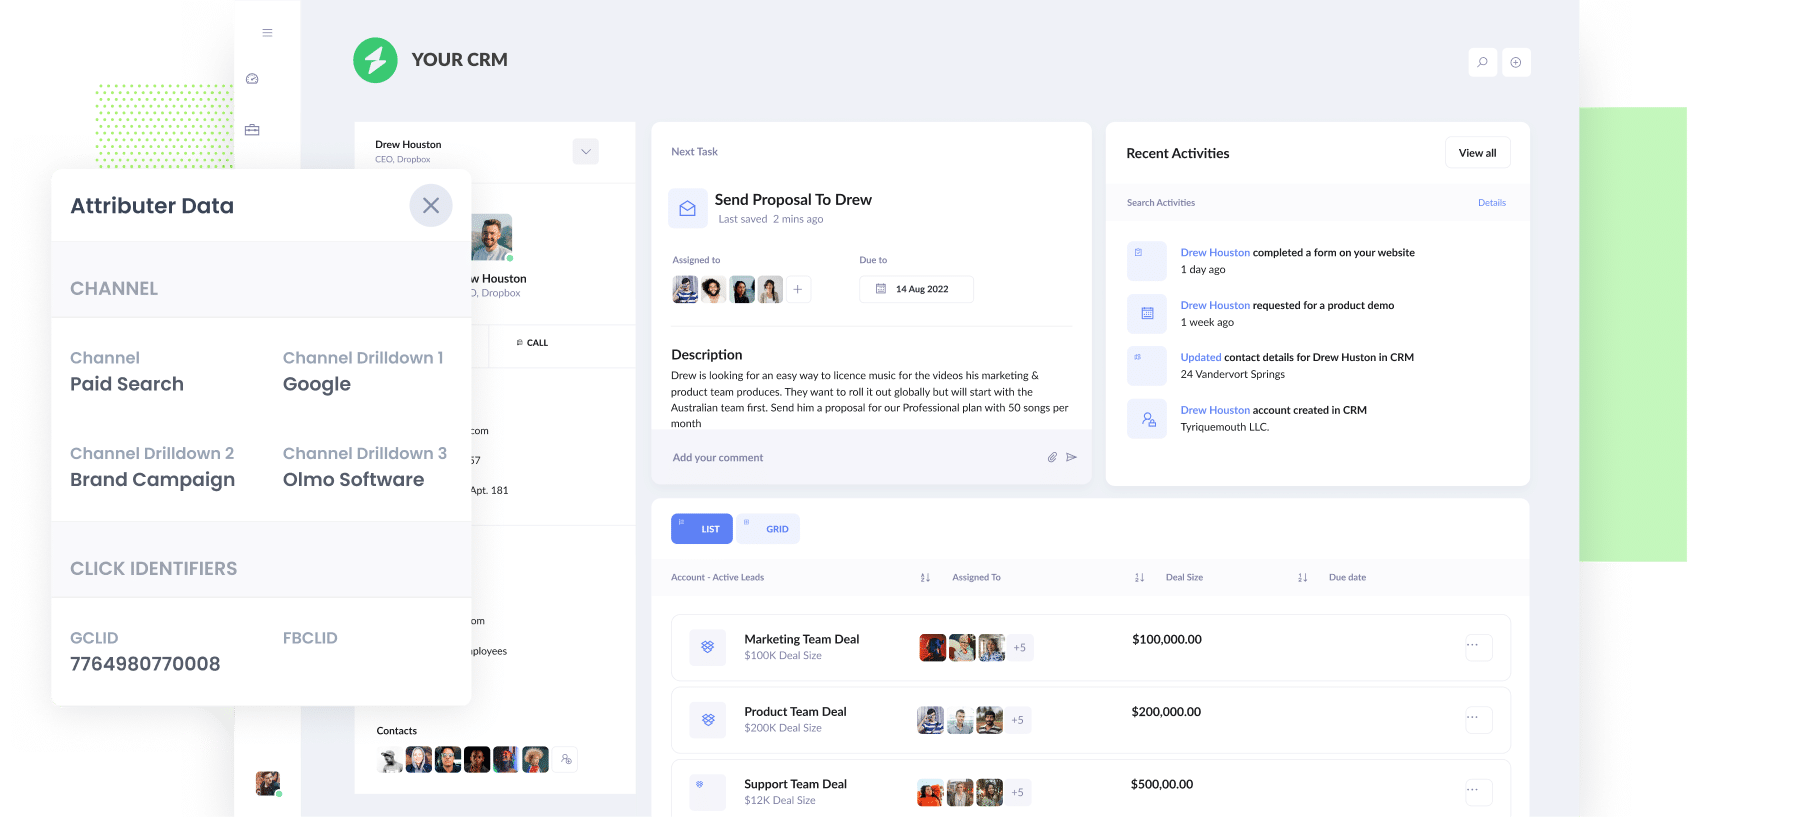
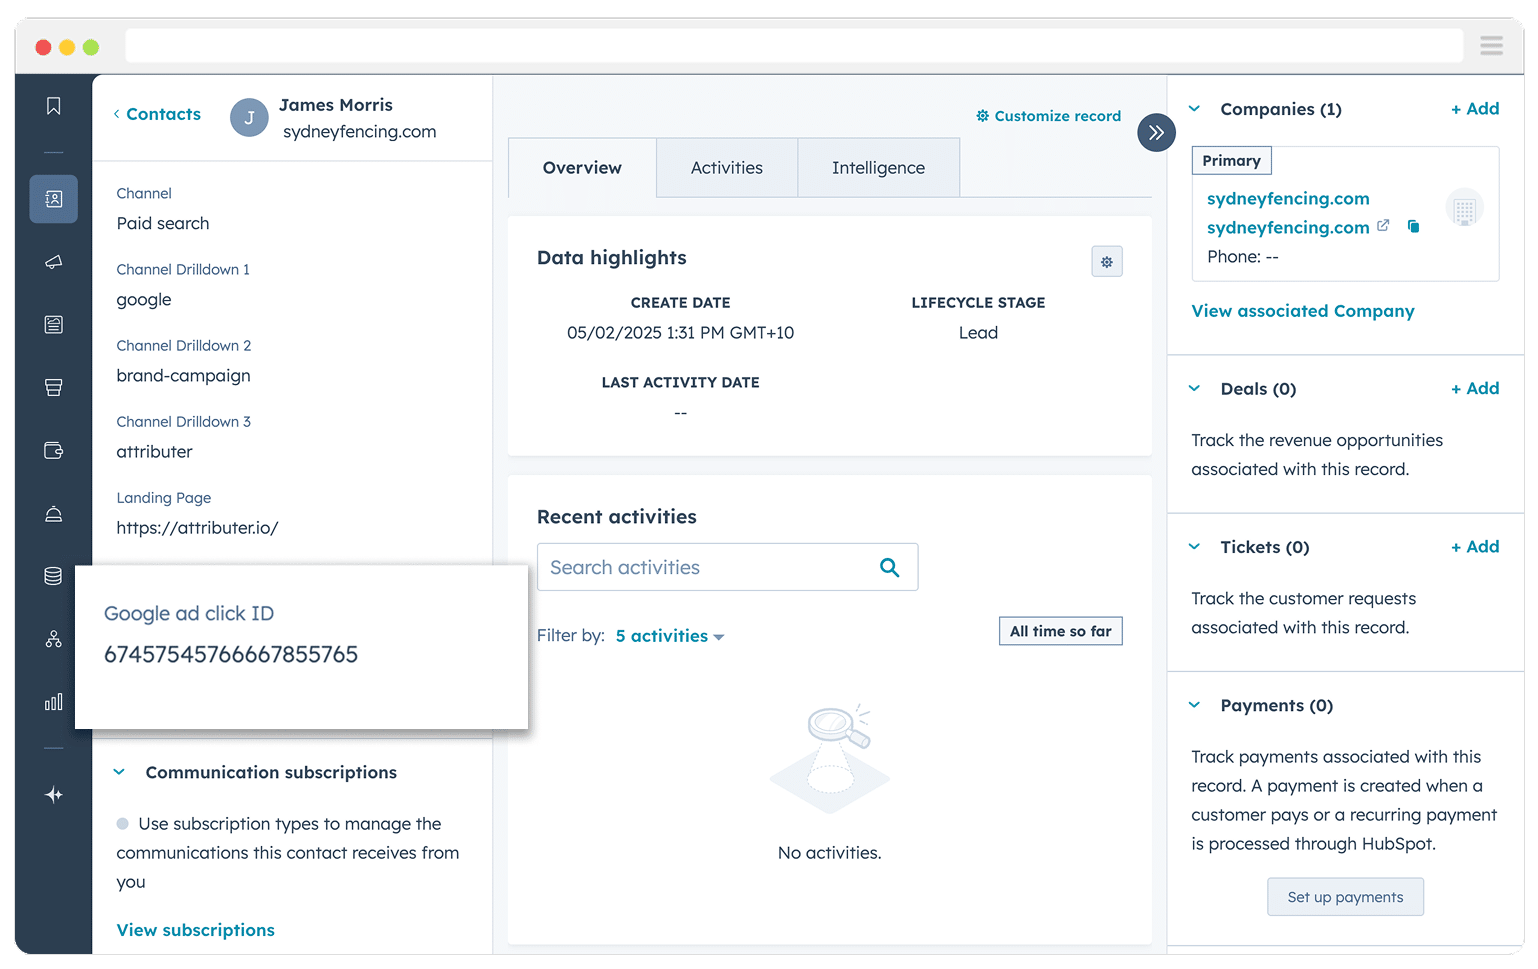
But in order to do that, you first need to capture it with each new lead in your CRM, and one of the best ways to do that is by using Attributer.
If you’ve never heard of Attributer, it’s a small bit of code you place on your website. When someone lands on your site, it stores information about where they came from (like the GCLID, any UTM parameters you have added to your ads, etc).
Then, when someone completes a form on your website and becomes a lead, it passes through all the data (the GCLID, UTM parameters, etc) with the form submission, and it can be sent to your CRM and other tools.
To get started, sign up for a 14-day free trial of Attributer and then follow the steps inside your account to set everything up.
Step 2: Create the conversion in Google Ads
The next thing you need to do is go and set up a new conversion in Google Ads.
To do that, log in to your Google Ads account, select the Goals option in the sidebar, and then select Conversions.
Once on the Conversions page, click the button to add a new Conversion and then select ‘Offline Conversion’
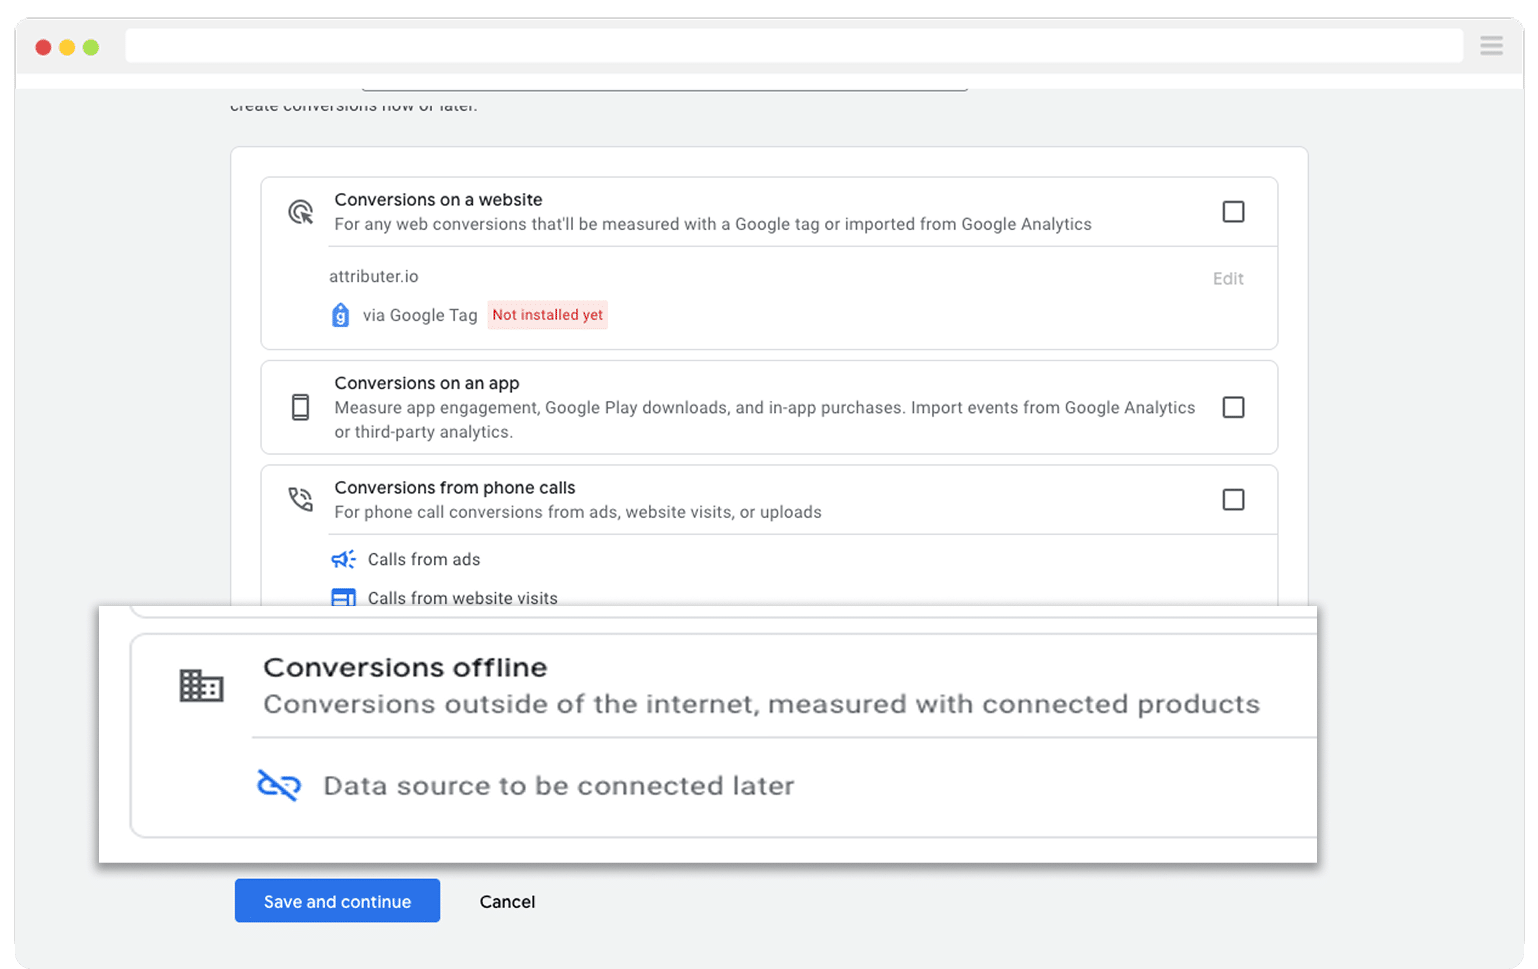
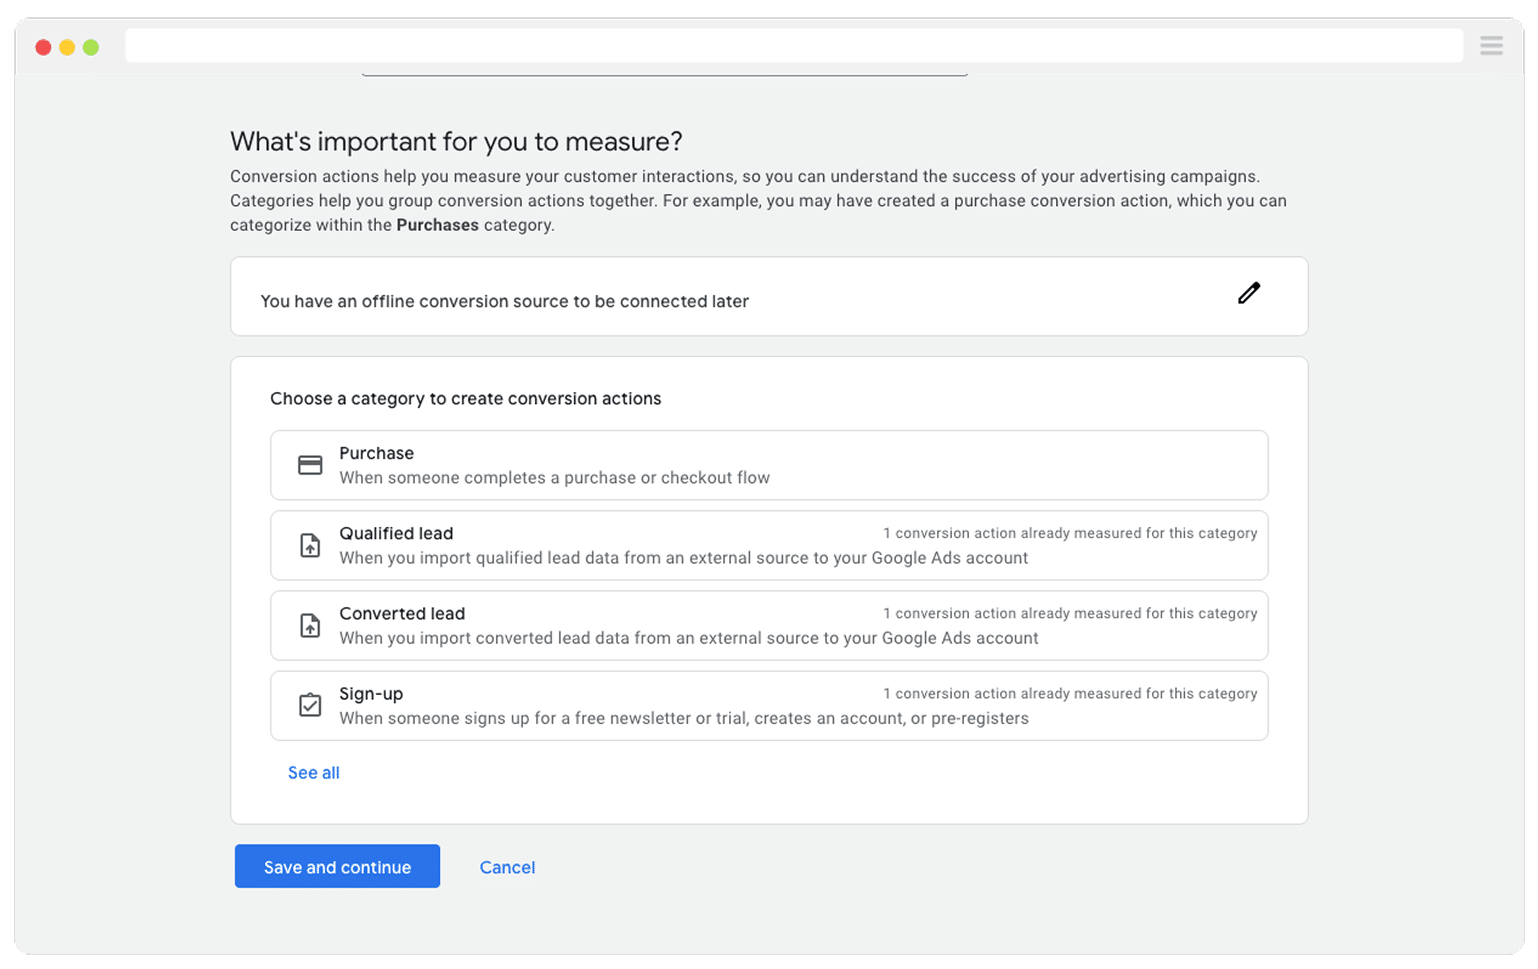
Then select the category of conversion that best suits your setup (likely Qualified Lead or Converted Lead).
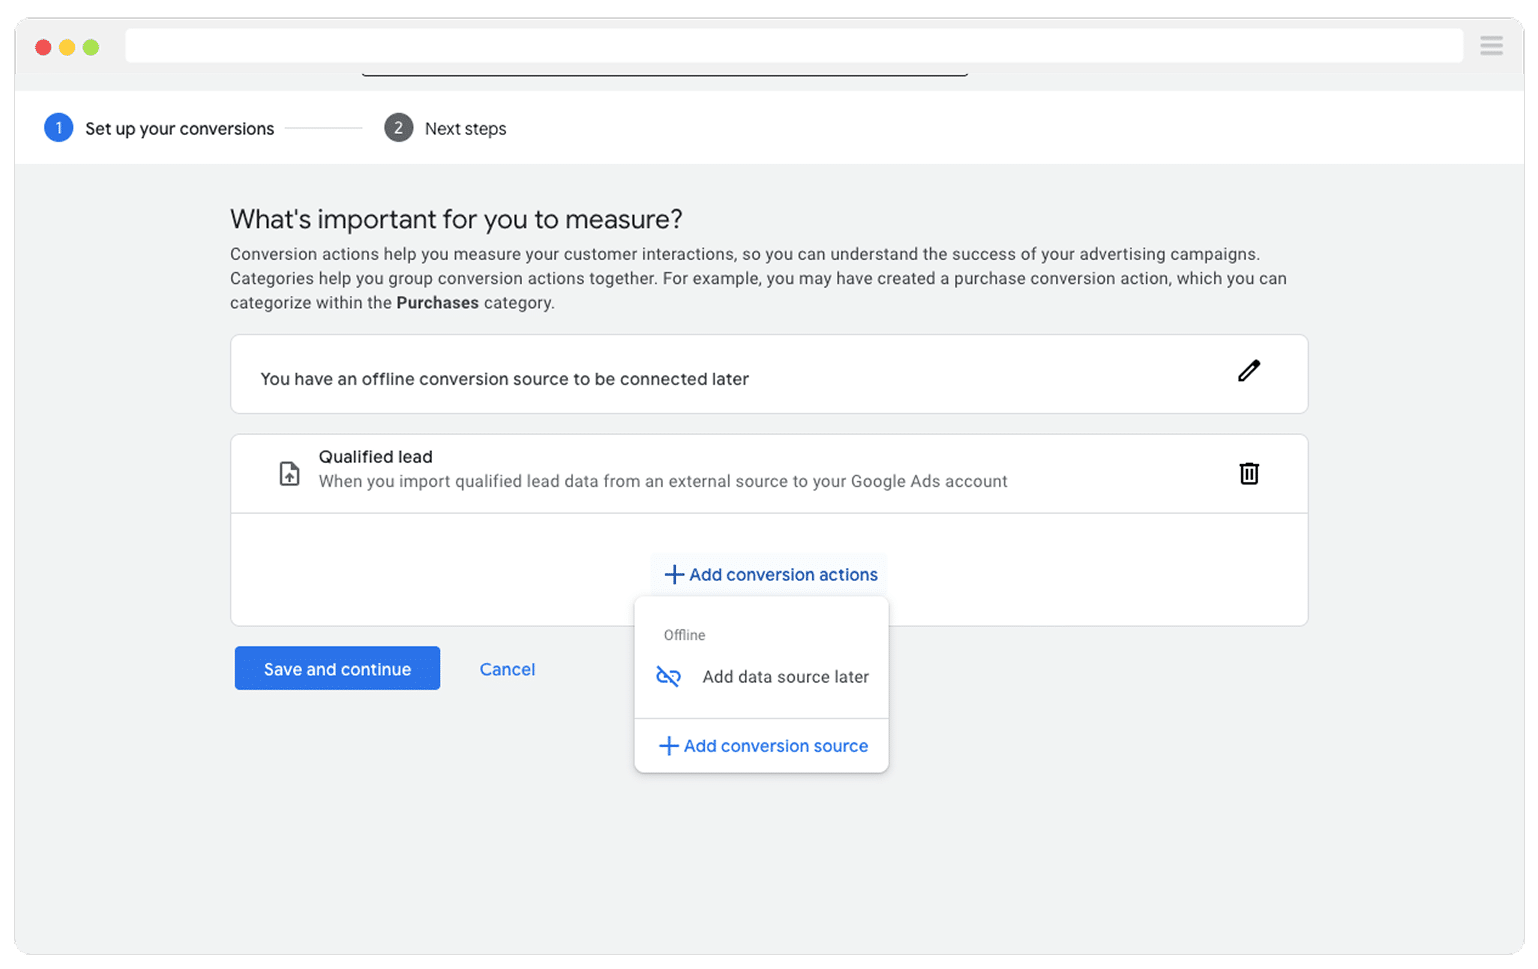
Finally, when it asks for a data source, select to ‘Add Data source later’. You will set this up in step 3.
Step 3: Use Zapier to send the GCLID from your CRM to Google Ads
The third and final step is to use an integrations tool like Zapier to trigger an Offline Conversion in Google Ads whenever the conversion event happens in your CRM (i.e., a deal is created against the lead).
To do this, log into your Zapier account and create a new Zap. Set the trigger to be whatever you decided your conversion point was. For instance, if you decided that you would send the offline conversion back to Google Ads when a Deal is created against the contact, then you would set that as the trigger.
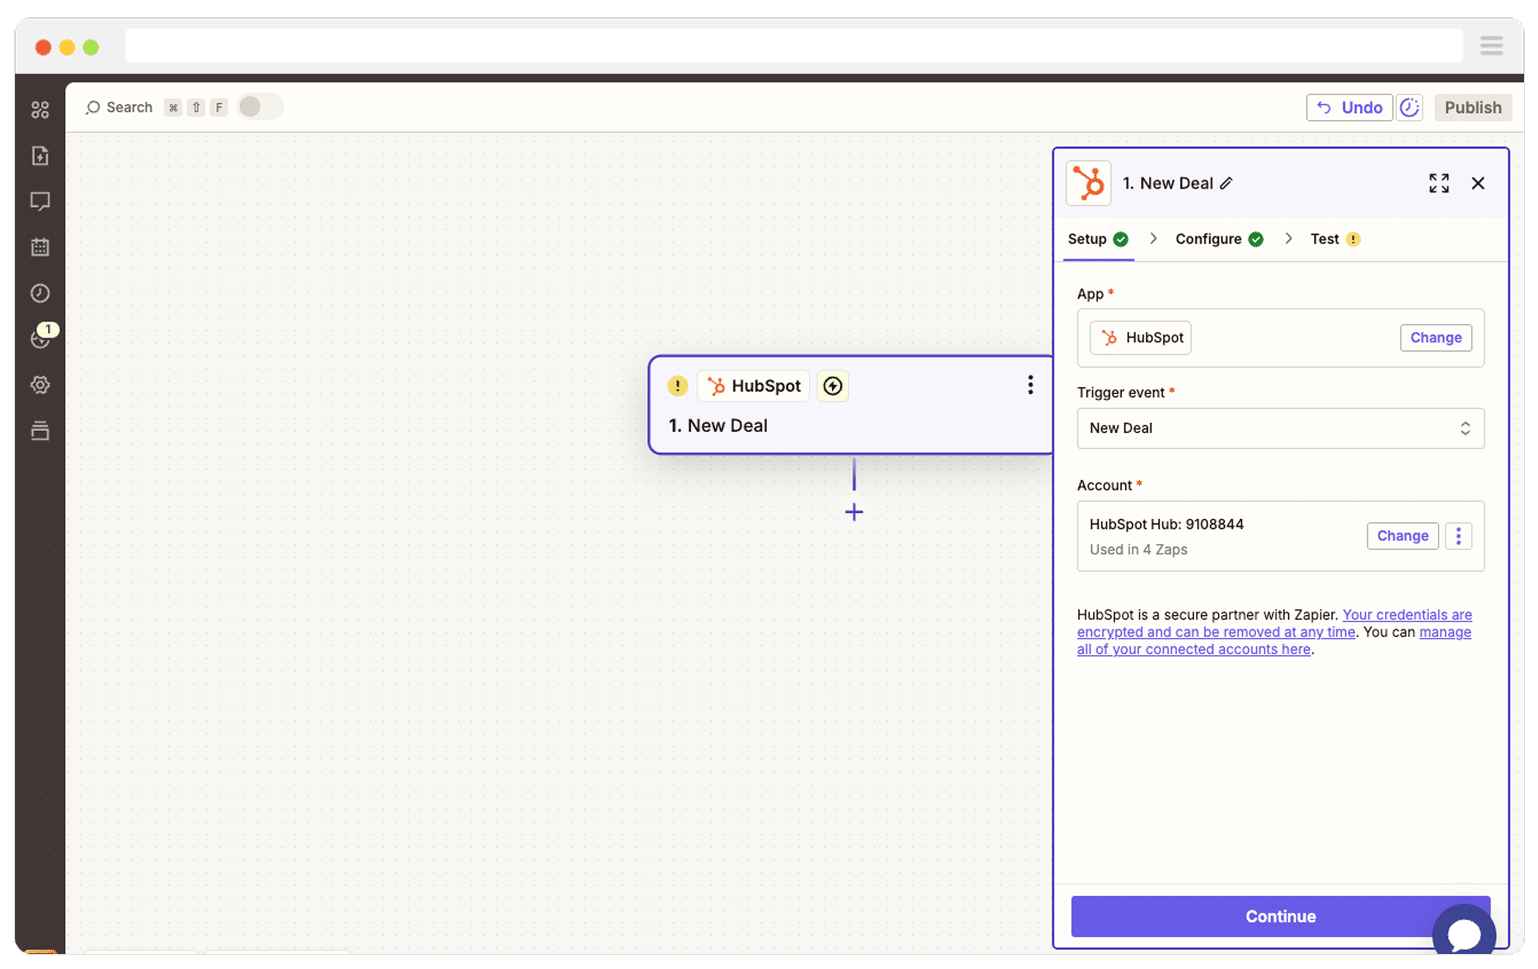
As you can see, we use HubSpot ourselves, but you can trigger the zap from dozens of other CRM systems, including Salesforce, Pipedrive, Zoho CRM, Close CRM, and more. You can even do it from a spreadsheet if you want.
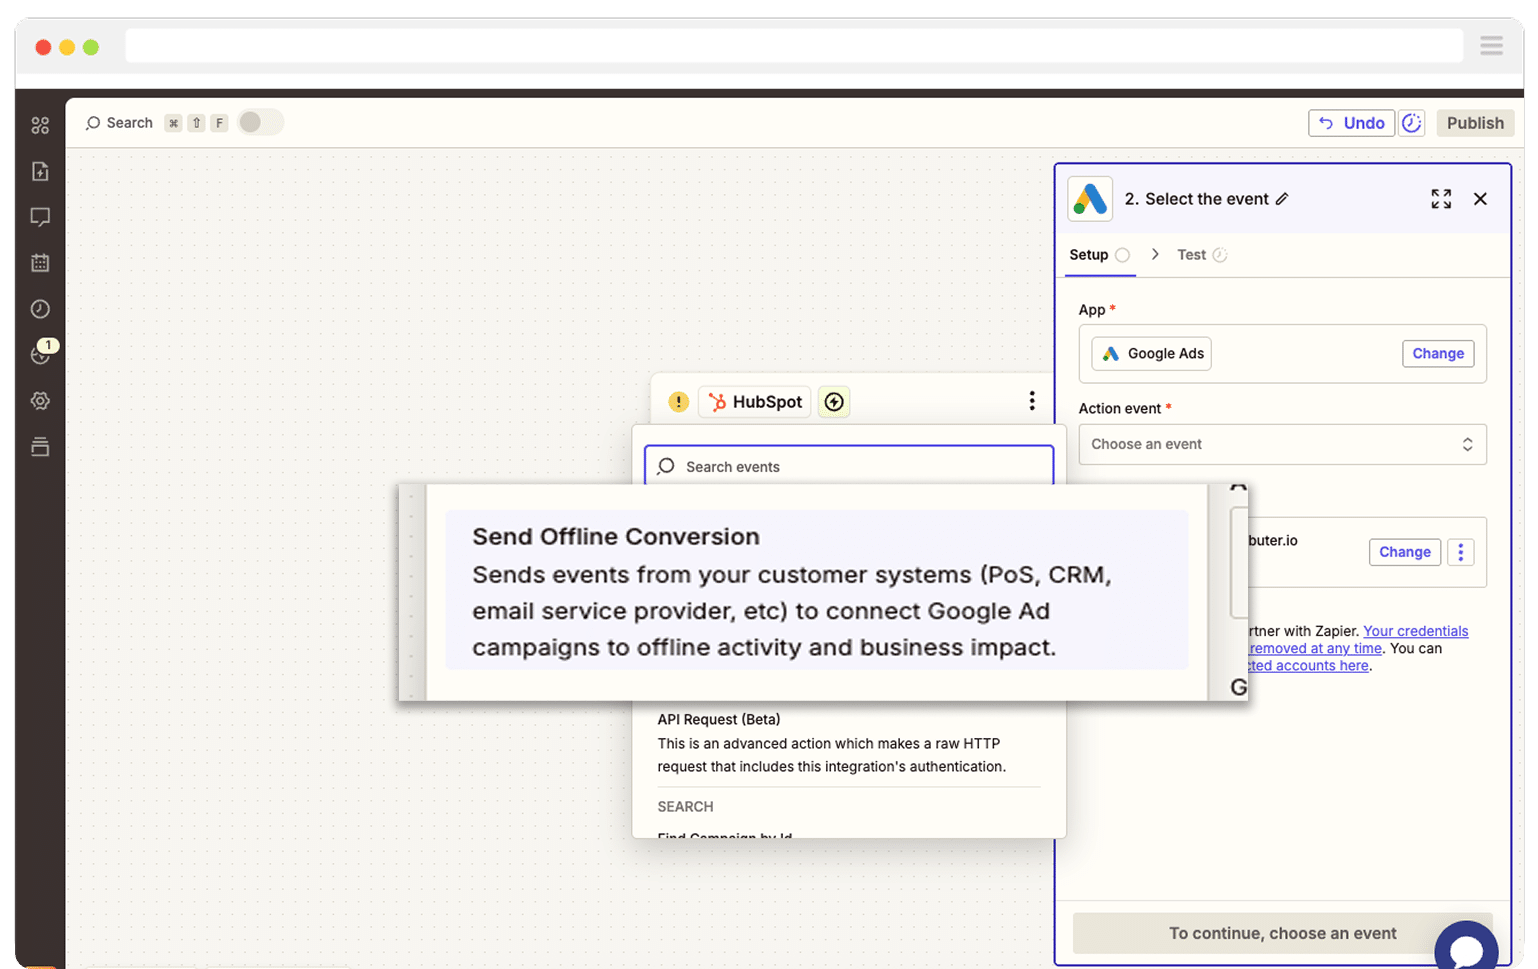
Next you need to select the Action that you want to happen, which is sending an offline conversion to Google Ads.
Finally, you will need to configure the Action by filling out the fields. Start by selecting the Google Ads account you want to send the offline conversion to.
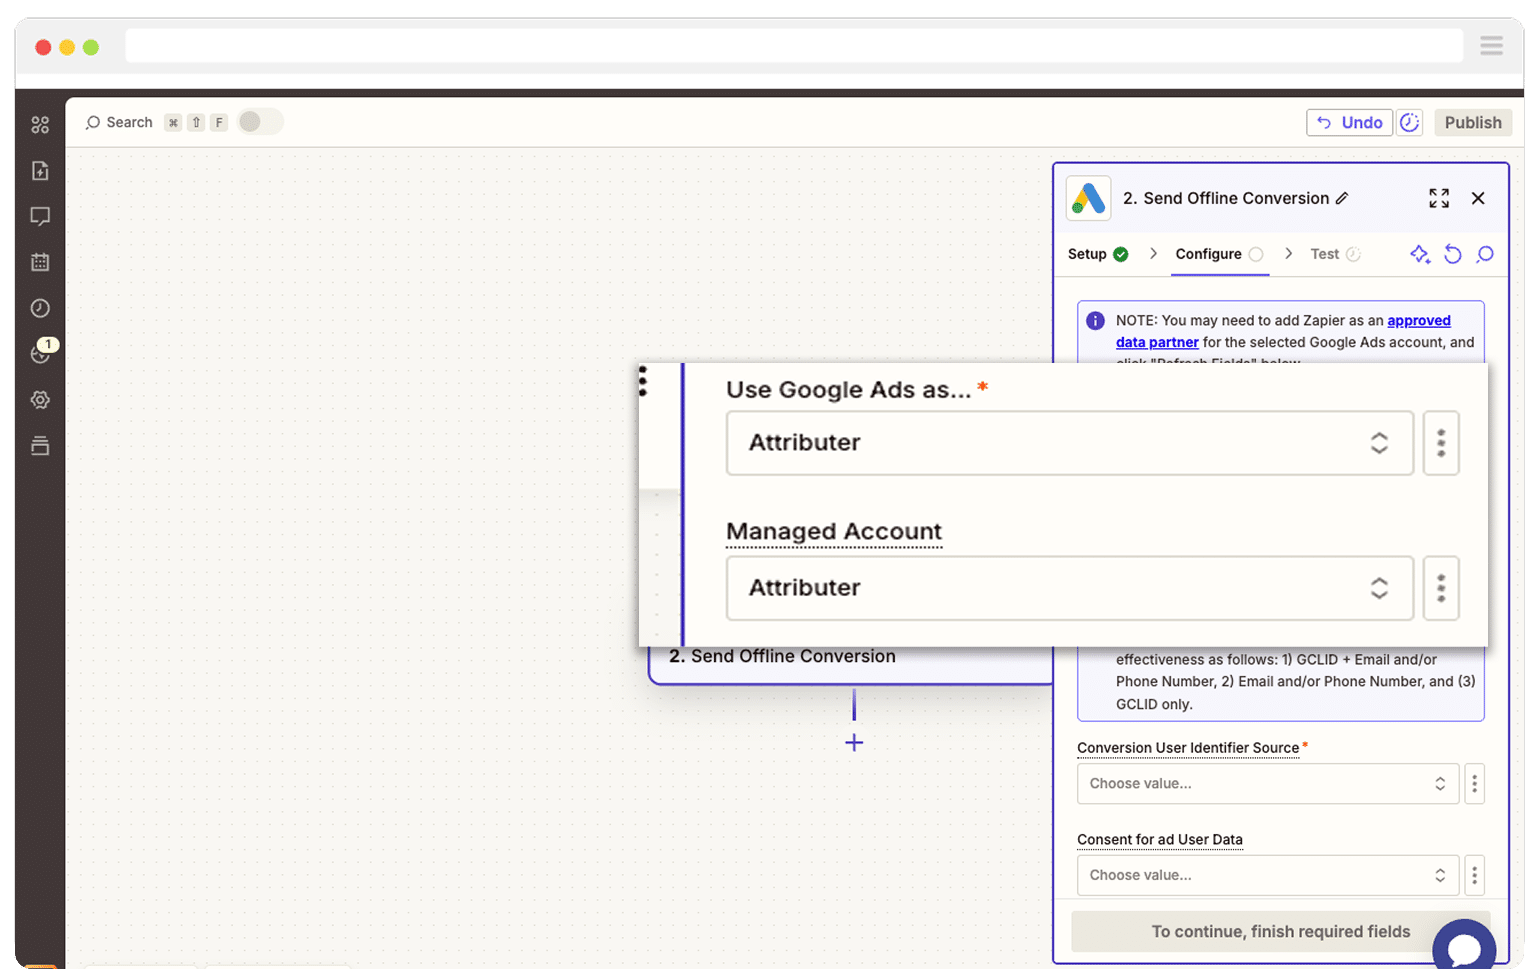
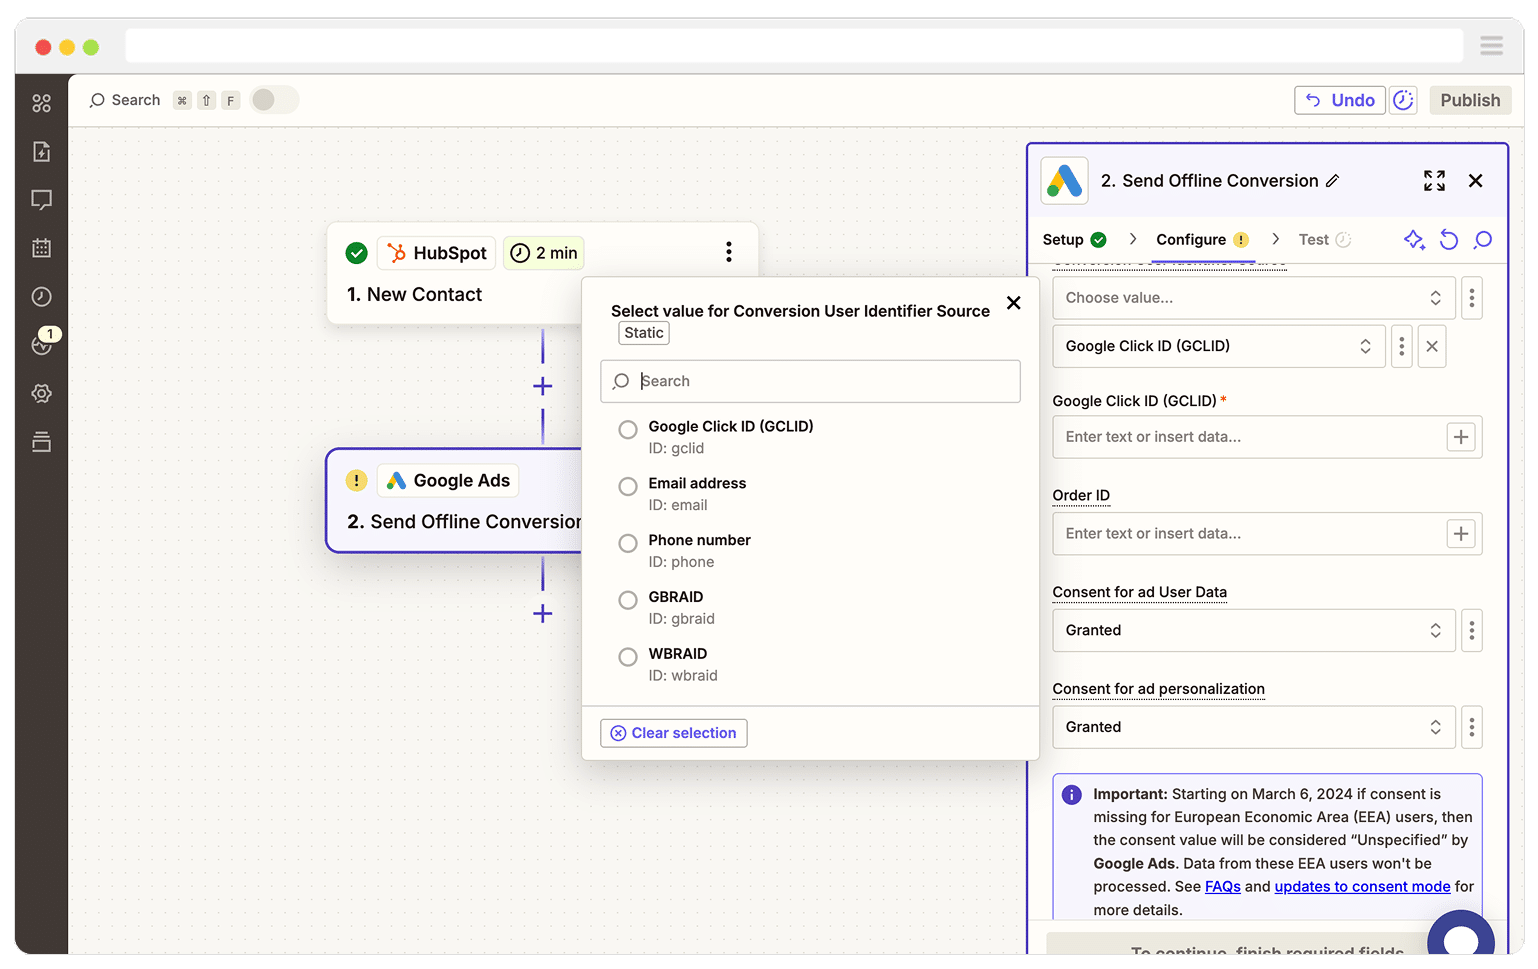
Next, select ‘Google Click ID (GCLID) as the ‘Conversion User Identification Source' and select the GCLID field from your CRM (the one that Attributer populates in Step 1) as the source of the Google Click ID (GCLID) field.

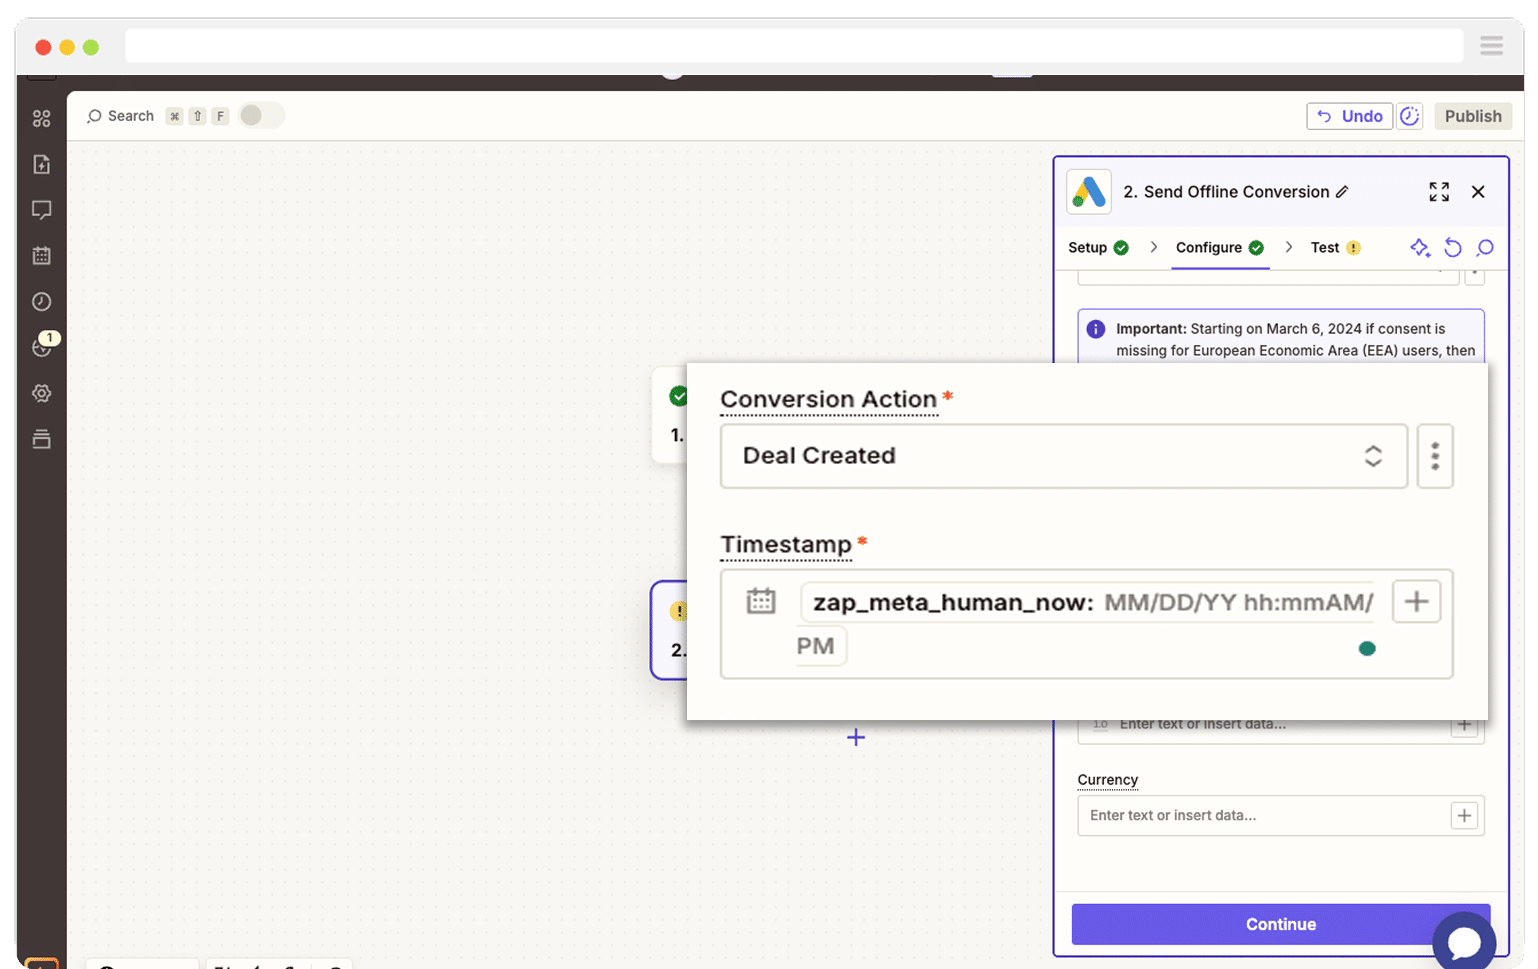
You will then also need to select which conversion it should trigger. You'll need to select the one you created in Step 3.
Finally, when it comes to the timestamp, you can select a date from your CRM (like the deal created date) or use the {{zap_meta_human_now}} variable to pass through the current date and time.
Once that is all configured, you can finalise the Zap creation by running a test and turning the Zap on.
How to test it's working
Now that you've got everything set up, follow these 3 simple steps to test it's all working correctly.
1. Generate a real GCLID and capture it in your CRM
First, you need to ensure that auto-tagging is switched on in your Google Ads account. This setting is what causes Google Ads to append the GCLID to your the URLs each time someone clicks an ad.
Then, open an incognito window and do a search for a term that would trigger your ad to show. Click your ad and when you land on your website, make sure there is a GCLID in the URL.
Then, complete a form on your website and check to see that the GCLID number has been captured in your CRM.
Unfortunately, you need to do a real-life click in the search results to test capturing the GCLID. Google’s Ad Preview tool, although convenient, doesn’t create genuine clicks and therefore never generates a GCLID.
2. Validate that Zapier is sending data to Google Ads
Next, go into your CRM and find the contact record for the lead you just created.
You now want to do whatever it is that would trigger the offline conversion to be sent back to Google Ads (I.e. Creating a deal against the contact, or marking it as Qualified). This should trigger the Zap to fire the GCLID over to Google Ads.
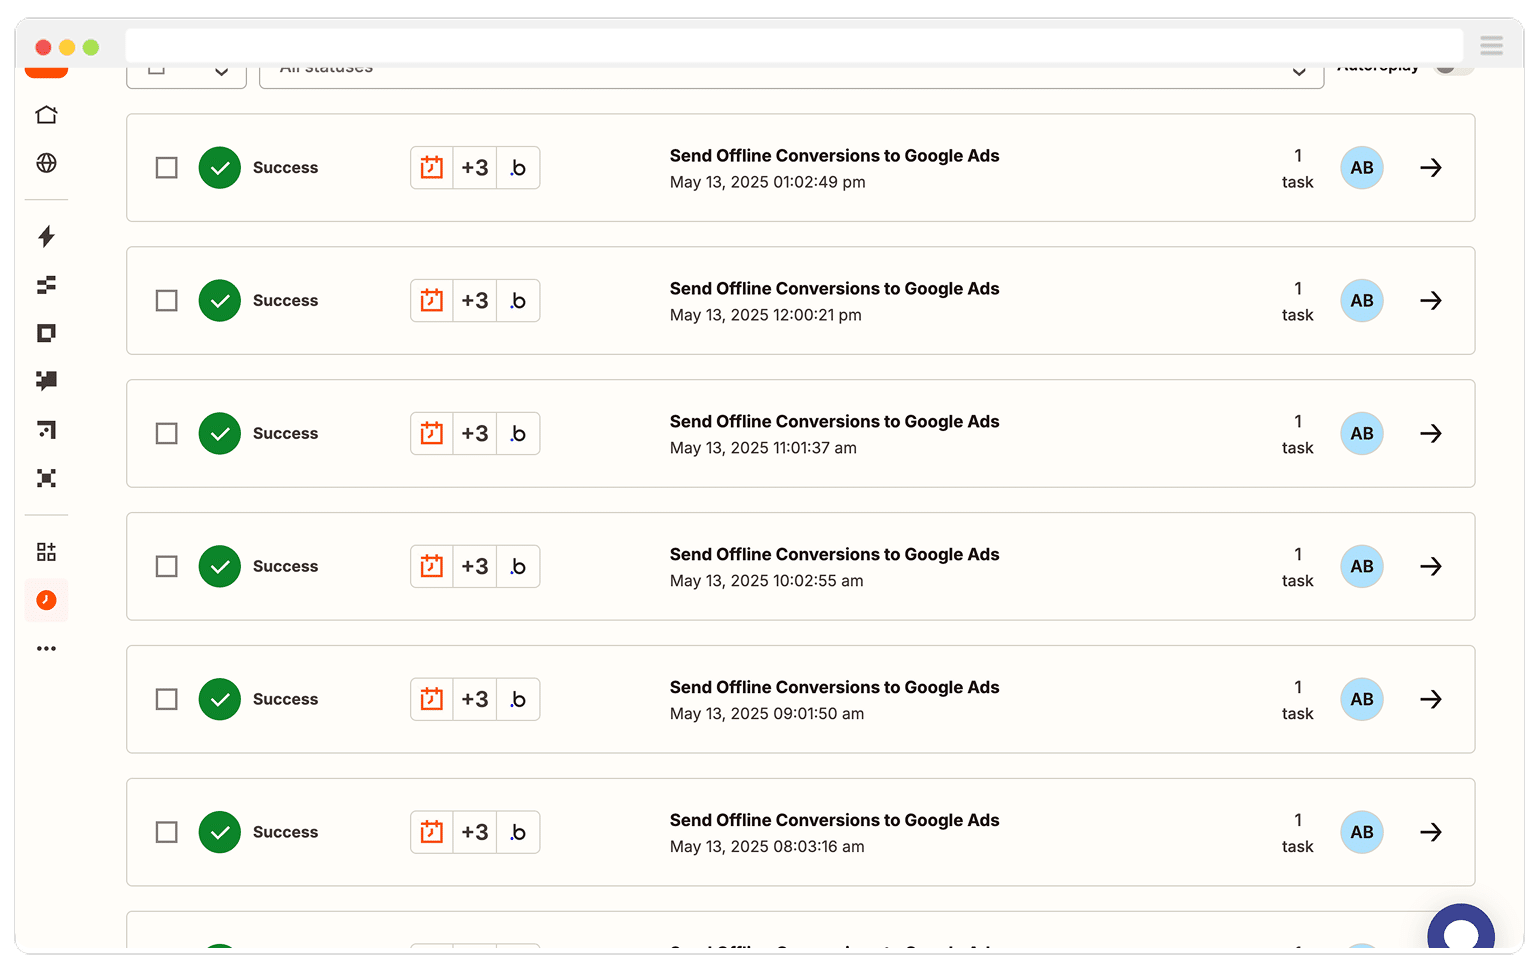
To check that it worked, open the Zap History and find the latest run. A “Status = Success” label indicates that Google accepted the offline conversion.
If you see an error, have a look at the logs for that particular run to understand might have gone wrong (the problem almost always lies in a blank CRM field or a mis-mapped Zapier field, so your best bet is to review the field mappings and try again).
3. Confirm the offline conversion has been received by Google Ads
After Zapier has sent the event, switch back your Google Ads and navigate to Tools & Settings → Conversions → Uploads and check to see if the upload is there (Note: new uploads typically show a Processed status within three hours).
Best practices for sending offline conversions to Google Ads from your CRM
Now that you’re familiar with when to send offline conversions back to Google Ads and how to set it up, let's chat about a few best practices you may want to keep in mind.
Filter out records without a GCLID
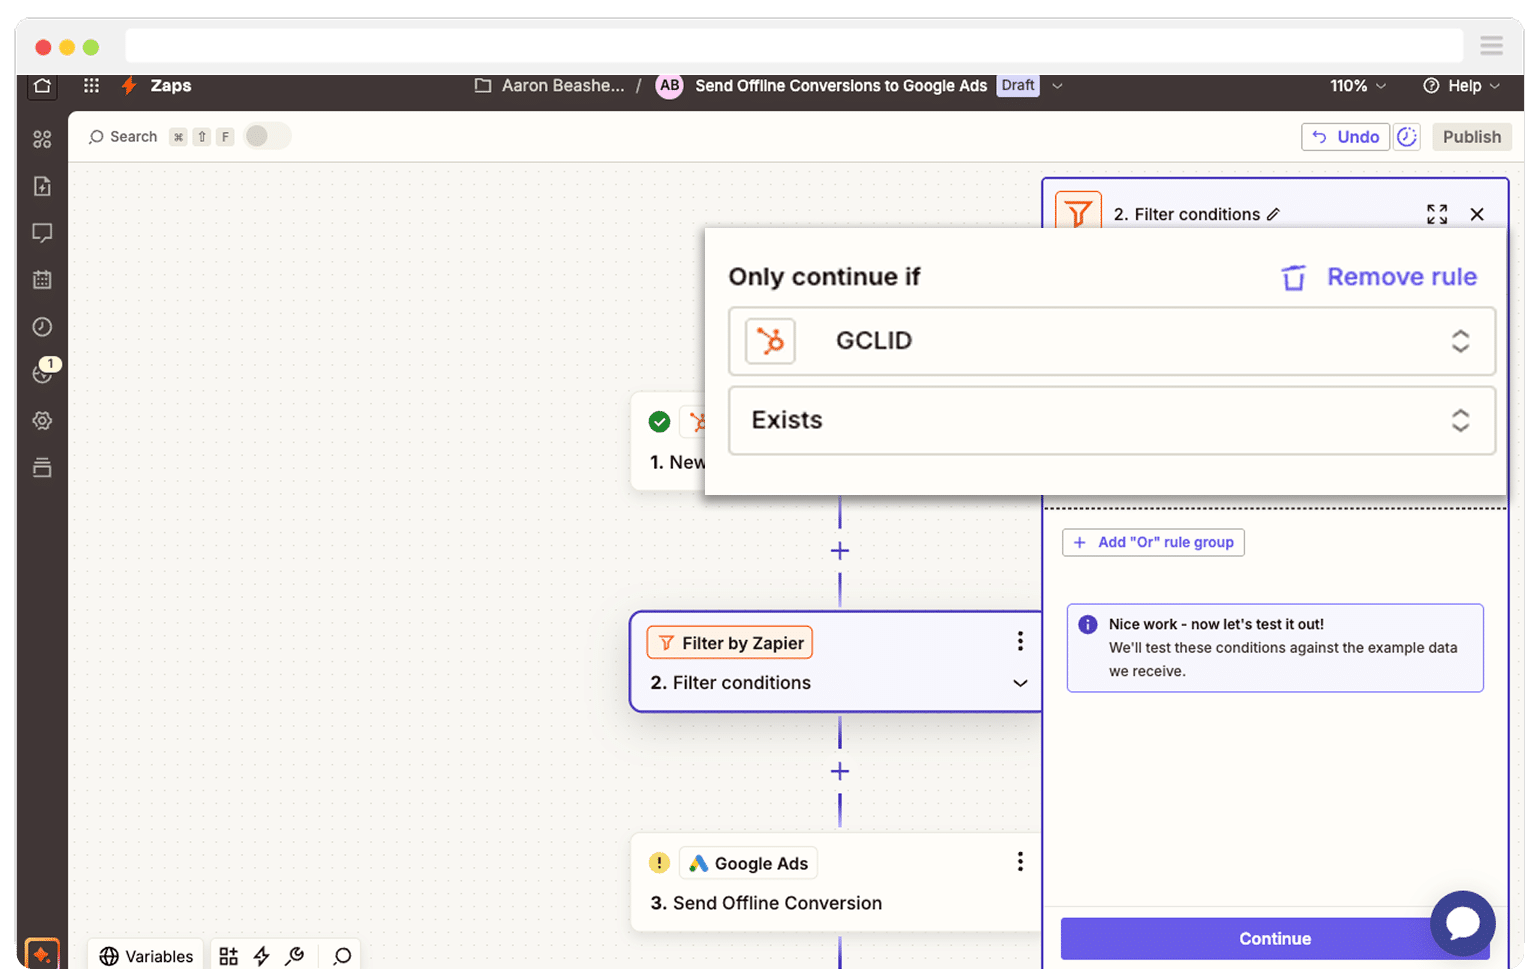
If you get leads from a lot of different sources other than just Google Ads, then it may be a good idea to add a filter to the Zap to only send through leads where a GCLID has been captured.
So, continuing the example above, I could put a filter in my Zap that tells Zapier to only send the offline conversion to Google Ads if the GCLID field on the lead record (in HubSpot) is not blank.
This isn’t absolutely necessary, as Google Ads will reject any conversions you try to send without a GCLID, but it will clutter your Zapier logs with errors and make it harder to see when something is actually going wrong.
Send through a value where possible
If you’re sending offline conversions back to Google Ads when a lead becomes a customer, then it’s definitely worth sending through the value of the customer as well.
You can do this by populating the ‘Value’ field in the Google Ads action with the revenue data from your CRM. It might look something like this:
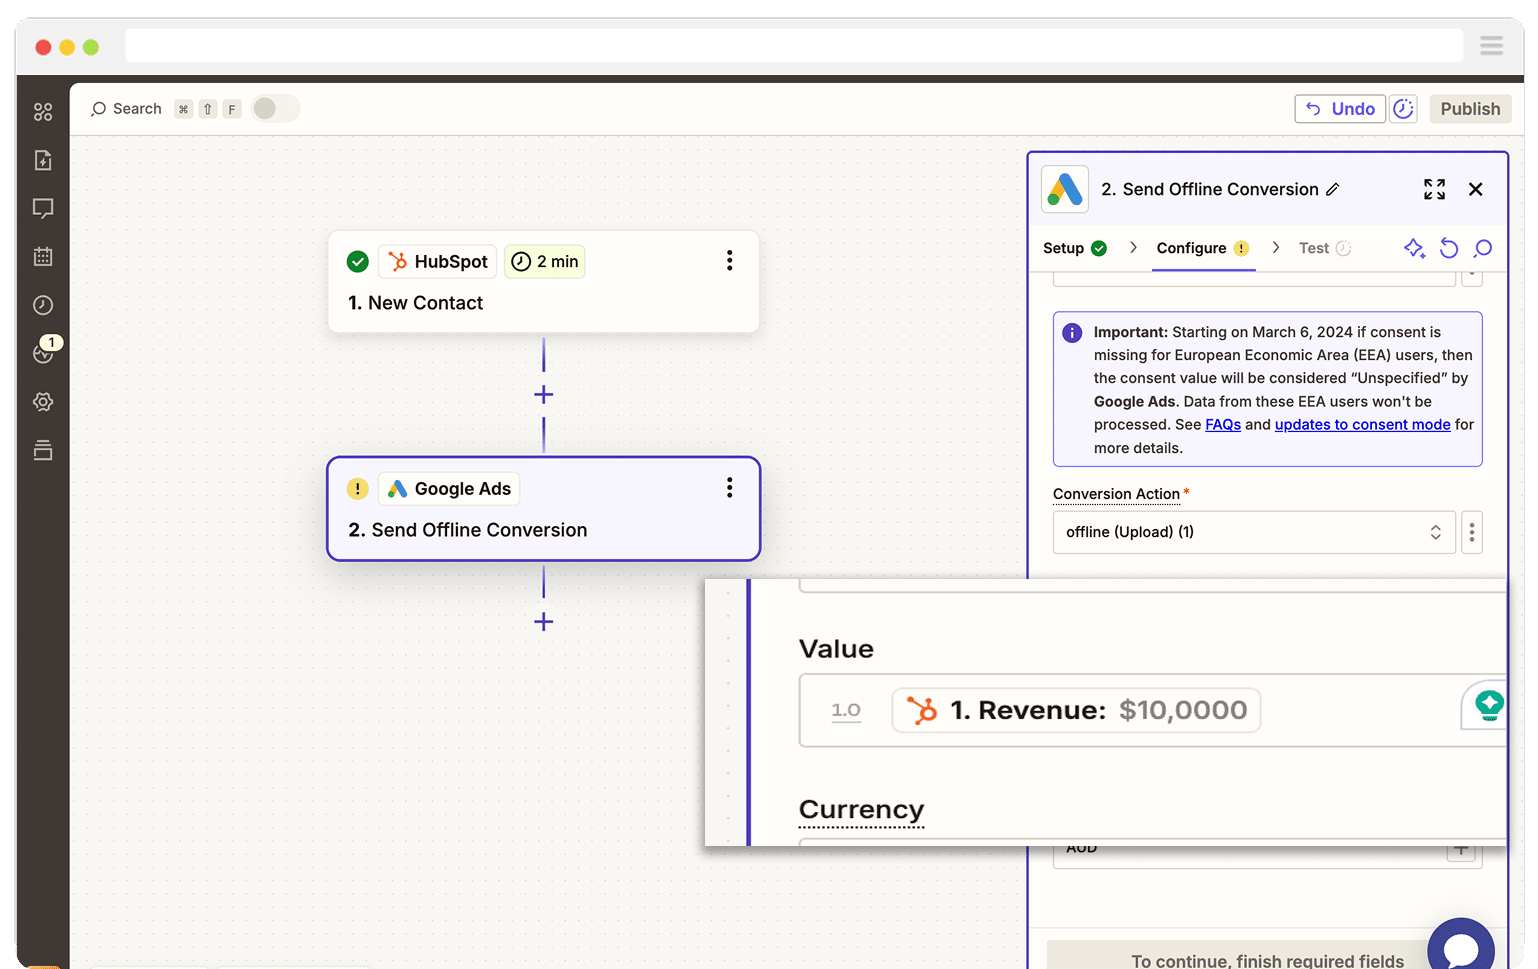
This gives Google Ads more information to feed its machine learning algorithms, and also opens up other bidding strategies (like Target ROAS).
If you’re sending offline conversions at an earlier point in the funnel (like when a deal is created), you should still consider sending the value. You can either send the expected value of the deal (even though it isn’t closed), or you can come up with a ‘value per deal’ by taking your average deal size and dividing it by your average close rate.
As an example, if my average deal size is $1,000 and my average close rate is 25% then a new deal would be valued at $250 (because if a closed deal is worth $1,000 and I close 1 in 4 deals, then I would be willing to pay $250 per deal).
Consider sending more data with each offline conversion
While the GCLID is the main identifier you want to send through with each offline conversion, Google Ads does give you the option to send other information (including the lead’s email address and phone number).
They claim this helps the match rate. I would argue that if you send the GCLID (which Google stores about every single click of an ad) then Google should know which campaign, ad group, etc that click came from, but it may be worth sending the extra information.
Just make sure this isn’t going to cause you legal issues. At the end of the day, you are basically handing over personally identifiable information (email & phone number) about your leads and customers to Google, which your legal team (and your customers) may not be too happy about.
Wrap Up
Sending offline conversions back to Google Ads can help the machine learning algorithms understand what a good lead looks like, and can ultimately help you acquire more of them at a lower cost.
But you need to choose your conversion point (i.e. the point in the sales process you send the offline conversion) wisely. It needs to be something that happens 50+ times per month and within 90 days of the lead clicking the ad.
Once you've done that though, you can follow the steps outlined above to create a system that automatically sends offline conversions back to Google Ads without you having to manually upload spreadsheets and the like.
So go ahead and get it set up today!
Need to capture the GCLID in your CRM?
Start your 14-day free trial of Attributer today!

About the Author
Aaron Beashel is the founder of Attributer and has over 15 years of experience in marketing & analytics. He is a recognized expert in the subject and has written articles for leading websites such as Hubspot, Zapier, Search Engine Journal, Buffer, Unbounce & more. Learn more about Aaron here.