How to capture the GCLID in Contact Form 7
Learn how to capture the Google Click ID (GCLID) with each submission of your Contact Form 7 forms and send it to your CRM and other tools (and back to Google Ads as an Offline Conversion).
Having trouble figuring out how many leads and customers are coming from your Google Ads campaigns?
If so, you are definitely not alone. Google Ads does a great job of showing clicks and impressions, but the built in reports will not show how many people actually turned into leads or customers.
The good news is that there is a really easy way to fix this.
In this post, we will walk you through how to use Attributer to capture the GCLID every time someone submits one of your Contact Form 7 forms, then pass that information to your CRM and other tools. We will also show you how to send that data back into Google Ads so you can track offline conversions and easily see which campaigns are doing the most to grow your business.
3 steps for capturing the GCLID in Contact Form 7
Capturing the GCLID is surprisingly simple when you are using Attributer with Contact Form 7. Here's how it works:
1. Install Attributer on your website and add a hidden field
When you begin your 14 day free trial with Attributer you will receive a small snippet of code to place on your site.
If you are running your website on WordPress there are a few simple ways to add it. Many themes include an area where you can paste code into the Head of your site, or you can use a plugin like Insert Header and Footer Code to handle it for you. If you like using Google Tag Manager you can drop it in there as well.
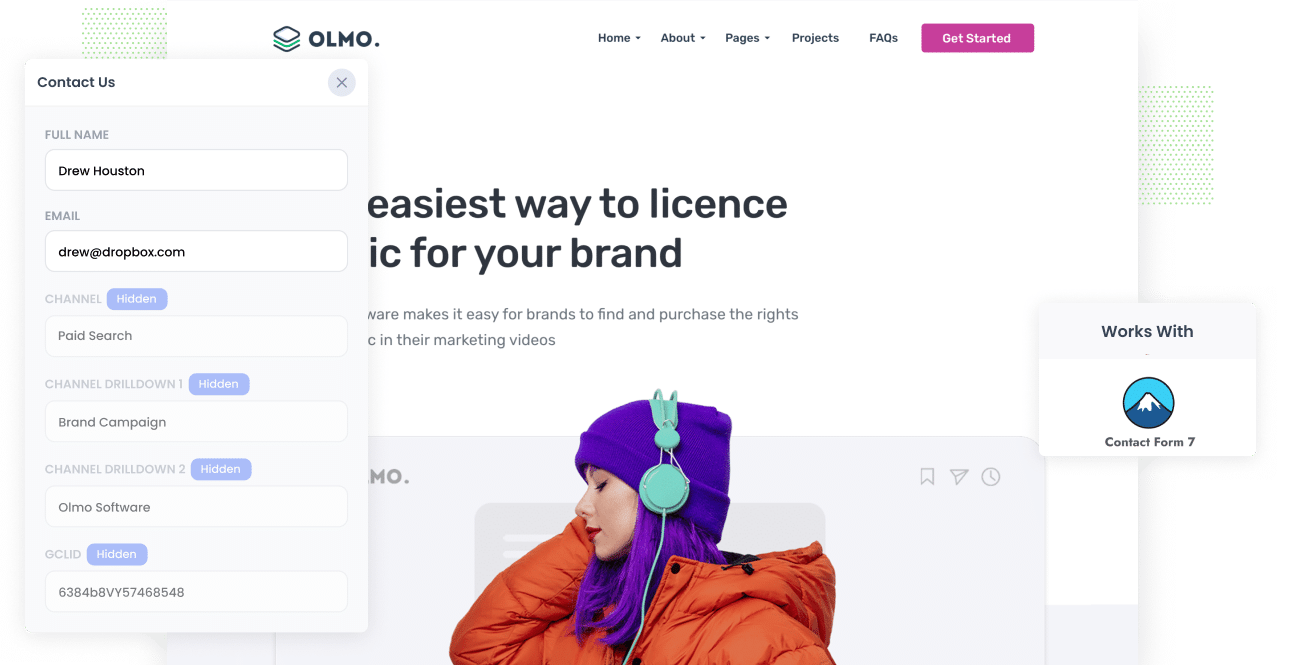
After that, you then need to add a hidden field called GCLID to your forms. This gives Attributer a place to write the GCLID on the form so it is captured with the form submission.
2. Attributer writes the GCLID into the hidden field
When someone arrives on your website after clicking one of your Google Ads, Attributer quietly collects the GCLID from the URL and stores it in their browser. This way, even if they look around your site for a while or leave and return later, that original GCLID is still remembered.
Once they fill out a form on your site, Attributer writes the stored GCLID into the hidden field you created earlier.
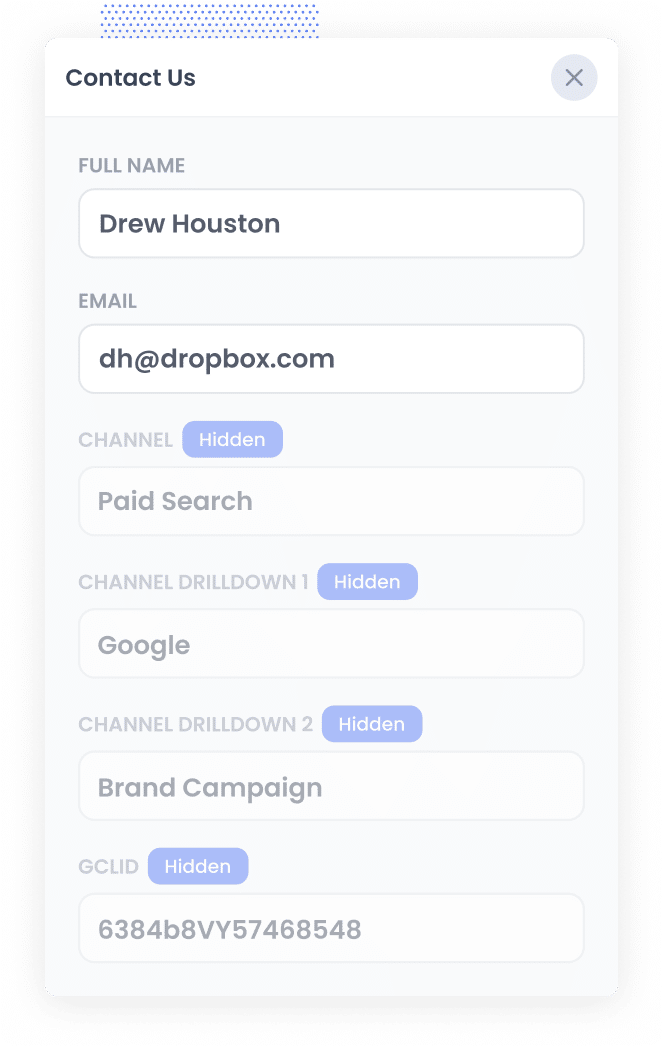
3. GCLID is captured with each form submission
Finally, when someone submits the form, Contact Form 7 collects the GCLID along with everything else the visitor entered, such as their name and email address.
From that point, you can pass the GCLID into your CRM or any other platform you work with. This can be done through WordPress plugins that integrate Contact Form 7 with CRMs like Salesforce, Pipedrive, HubSpot, etc. Alternatively, you can use dedicated integration tools like Zapier to send the data across.
How to send the GCLID back to Google Ads and mark it as an offline conversion
Before you can pass the GCLID back into Google Ads, you will need to set up a new conversion inside your Google Ads account.
To get started, log in to Google Ads, open the left side menu, and choose Goals. From there, select Conversions. On that screen, click the option to create a new conversion and choose Offline Conversion as the type you want to use.
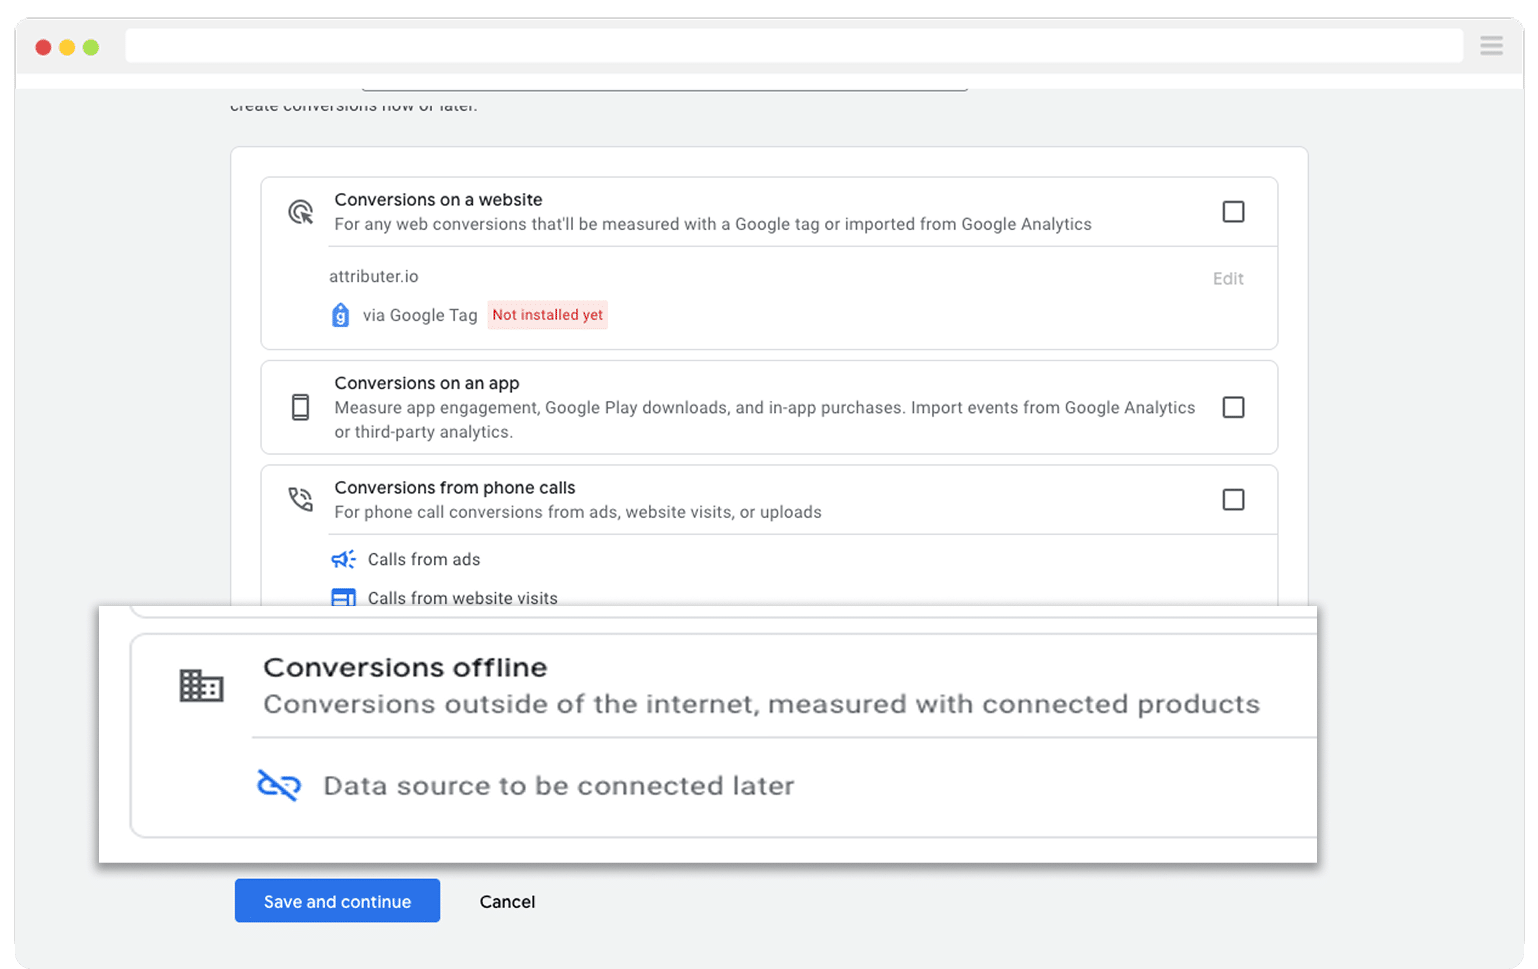
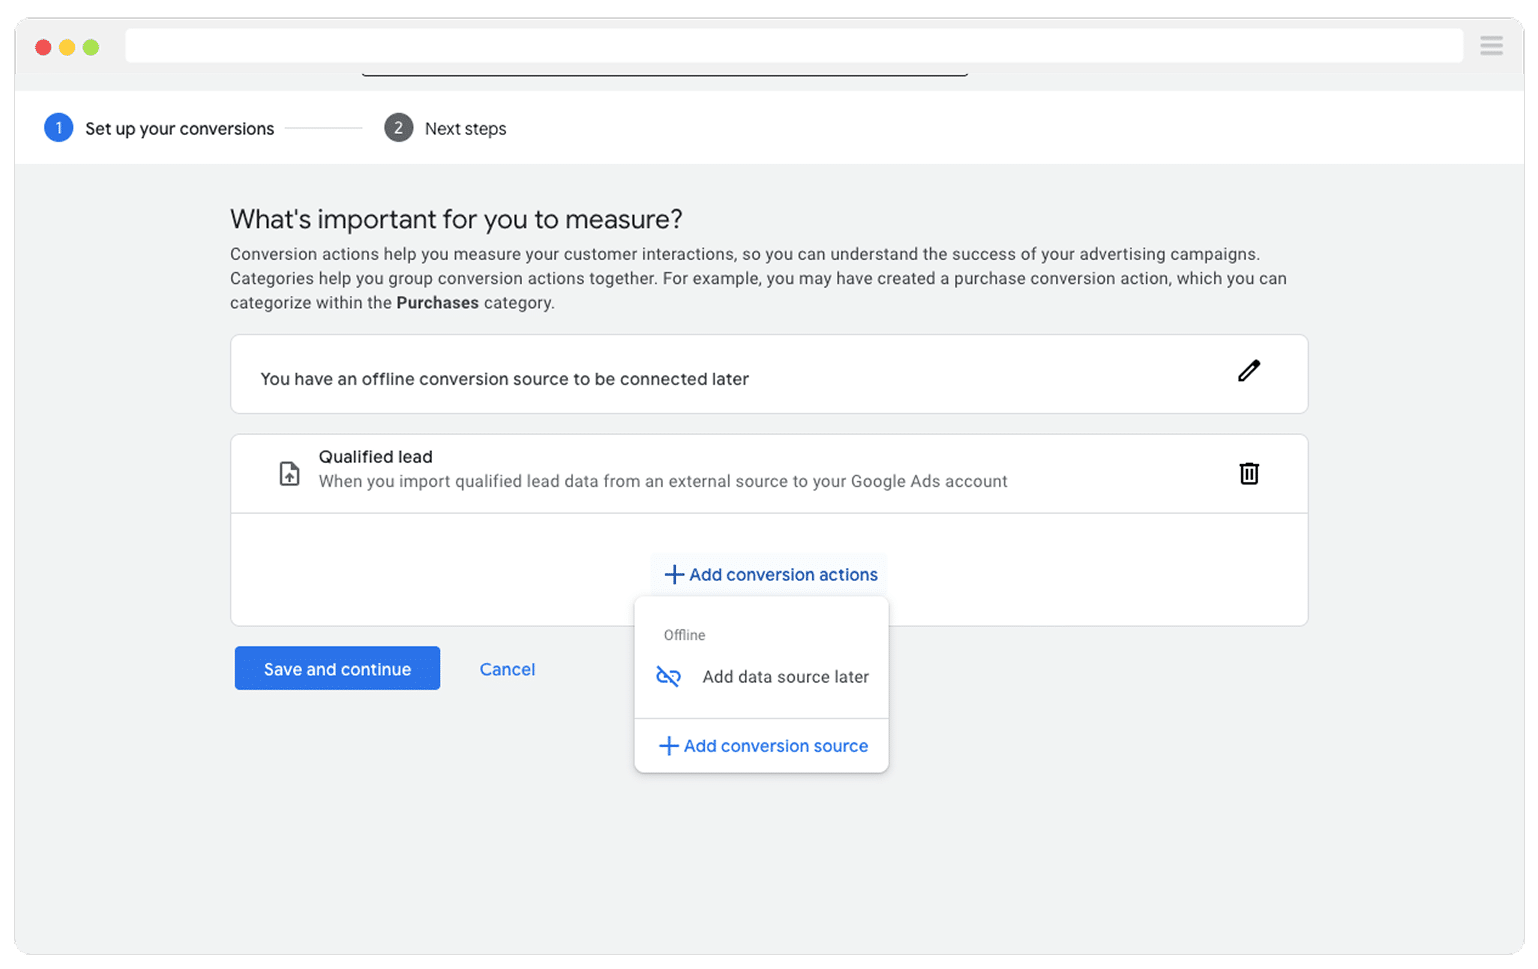
Then, in the final screen when it asks you to add a data source, select the option to ‘Add data source later’.
Now that your conversion is set up inside Google Ads, you can start to send the GCLID back in. Before you turn anything on though, it is important to decide exactly which point in your sales process should count as the conversion.
Many teams choose to wait until a deal is fully won before reporting the conversion to Google Ads. While this can work, it often slows down how quickly the system learns. Automated bidding strategies like Maximise Conversions, Maximise Conversion Value, and Target CPA tend to perform best when they receive more than 50 conversions each month. So if your business usually closes fewer than that each month, you may want to use an earlier milestone, such as when a new deal is first created. This gives Google more data to work with and can improve results.
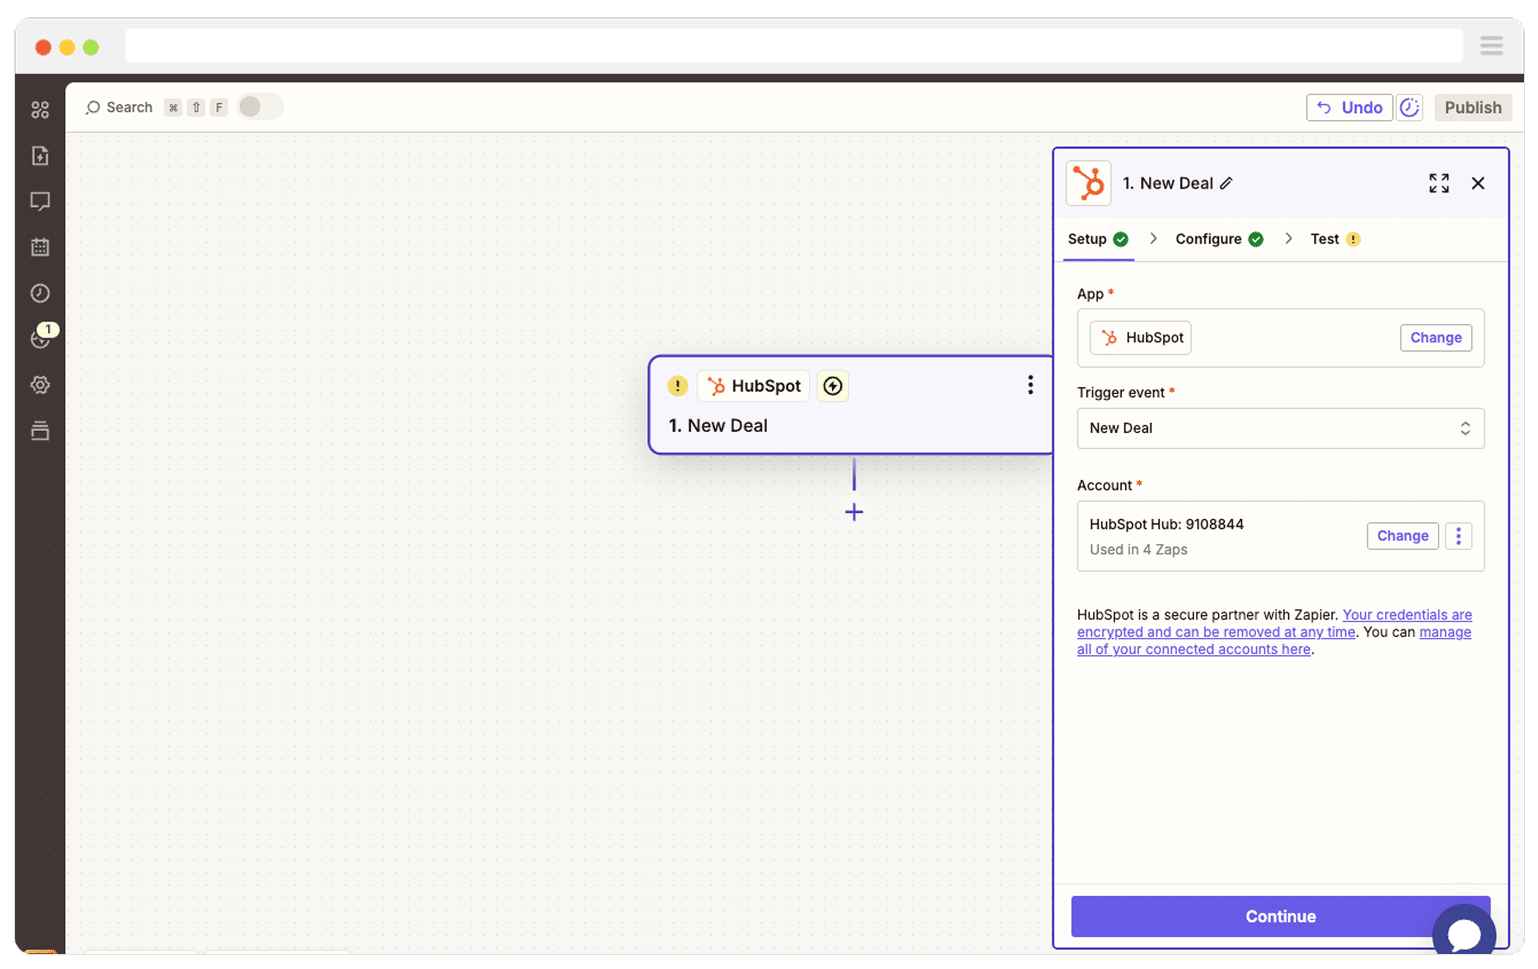
Once you know which milestone you want to use, jump into Zapier, set up a new Zap, and choose a trigger that matches that moment. For example, if you decided to send the offline conversion when a new deal is created, use that event as your starting point.
Next, select Google Ads as the Action and then select the ‘Send Offline Conversion’ as the event.
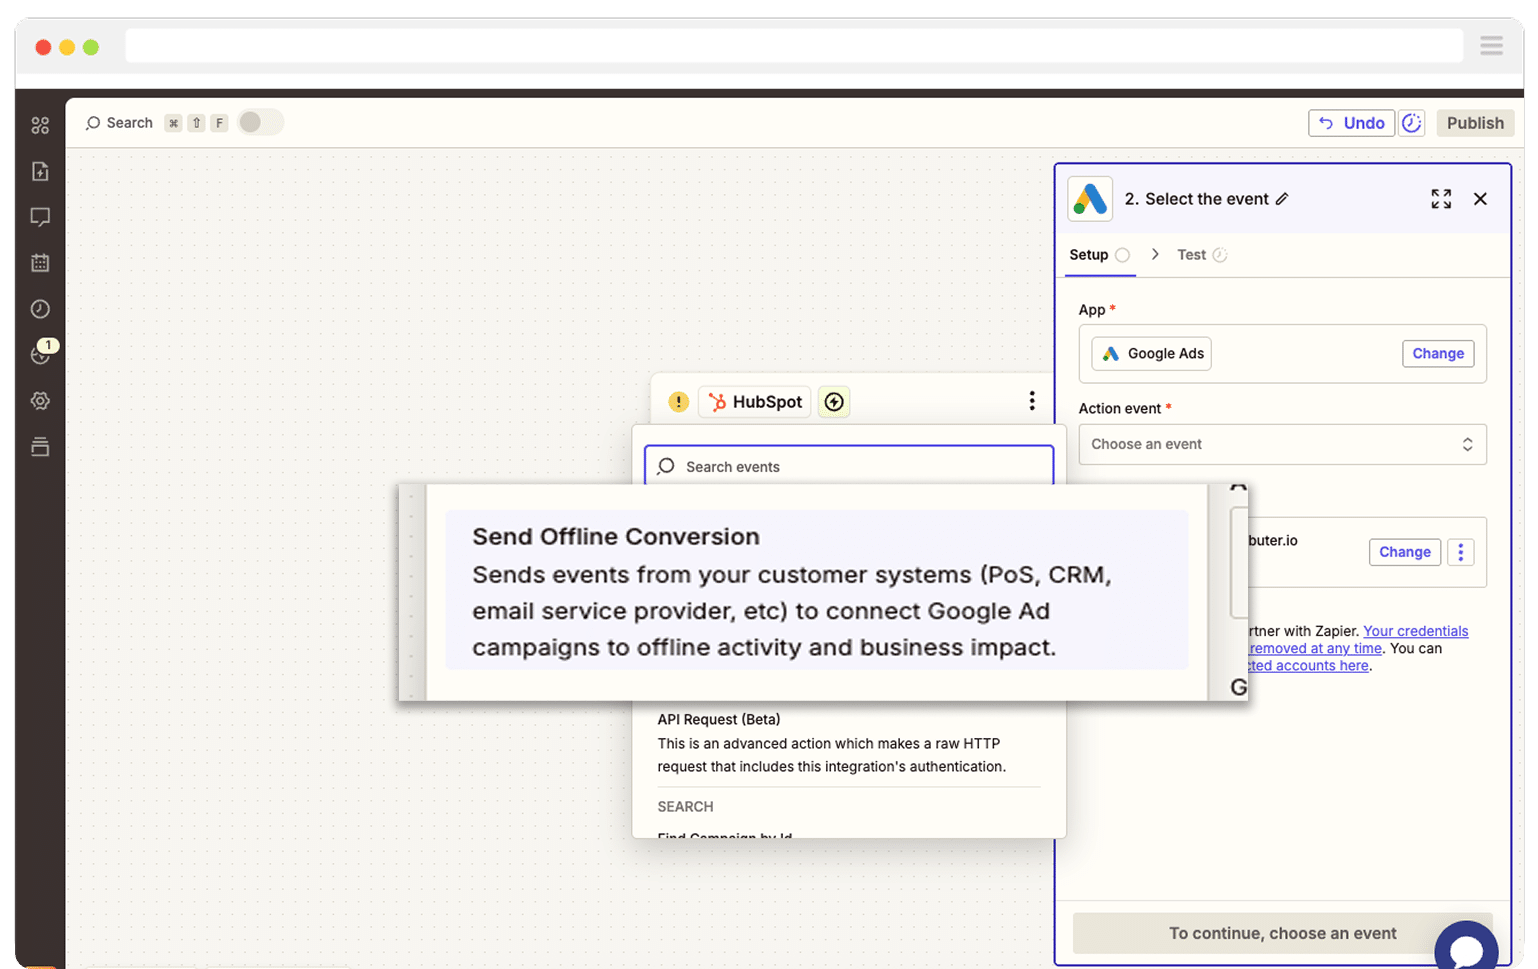
Finally, you just need to map the GCLID from your CRM (or wherever you are storing it) to the correct field in Zapier.

And that is all there is to it. You now have offline conversions successfully set up in Google Ads. Before you increase your ad spend though, it is wise to run a quick test to make sure everything is working as expected. You can read more about how to do that here.
Why Attributer is the best way to capture the GCLID in Contact Form 7
There are a couple of different methods for capturing the GCLID in Contact Form 7, so why choose Attributer?
Here are a few reasons why it is the smarter choice:
1. Remembers the GCLID as visitors browse your site
Most other methods for collecting the GCLID rely on it still being visible in the URL at the exact moment someone submits your form.
The issue is that real visitors rarely follow such a neat path. They might click your Google Ad, spend time on your homepage, explore a few more pages, and then eventually head to your Contact page. By then, the GCLID has usually disappeared from the URL, which means it never gets recorded.
Attributer takes a different approach. It stores the GCLID in the visitor browser, so even if they click around your site or come back later, that original value is remembered and will be included when they finally submit the form.
2. Captures UTM parameters as well
Attributer does more than just help you capture the Google Click ID. It also passes through any UTM parameters you have added to your ads.
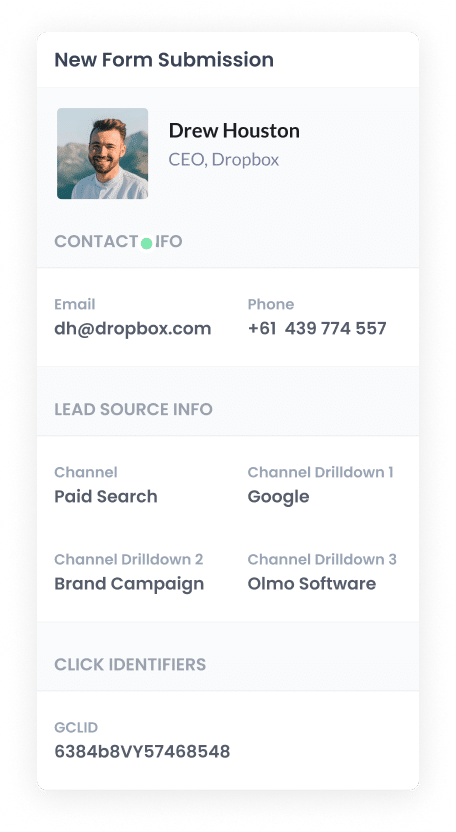
Imagine you run an accounting firm. When someone clicks one of your Google Ads and fills out a form on your website, Attributer can pass through details like:
- Channel: Paid Search
- Channel Drilldown 1: Google
- Channel Drilldown 2: Tax Returns Campaign (or the name of your campaign)
- Channel Drilldown 3: Tax Returns Sydney (or the keyword you are targeting)
- Channel Drilldown 4: Free Consultation Ad (or the exact ad they clicked)
And once that information is in your CRM or reporting tools, you can use it to see where each lead came from and which campaigns are truly delivering results.
3. Captures information on users from organic channels
Attributer does not stop at tracking your paid advertising. It also sends through attribution data on visitors who arrive through organic channels like search engines, social media, referrals, or even by typing your website directly into their browser.
Sticking with the accounting firm example, if someone finds your site through an organic Google search, Attributer can pass through information such as:
- Channel: Organic Search
- Channel Drilldown 1: Google
- Channel Drilldown 2: www.google.com (or whichever search engine they used)
- Channel Drilldown 3: Tax Accountant Sydney (or the keyword they searched for when available)
With this data in your CRM or analytics tools, you can also run reports that show how your SEO or social media marketing efforts are performing when it comes to generating leads and customers.
Wrap Up
Attributer makes it simple to capture the GCLID every time someone submits a form on your site. You can then send it into your CRM and other platforms, and eventually pass it back into Google Ads as an offline conversion.
It even stores the GCLID as people move through different pages on your site (or if they leave and return later). This helps you report a much more accurate number of conversions inside Google Ads as you're not losing the GCLID for certain leads.
The best part is that you can get started for free, and the setup usually takes less than 10 minutes. Begin your 14 day trial today and start capturing the GCLID in Contact Form 7 today!
Get Started For Free
Start your 14-day free trial of Attributer today!

About the Author
Aaron Beashel is the founder of Attributer and has over 15 years of experience in marketing & analytics. He is a recognized expert in the subject and has written articles for leading websites such as Hubspot, Zapier, Search Engine Journal, Buffer, Unbounce & more. Learn more about Aaron here.