How to track the source of leads in Netlify
Learn how to track the source of your leads in Netlify, so you can easily see where they're coming from.

Struggling to track where your leads are coming from?
What if, every time a new lead submits a form on your website, you automatically receive detailed information about their source (such as organic search, paid search, paid social, etc.) along with the details they enter into the form (like their name, email, etc)?
Now, picture being able to view this data directly in Netlify, include it in your lead notification emails, and send it to your CRM.
That's where Attributer can help. And in this article, we’ll show you how to use it track the source of all your leads within Netlify.
3 easy steps to track the source of leads in Netlify
Attributer makes it easy to see the source of every lead that submits a Netlify form on your website. Here's how to do it in 3 easy steps:
1. Install Attributer and add hidden fields
To get started, simply sign up for a free 14-day trial of Attributer, and you'll receive a small piece of code to install on your website.
Installing the code on a Netlify site is quick and easy and you can find instructions to do it here.
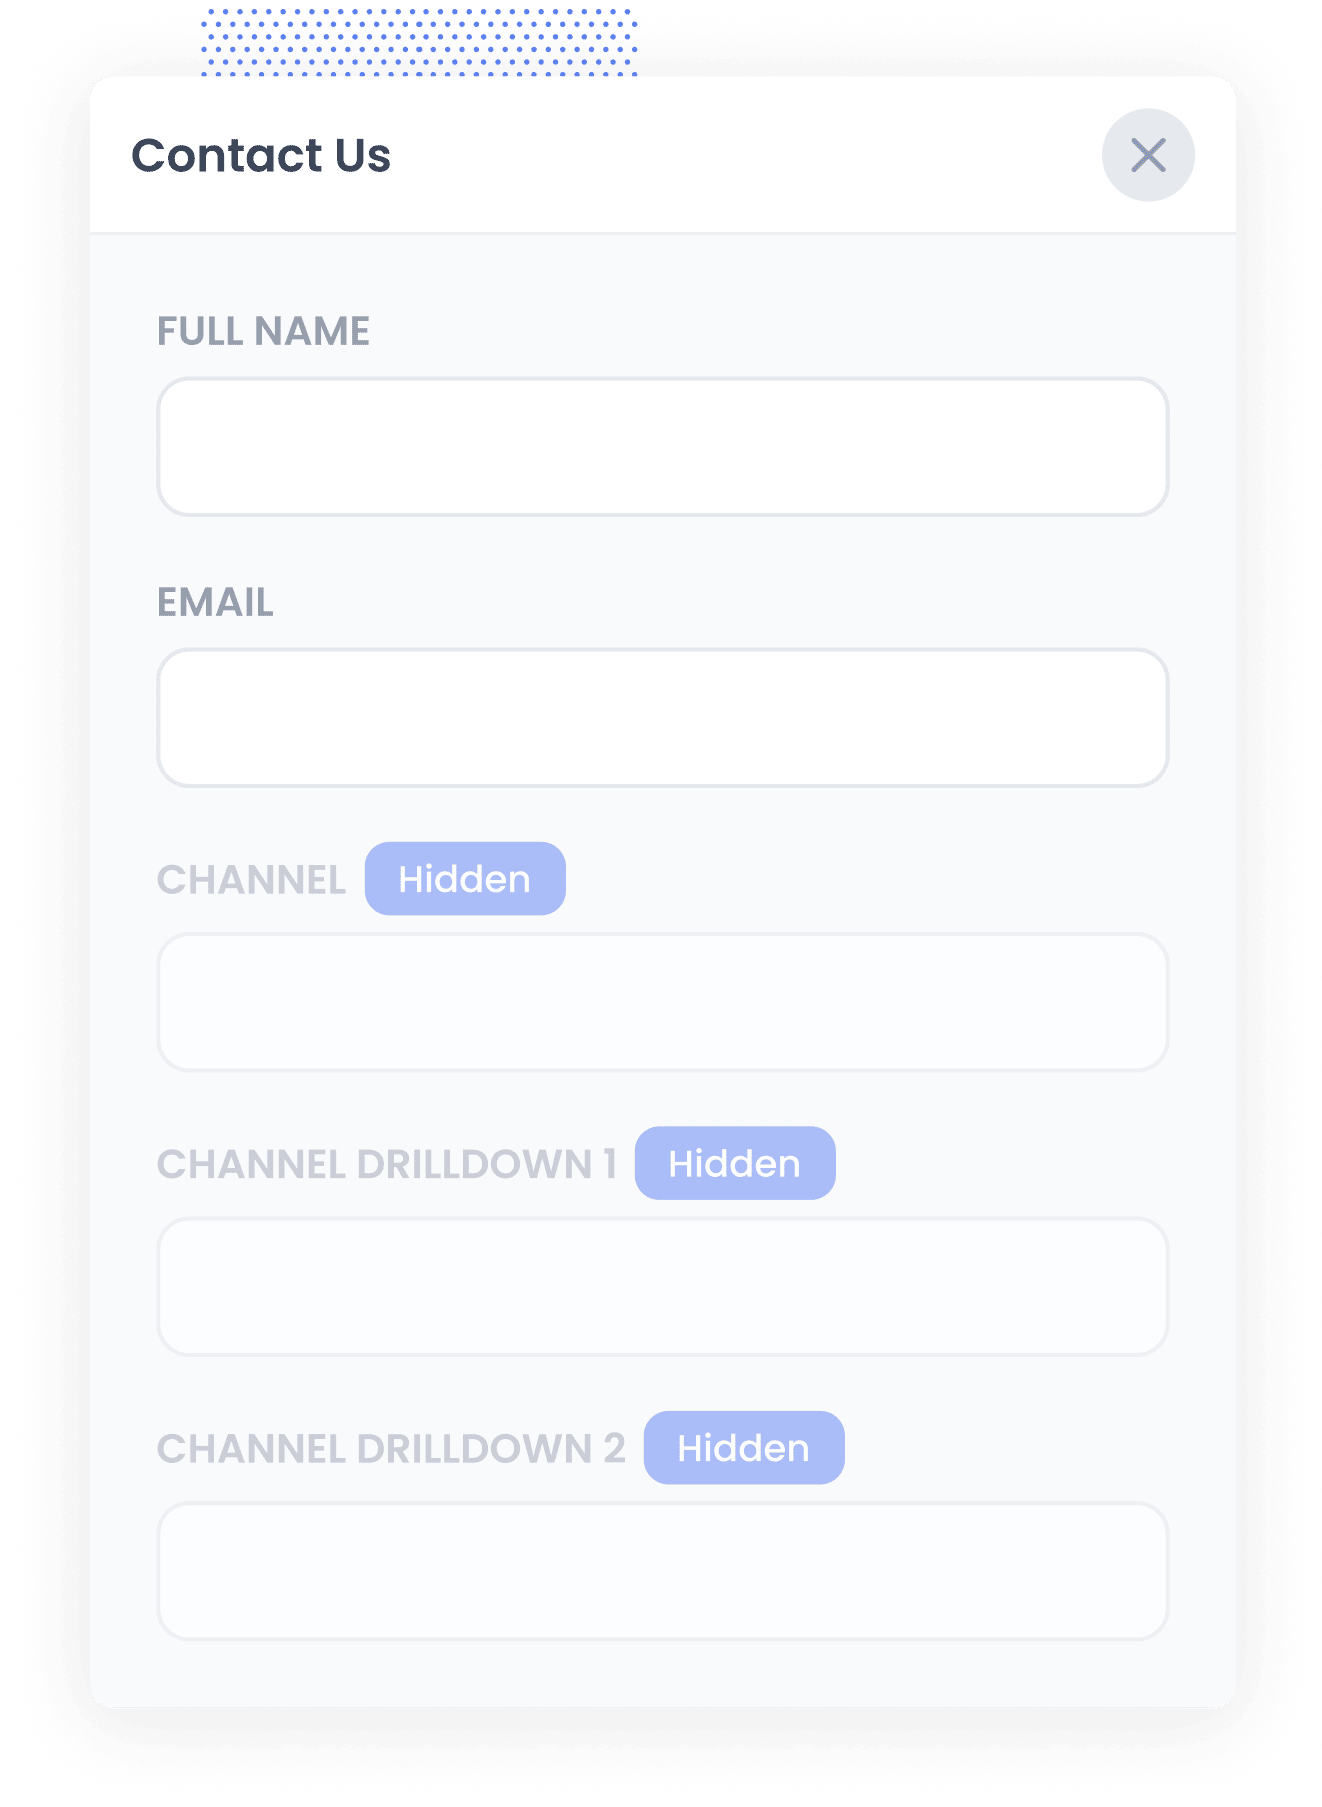
Once the code is on your site, you then need to add the following hidden fields to your forms, including:
- Channel
- Channel Drilldown 1
- Channel Drilldown 2
- Channel Drilldown 3
- Landing Page
- Landing Page Group
2. Attributer fills the lead source data into the hidden fields
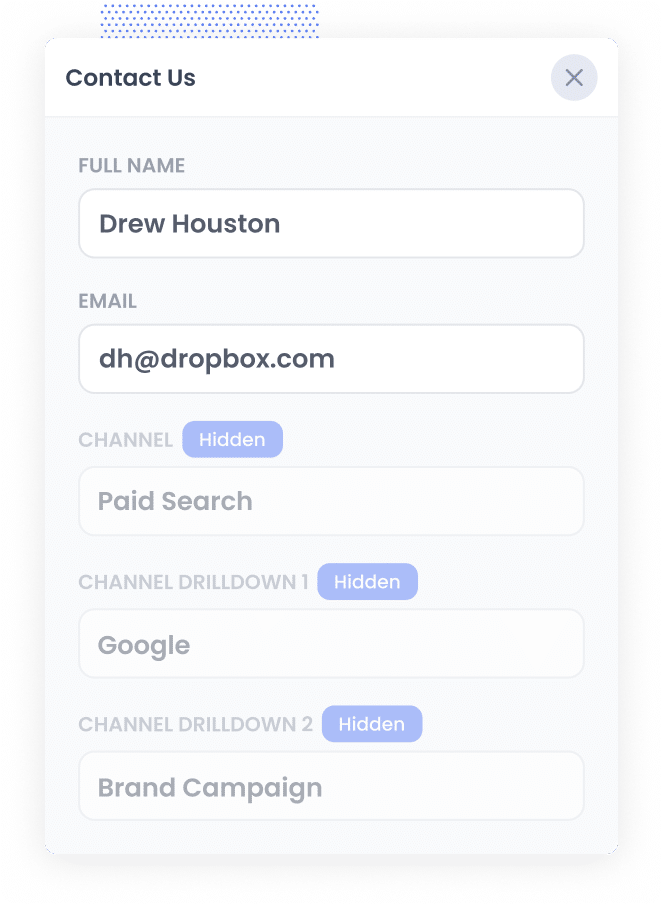
After setting everything up, Attributer will start tracking where your website visitors are coming from.
Then, when they complete a form on your website, Attributer writes the lead source data into the hidden fields you added to your forms.
3. Lead source data is captured in Netlify
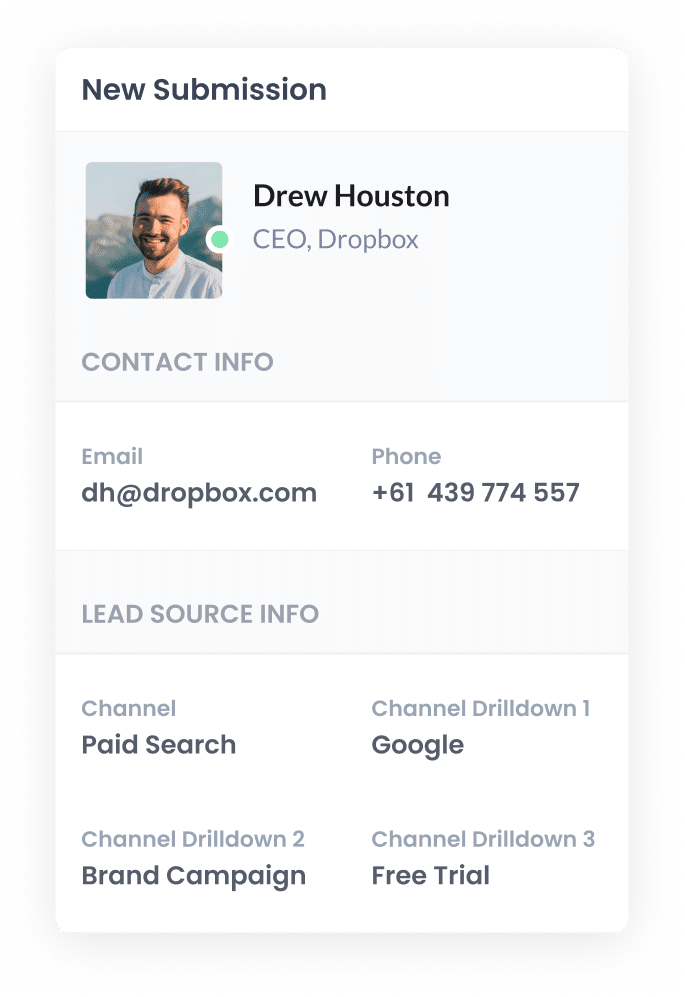
Then, when a visitor submits the form on your website, Netlify captures the lead source data that Attributer wrote into the hidden fields along with other details the lead provided (such as their name, email, phone, etc.).
You can leverage this data in multiple ways:
- View it in Netlify: Access the data in the submissions table within the Forms section of your Netlify dashboard.
- Include it in notification emails: Add this information to the notification emails sent by Netlify each time a form is submitted.
- Send it to your CRM: Utilise Netlify's built-in integrations or third-party tools like Zapier to send the data directly to your CRM.
- Send it to a spreadsheet: Use various add-ons or third-party tools (like Zapier) to forward the data to a spreadsheet, allowing you to generate detailed reports.
What data gets captured in Netlify?
Once everything is set up, the following information will be written into the hidden fields by Attributer and captured in Netlify:
1. Marketing channel data
This includes comprehensive information about the channel through which the visitor arrived at your website.
For example, let’s say you’re a marketing manager at a law firm. If someone clicks on one of your Google Ads and completes a form on your site, the following information would be passed through (depending on the UTM parameters used behind your ad):
- Channel: Paid search
- Channel Drilldown 1: Google
- Channel Drilldown 2: Family Law Campaign (or the specific campaign name)
- Channel Drilldown 3: Estate Planning Lawyer (or the keyword used in the campaign)
On the other hand, if a lead arrives organically through a Google search for "best family lawyers Seattle" the following information would be captured:
- Channel: Organic search
- Channel Drilldown 1: Google
- Channel Drilldown 2: www.google.com (or the specific Google domain they came from)
- Channel Drilldown 3: best family lawyers Seattle (or the keyword used to find the site, if available)
2. Landing page data
In addition to capturing information about how the lead arrived at your website, Attributer also helps you understand which content brought them to your site.
For this, Attributer captures two key pieces of data: the lead's initial landing page (e.g., familylaw.com/blog/best-family-lawyers-seattle) and the landing page group (e.g., /blog).
With this data, you can start to understand how many leads and customers are being generated from different sections of your site, such as your blog.
Additionally, you can dig deeper to find out how many leads you’ve acquired from each individual page, allowing you to assess the performance of specific blog posts or pages.
3 example reports you can run when you track the source of your leads in Netlify
If you're using Attributer to capture the source of leads in Netlify and sending that data to your CRM or a spreadsheet, you should be able to use those tools to run reports similar to the below examples:
1. Leads by channel
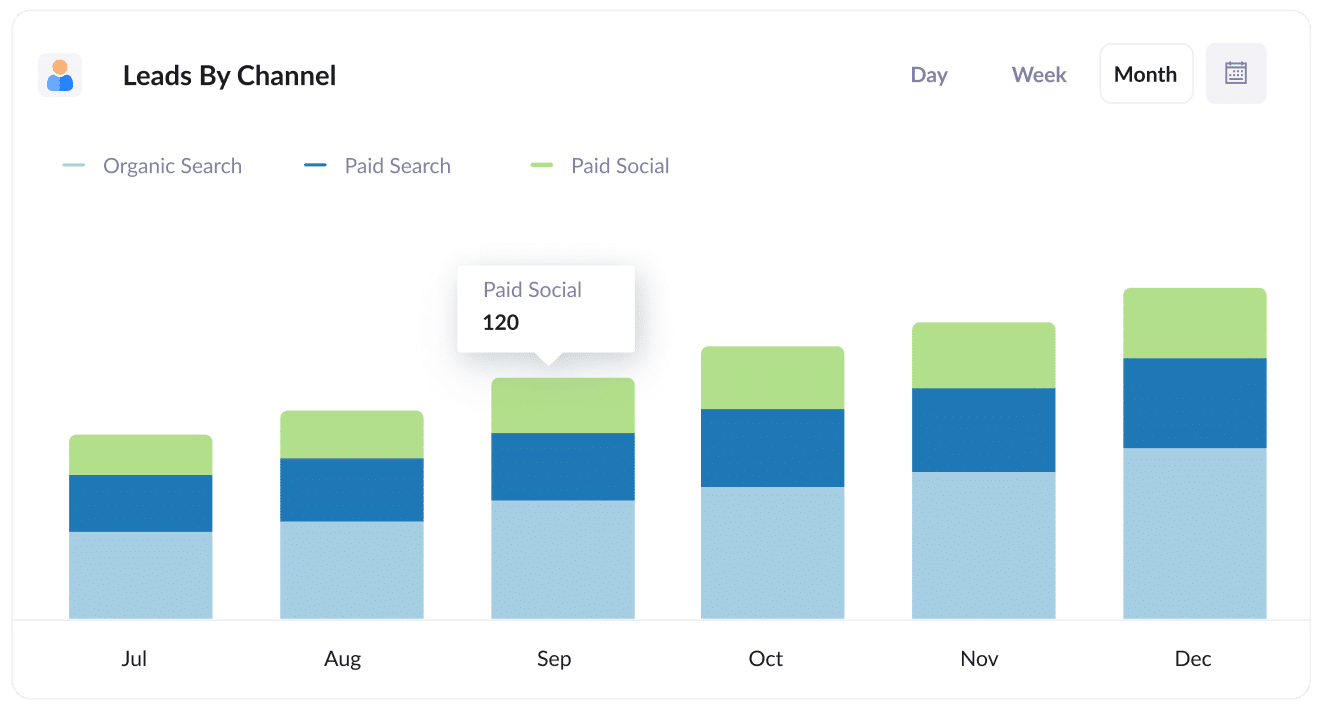
This report gives you a clear view of how many leads you’re getting each month from different channels (like Paid Search, Paid Social, and Organic Search).
It’s a great way to see where your leads are actually coming from and helps you understand what channels are working best.
With that insight, you can focus on the channels that are performing well and look for opportunities to improve the ones that are falling behind.
2. Leads by Google Ads campaign
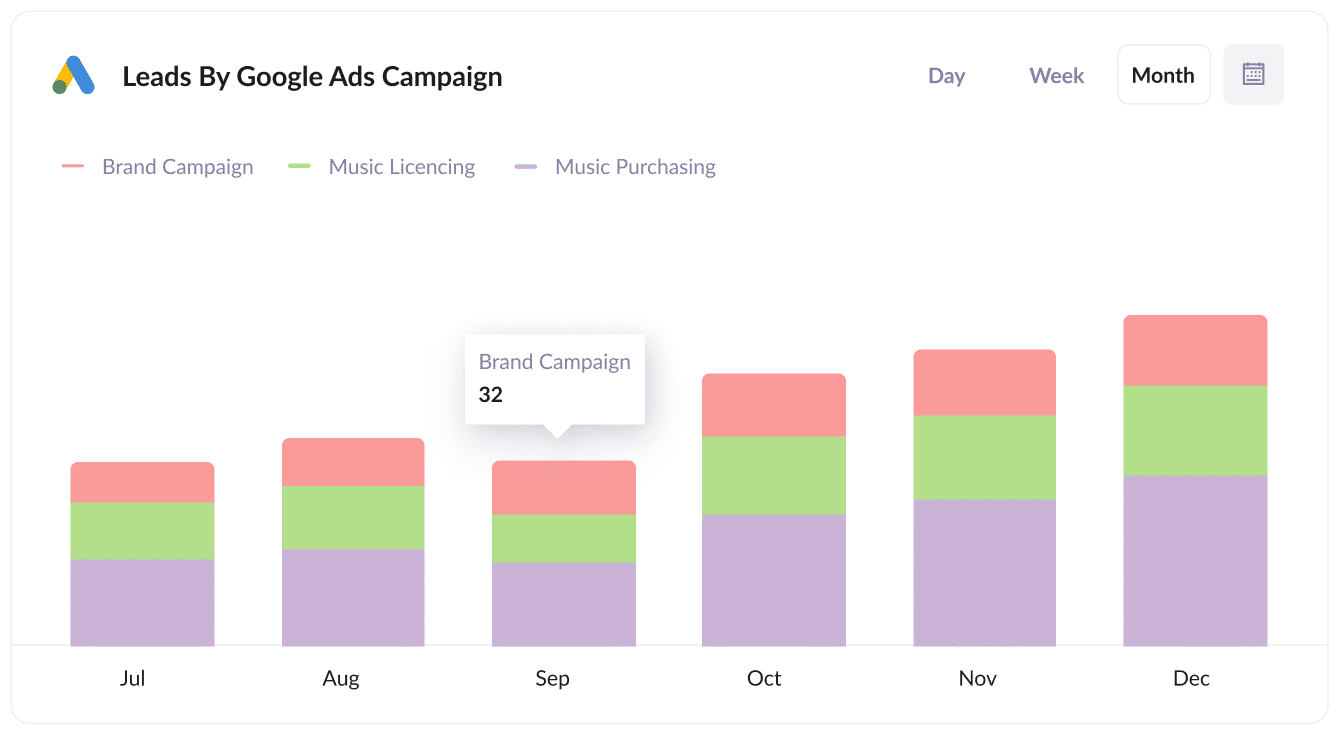
The chart above shows how many leads you’re getting from Google Ads each month, broken down by campaign.
It helps you see which campaigns are actually bringing in leads (not just clicks or visits that don’t turn into anything), so you can focus on what’s really working.
3. Leads by social network
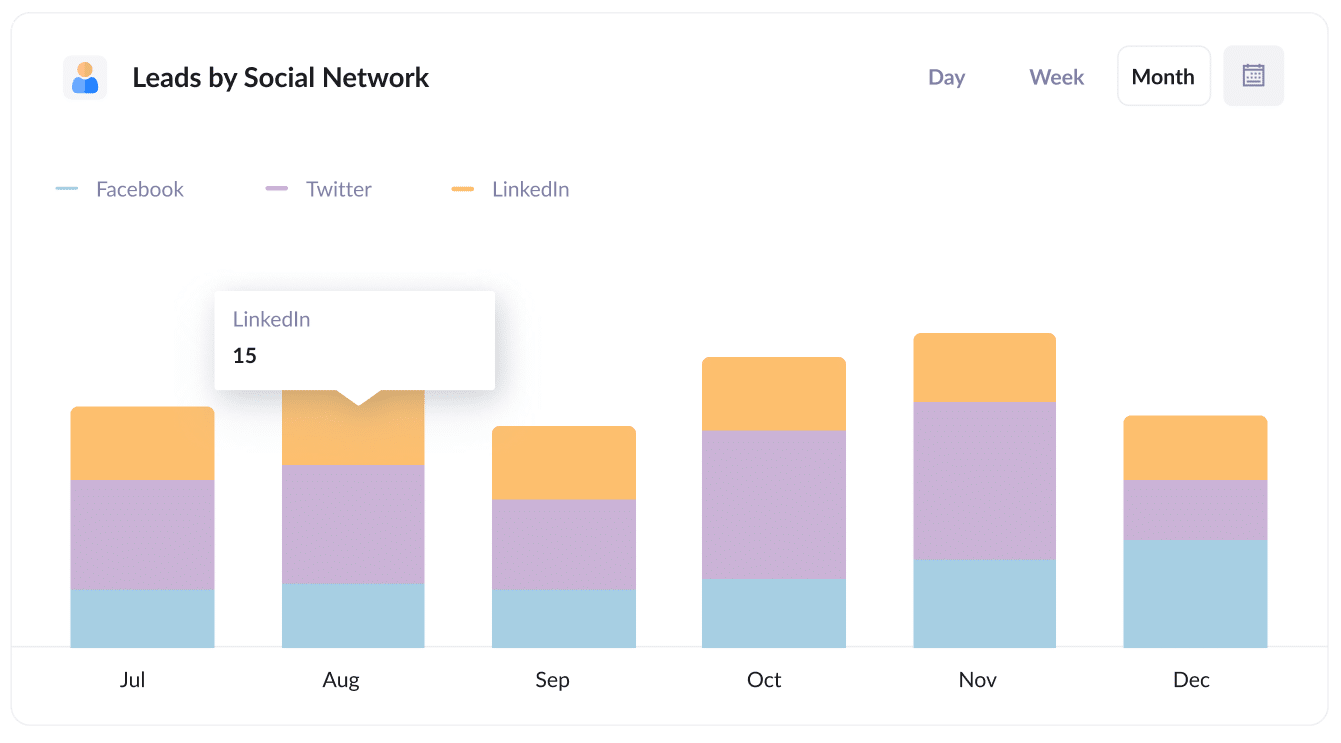
The report above shows how many leads have come from your organic social activity.
If your team is consistently posting updates, sharing content, or engaging with followers across platforms, this helps you see which networks are actually driving leads (not just likes and engagement), so you can focus your efforts where they’re making the biggest impact.
Wrap up
If you want to understand where your leads are coming from in Netlify, Attributer is a great solution.
It makes it easy to capture source information for each new lead, and you can use that data in a variety of ways (like showing it in Netlify, adding it to your email notifications, or sending it to your CRM).
With this insight, you can see which marketing channels and campaigns are actually driving leads, so you know where to double down and where there’s room to improve.
You can try it free with a 14-day free trial, and setup usually takes less than 10 minutes. Give it a go today.
Get Started For Free
Start your 14-day free trial of Attributer today!

About the Author
Aaron Beashel is the founder of Attributer and has over 15 years of experience in marketing & analytics. He is a recognized expert in the subject and has written articles for leading websites such as Hubspot, Zapier, Search Engine Journal, Buffer, Unbounce & more. Learn more about Aaron here.