The most convenient way to track Google Ads campaigns in Zendesk Sell
Know which of your Google Ads campaigns attract leads, opportunities and customers by tracking them in Zendesk Sell.
How do you determine which of your Google Ad campaigns generate most of your leads, customers and opportunities and which ones you need to drop?
With Google Ads data in Zendesk Sell, you can view the campaign where your leads, opportunities, and customers come from. You can also run reports in Zendesk Sell to tell you which of your campaigns are bringing in a positive ROI and which ones don’t.
In this blog, we’ll show you how to use Attributer to pass Google Ads data into Zendesk Sell together with all the leads. In the end, you can also use it to track your Google Ads campaigns’ performance.
What is Attributer?
Attributer is a piece of code that you insert on your site. Every time a visitor arrives at your domain, it scans some technical data to identify the visitor’s origins.
It then groups each visitor according to channels such as paid search, paid social, etc. This channel information gets stored as a cookie in the visitor’s browser. Once that visitor completes a lead form on your site, it sends the channel data into Zendesk Sell, and the lead’s entered info on the form.
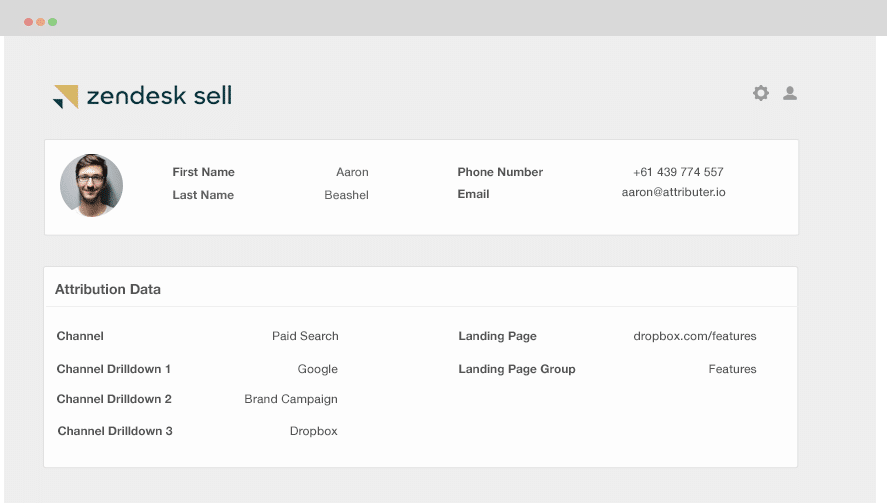
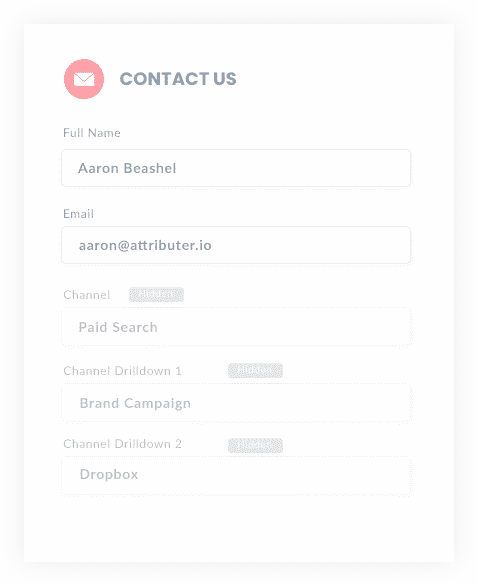
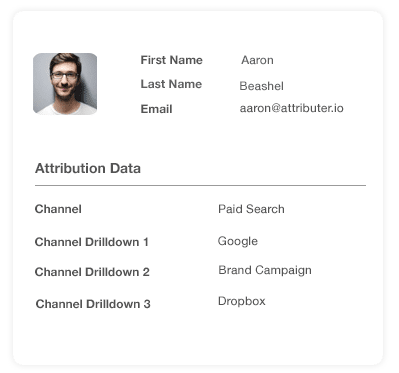
So once a new lead arrives in Zendesk Sell from one of your Google Ad campaigns, it may look like this:
As shown above, Attributer has sent the information that the visitor came from ‘paid search’ as well as the campaign name, ad group name and visitor’s landing page.
4 simple steps to track your Google Ads campaigns in Zendesk Sell
Attributer makes it easy to track Google Ads campaigns in Zendesk Sell. Here’s how it works:
1. Add UTM parameters to your Google Ads campaigns
The first step in tracking your Google Ad campaigns in Zendesk Sell is to add UTM parameters to your ads.
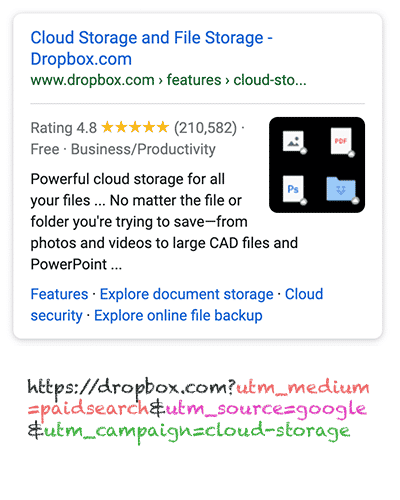
UTM parameters are bits of text that get added at the tail-end of the URL you send to people from your campaigns.
Let’s pretend the page you send someone is attributer.io/integrations/salesforce, and your final URL may look like this:
https:/ /attributer.io/integrations/salesforce?utm_medium=paidsearch&
You may get away with structuring your UTM parameters however you want, but the time-tested practices for Google Ads are:
- UTM Medium = Paid search
- UTM Source = Google
- UTM Campaign = The name of your Google Ads campaign
- UTM Term = The name of the ad group the ad belongs to
- UTM Content = The specific ad
Tagging your URLs with UTM parameters is simple; free tools online can help you create them.
2. Add hidden fields to your forms
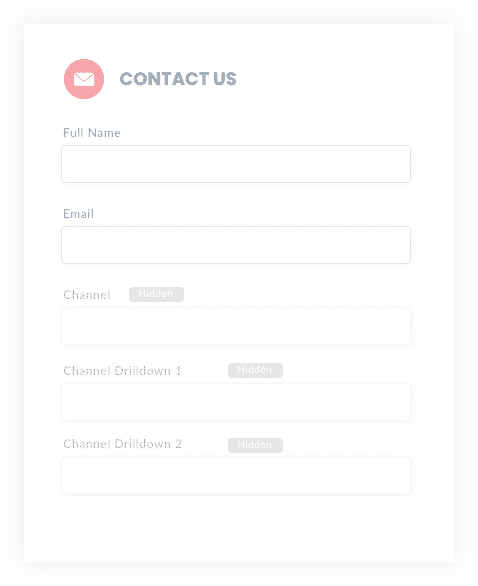
The second thing to do is add hidden fields to your lead capture forms. These forms are the ones you use to collect information from your site visitors. These fields aren’t shown to end-users but still do their work behind the scenes, meaning tools like Attributer can work with them without visitors ever knowing.
Here are the hidden fields that you need to add to your forms:
- Channel
- Channel Drilldown 1
- Channel Drilldown 2
- Channel Drilldown 3
- Landing Page
- Landing Page Group
A lot of the form-building tools make adding hidden fields easy. You simply drag and drop a ‘hidden’ field type into your form. Instructions on how to do this for different form builders can be found here.
3. Attributer writes Google Ads data into the hidden fields
When the hidden fields are up and running, Attributer will scan for the technical data of your visitors' origins, and once they submit your form, it auto-completes the hidden fields with the specified values in your UTM parameters.
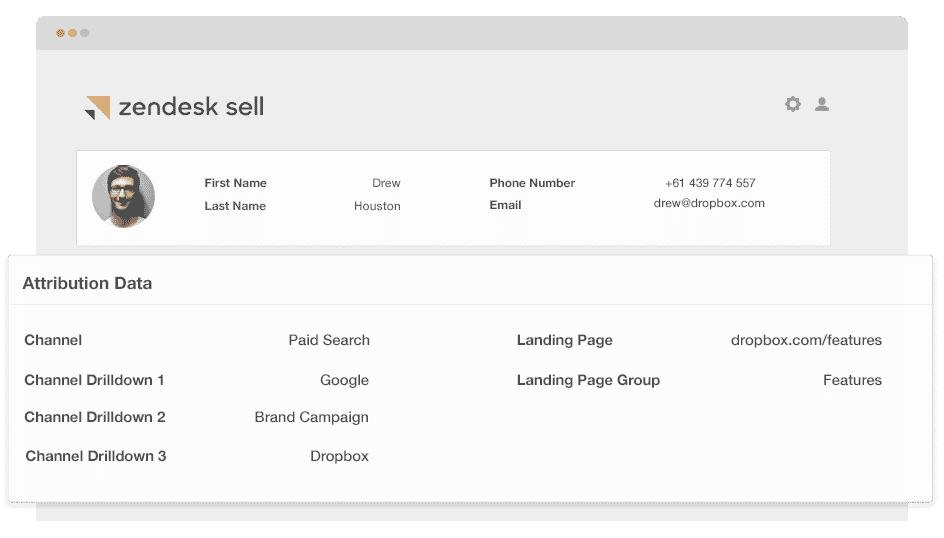
For instance, let's pretend I'm a market for Dropbox and a person arrives at my site from one of my brand campaigns unpaid search, Attributer would auto-fill the hidden fields like so:
- Channel = Paid search
- Channel Drilldown 1 = Google
- Channel Drildown 2 = Brand campaign
- Channel Drilldown 3 = Free account ad
Apart from the UTM parameters, Attributer also secures the visitor's landing page (e.g., dropbox.com/features/cloud-storage) and the first landing page group (e.g., features).
4. Google Ads data is sent to Zendesk Sell
Lastly, whenever a visitor submits a form on your website, all the Google Ads data, landing page, and the lead’s name, email, phone, etc., are sent into Zendesk Sell.
When it reaches Zendesk Sell, you can start running reports on it using native reporting tools or opt for BI tools like Tableau and Looker to run more advanced reports.
Example reports you can create with Google Ads data in Zendesk Sell
If you go through the 4 steps and use Attributer to capture Google Ads data in Zendesk Sell, then you’ll get to run reports similar to the following:
1. Leads by campaign, ad group or ad
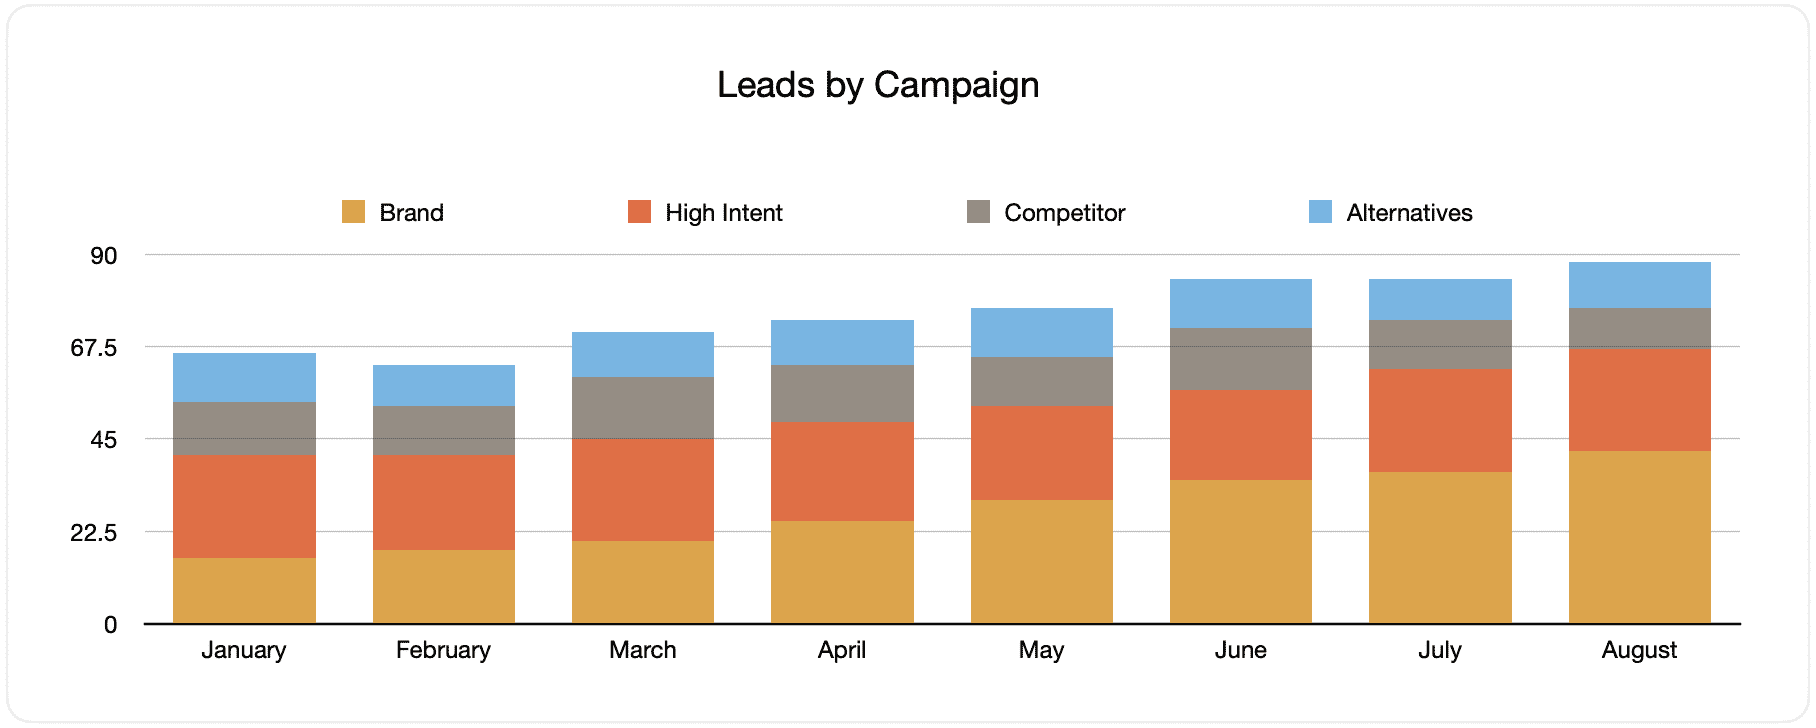
This document shows the monthly generated leads from your Google Ads, broken down by the Google Ads campaign they originally came from.
When reviewed after some time, you may observe the breakdown of leads per campaign each month and the changes that happened over time. By extension, the impacts of the optimizations you applied on the generated leads can also be seen.
2. Customers by campaign, ad group or ad
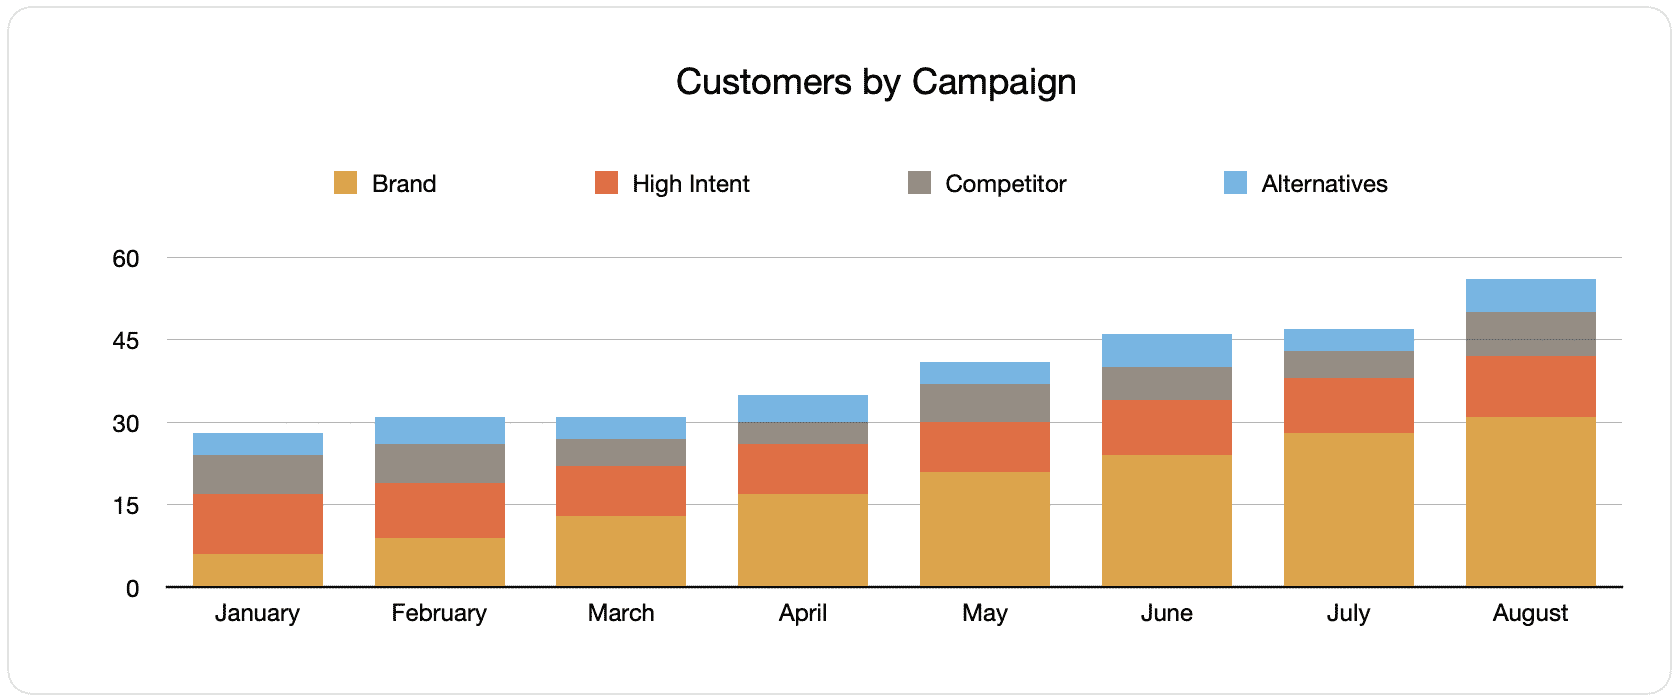
This file exhibits the number of new customers generated each month from your Google Ads, grouped by the channel they arrived from.
Comparing this graph to the leads chart can reveal interesting facts, such as discovering that there are campaigns that bring in leads that never convert into customers. When this happens, it can signify that those campaigns are not worth continuing.
3. Revenue by campaign, ad group or ad
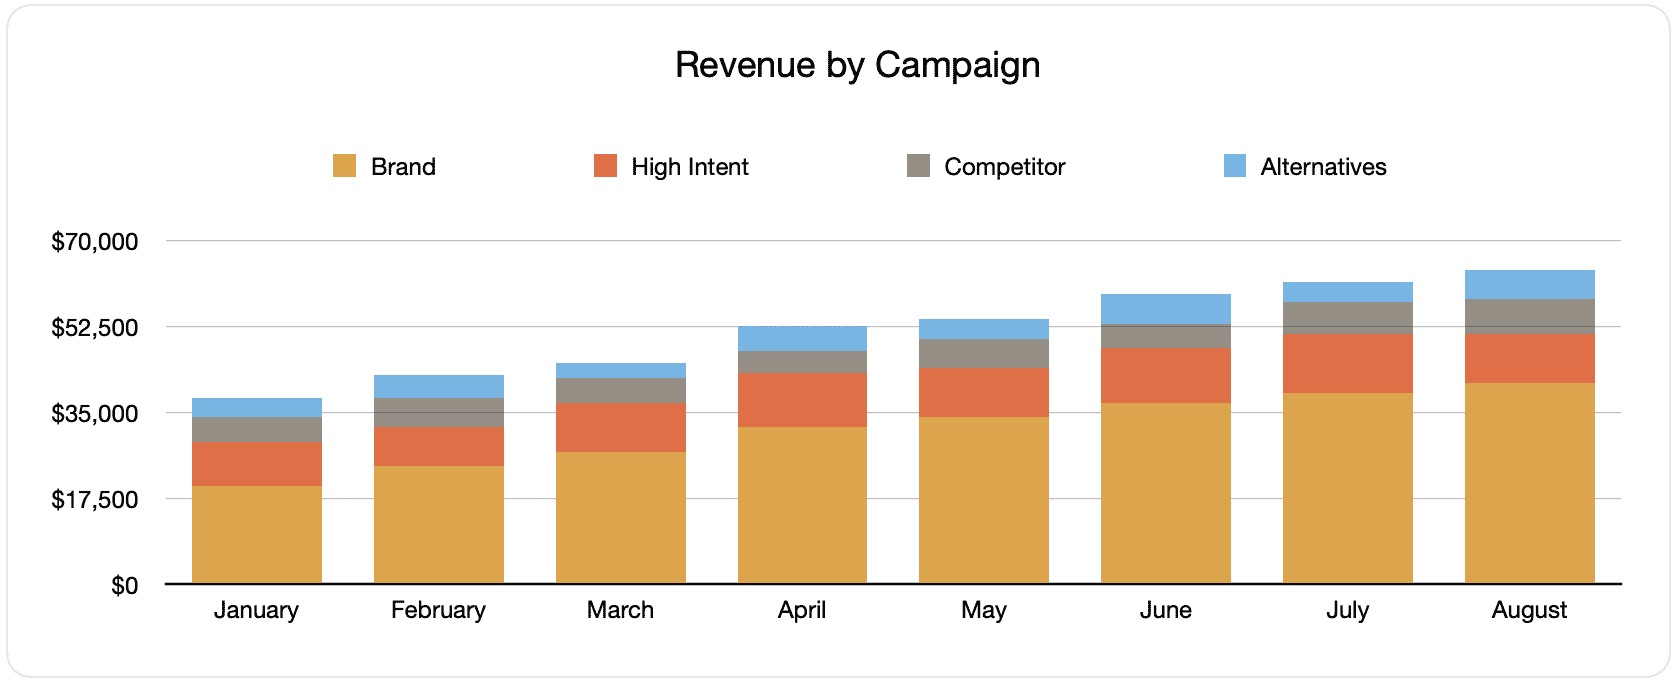
This assessment displays the generated revenue per month sorted by the customer's channel.
It can be useful for measuring the overall ROI of your marketing efforts. For example, we can see in the graph above that $236,156 was generated in new revenue from March’s paid social ads. If the client shelled out less than this on the ads, it’s a positive ROI and worth continuing.
Why using Attributer is better than capturing raw UTM parameters
Other systems for capturing UTM parameters and using them to track your Google Ads in Zendesk Sell are available, but why use Attributer?
Here’s why:
1. Captures all traffic
If you want to capture UTM parameters and pass them into Zendesk Sell so you can track your Google Ads campaign, Attributer is an excellent tool for this.
It also sends information on visitors who arrive through other channels like organic social, organic search, direct, referral, etc.
This means that when you build reports in your CRM to find out where your leads and customers have come from, you can identify the source of ALL your leads, not just those from your campaigns.
This data can be valuable, especially when your SEO efforts are the ones bringing in the leads and customers instead of your Google Ads campaigns. This way, you can invest accordingly.
2. Remembers the data
Usually, the UTM parameters must be present on the page where most UTM capturing tools and methods submit the form. This presents a problem when the page visitors complete a form on is different from the one they landed on.
For instance, imagine someone clicks one of your Google Ads and is led to a landing page for that campaign. Once the user decides they like your product or service, they will click the ‘Get A Quote’ button and are taken to a different page to complete your request form. This means that the page they complete a form on isn’t the same as the one they initially landed, so the UTM parameters are lost.
This doesn’t happen with Attributer because it stores the UTM parameters in a cookie in the user’s browser. So no matter what page the user submits a form on, the UTM parameters always get passed through.
In the end, this implies that regardless of the user’s navigation activity before submitting a form, you can always track them back to your Google Ads.
3. Provides cleaner data
One of the problems with using other tools that capture raw UTM parameters is that you can end up with messy data that makes it difficult to run accurate reports.
As an example, imagine some of your Google Ads campaigns are tagged with UTM_Source= Google.com (capital T), others with UTM_Source= google (lowercase, no domain), and others with UTM_Source= adwords.
If you were to pass this raw UTM data into Zendesk Sell and try to use it to see how many leads your Google Ads campaigns have brought you, you'll get three different sources that you would have to manually stitch together.
With Attributer, you don't have to deal with this because it takes the possibility of capitalization and other inconsistencies into account, and would ascribe leads to the correct channel.
4. Records landing page data
Do you want to know the number of leads and customers your blog has made? As well as the in-depth content piece you’ve worked on for a long time?
Attributer captures the channel data, landing page (i.e., attributer.io/blog/capture-utm-parameters), and the landing page category (i.e., /blog).
This means that you view the performance of certain sections on your site (like your blog) regarding leads, customers, and revenue generation.
Since Attributer also captures both the landing page and landing page group, you can see how your blog as a whole is performing and zero in on each blog post’s performance too.
Wrap up
If you’ve been wondering how to track your Google Ads’ success in Zendesk Sell, then Attributer is an excellent solution.
It will secure the UTM parameters behind your Google Ad campaigns and send them to Zendesk Sell, where you can build reports that display the campaigns where your leads and customers have come from.
Additionally, it also provides data on leads that arrive from other channels so that you can track the source of ALL your leads, not just those from Google Ads. Ultimately, these data can help you decide where to invest in growing your business.
Did we mention the best part yet? Because it’s free to start! Begin your free trial today and find out if it’s for you.
Get Started For Free
Start your 14-day free trial of Attributer today!

About the Author
Aaron Beashel is the founder of Attributer and has over 15 years of experience in marketing & analytics. He is a recognized expert in the subject and has written articles for leading websites such as Hubspot, Zapier, Search Engine Journal, Buffer, Unbounce & more. Learn more about Aaron here.