
The best way to track Fillout Forms submissions as conversions in Google Ads
Learn how to set up proper conversion tracking in Google Ads when someone submits a Fillout Form on your website
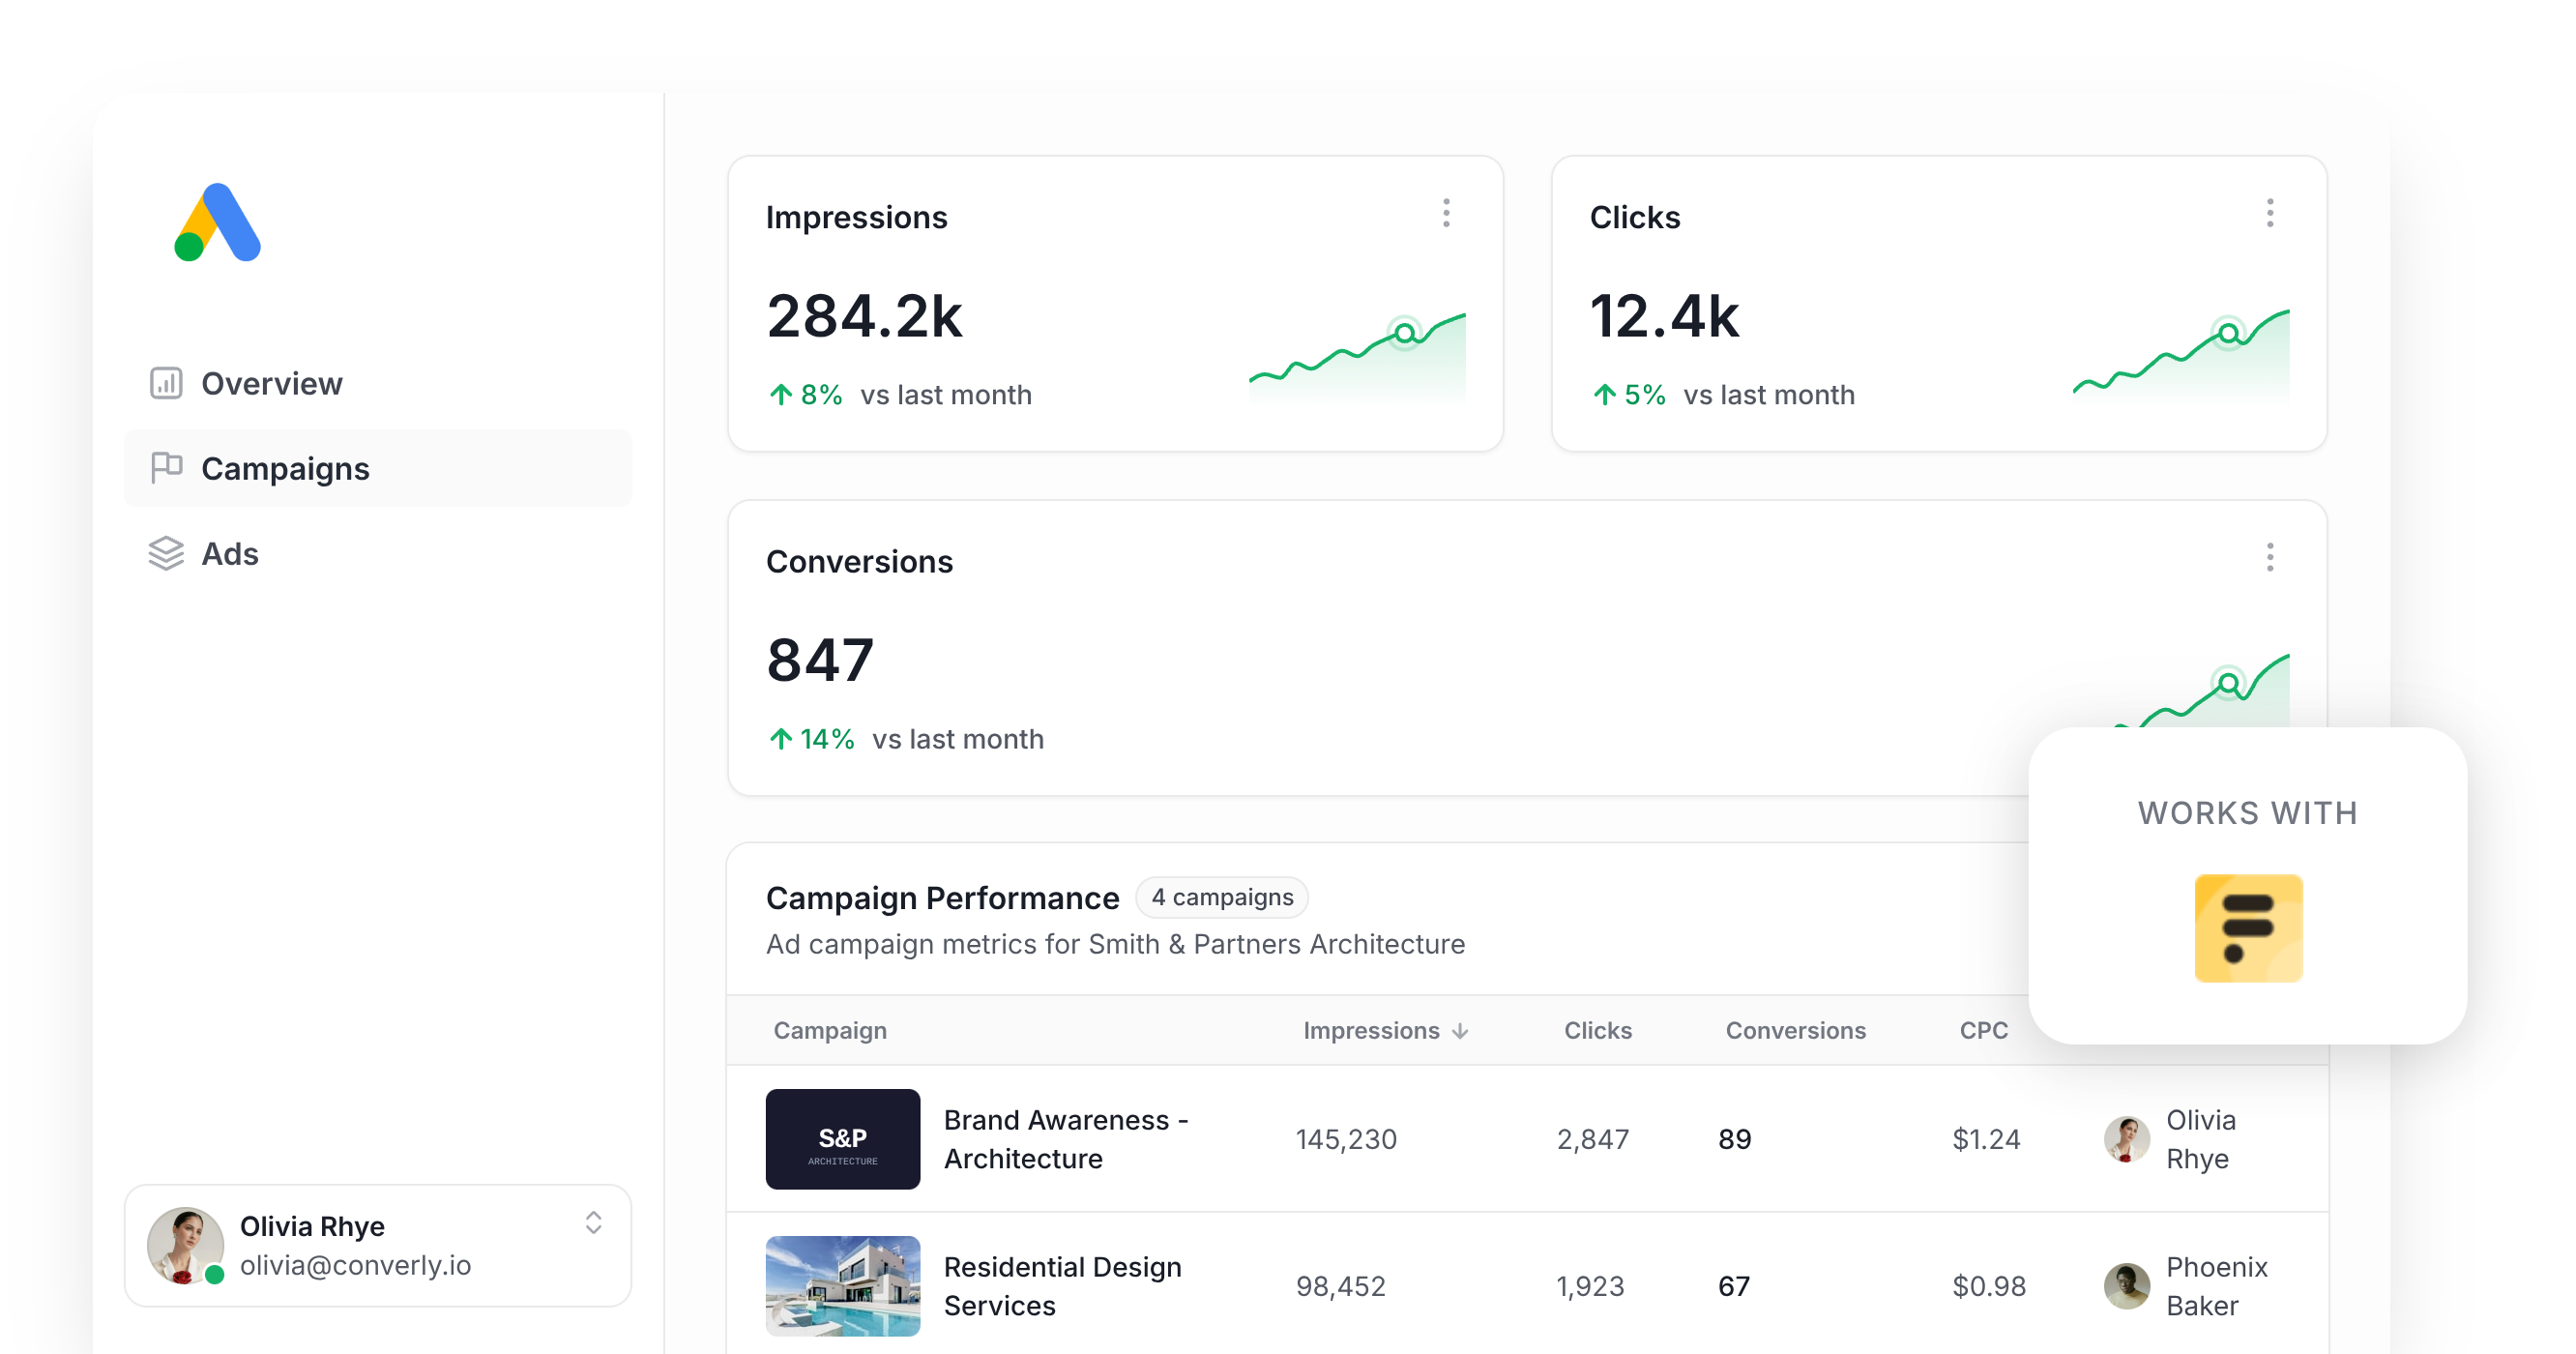
Use Attributer to capture the GCLID when someone submits a Fillout form, then send it back to Google Ads as a conversion (either straight away or later once that lead becomes a customer).
Running Google Ads campaigns is a great way to get new leads for your business, but if you don't know which campaigns are actually generating leads (as opposed to clicks that never convert), then you're not getting the most out of it.
Tools like Google Tag Manager can help you solve this, but because Fillout Forms embeds via iFrame the standard ‘Form Submission’ trigger doesn't work, so you're stuck writing custom code to detect form submissions and sending information to the dataLayer, then setting up the Tags, Variables, and Triggers to actually send the conversions. It's complicated stuff.
The other options, like tracking thank you page visits, are easier but inaccurate. There are a ton of ways people can hit a thank you page without ever filling out a form (they get indexed in Google, browser autocomplete sends people there, etc). On top of that though, to get accurate conversion tracking you need to send the lead's name, email, phone, etc to Google Ads with each conversion, and you can't get that information from a thank you page.
So what's the best way to do it?
In this article, we'll show you 2 different ways to send conversions to Google Ads when someone fills out a Fillout form (using an approach known as server-side tracking).
Why server-side tracking matters for Google Ads
Whether you're counting thank-you page visits or firing events through Google Tag Manager, the standard ways of measuring Google Ads conversions all break down because they rely on the visitor's browser to send the conversion to Google Ads. Here's why that's a problem:
- Ad Blockers. They prevent the Google Tag from loading in the visitor's browser when they visit your site, so nothing that happens on your site after that gets recorded anywhere.
- Browser privacy features. Safari and other privacy-focused browsers limit how long the Google Tag can track a visitor (often to just a single day), so if someone clicks your ad today and converts several days later, Google has no way to tie the conversion back to a real person and the ad they clicked.
- Cross-device behaviour. Someone might click your ad on their phone during their commute, then sit down at their laptop that evening to actually fill out your form. Browser-based tracking has no way to tie those two sessions together because they happen on different devices.
These are the kinds of problems that server-side tracking solves. Rather than waiting for something to happen in the visitor's browser and hoping the Google Tag catches it, you send the lead's details (name, email, phone) to Google's servers directly. Ad blockers and privacy-focused browsers can't get in the way because it doesn't happen in a browser, and because you send the name, email, phone, Google can match the conversion back to the original ad click regardless of what device it happened on.
If this sounds like a lot of technical mumbo-jumbo, just know that the benefits are real. In fact, Google reports that businesses moving to server-side tracking see a 23% average increase in total recorded conversions and a 10% cut in cost per conversion, mostly because Google's bidding algorithms finally have the data they need to understand who your ideal customers are and can go and serve your ads to more people like them.
How to track Fillout Forms submissions in Google Ads with server-side conversion tracking
There are two main ways to do it, and which one you pick comes down to when you want the conversion to be sent back to Google Ads.
Option 1: When the lead initially submits the form
There are tools like Converly that make it easy to send a server-side conversion to Google Ads when someone submits your Fillout form.
Instead of building the whole thing yourself in Google Tag Manager (detecting the submission, extracting the lead's details, hashing them with SHA-256, then calling Google's API), you get a visual builder you can use to set everything up.
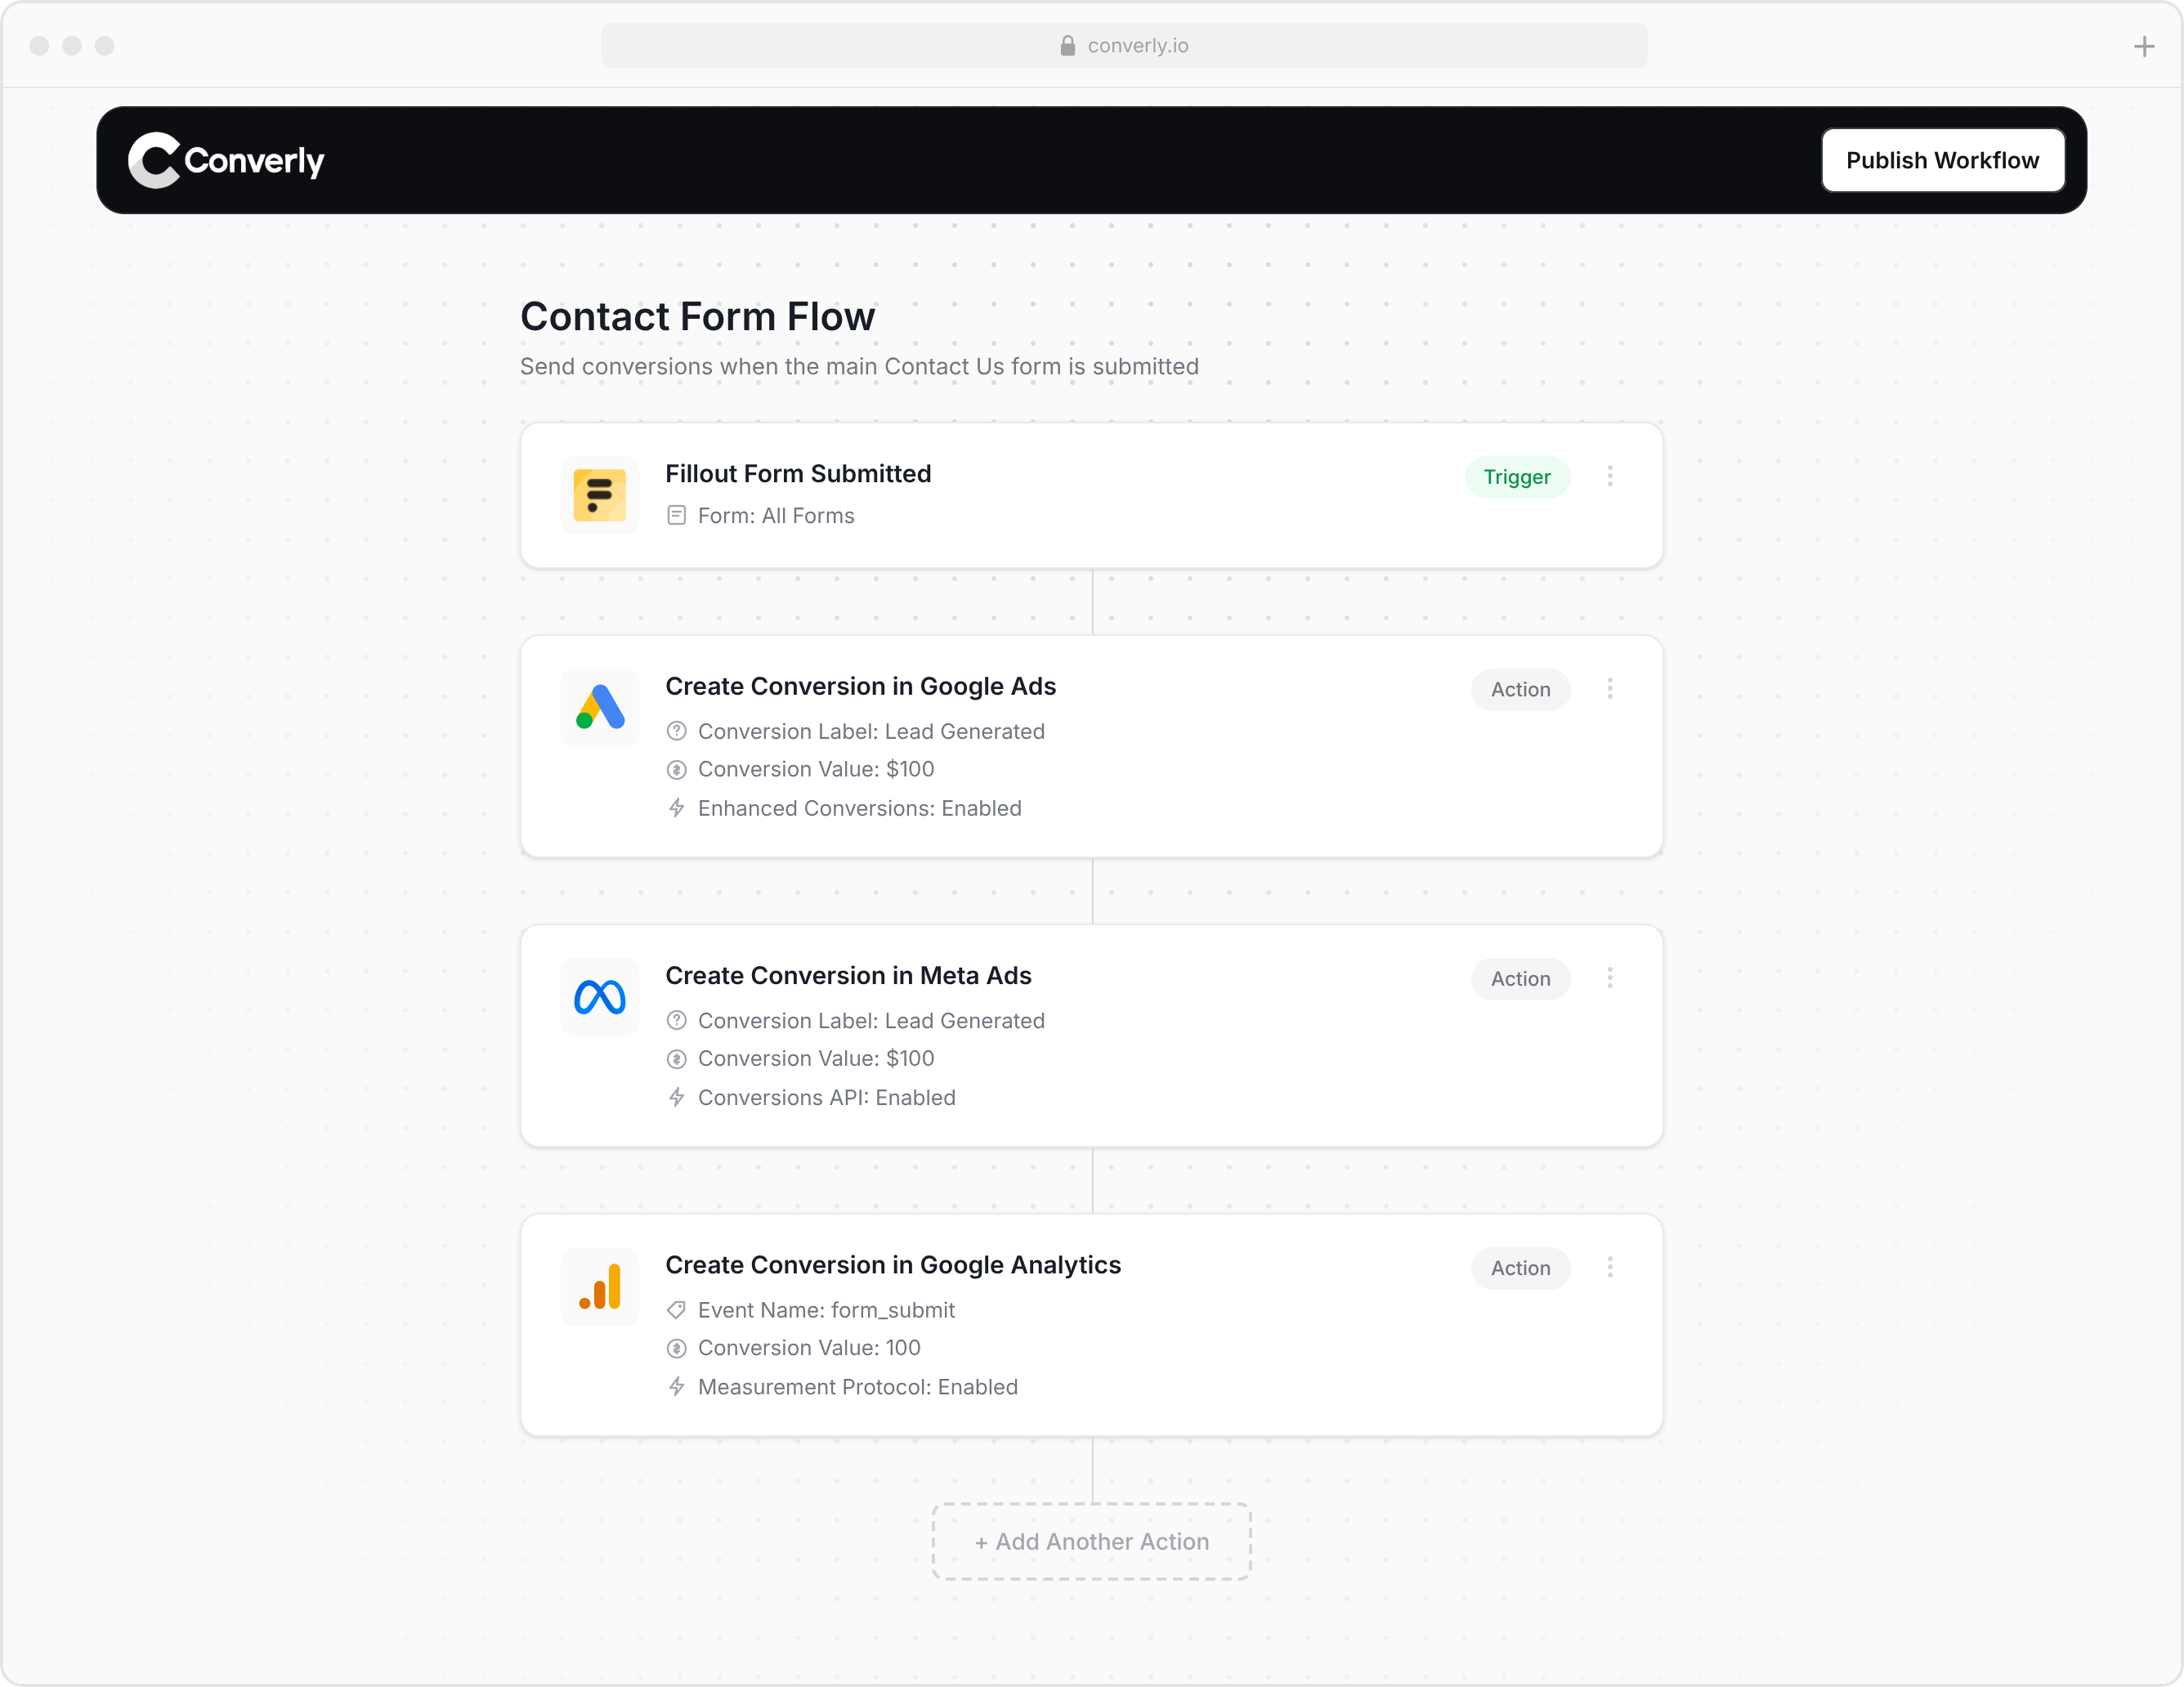
You simply choose a trigger (in this case a Fillout form being submitted) and then select whatever actions you want to happen next (like sending a conversion in Google Ads).
Converly does the rest. It watches for new Fillout submissions, hashes the respondent's name, email, and phone number with SHA-256, and sends them to Google Ads. On top of that, it also captures and sends the Google Click ID (GCLID), IP address, User Agent and more, so Google has all the data it needs to match the conversion back to a real person and the specific campaign, ad, and keyword they clicked from.
Ultimately, by using Converly you end up with the full benefit of server-side tracking (the 23% lift in conversions and the 10% drop in cost per conversion) without touching any code, without learning how SHA-256 hashing works, and without building anything against Google's API yourself.
Option 2: Once a lead turns into a customer
Fillout stores every submission in its own Submissions view, so the other option is to grab the data that Google Ads needs to record a conversion, store it in Fillout Forms or in your CRM, and then send it to Google Ads further down the line, once the lead has actually become a paying customer.
Here’s how that would work:
1. Install Attributer and add a hidden field to your Fillout form

When you sign up for a 14-day free trial of Attributer, you'll get given a bit of code to add to your website (you can add it directly or use tools like Google Tag Manager).
Once that's done, head on over to your Fillout Forms account. In the form editor, add a Hidden Field element and set ‘gclid’ as the ID. Finally, you’ll need to update the embed code on your site so that Attributer has a way to pass through data. The exact steps for this are on the Attributer Help site.
2. Attributer writes the GCLID into the hidden field
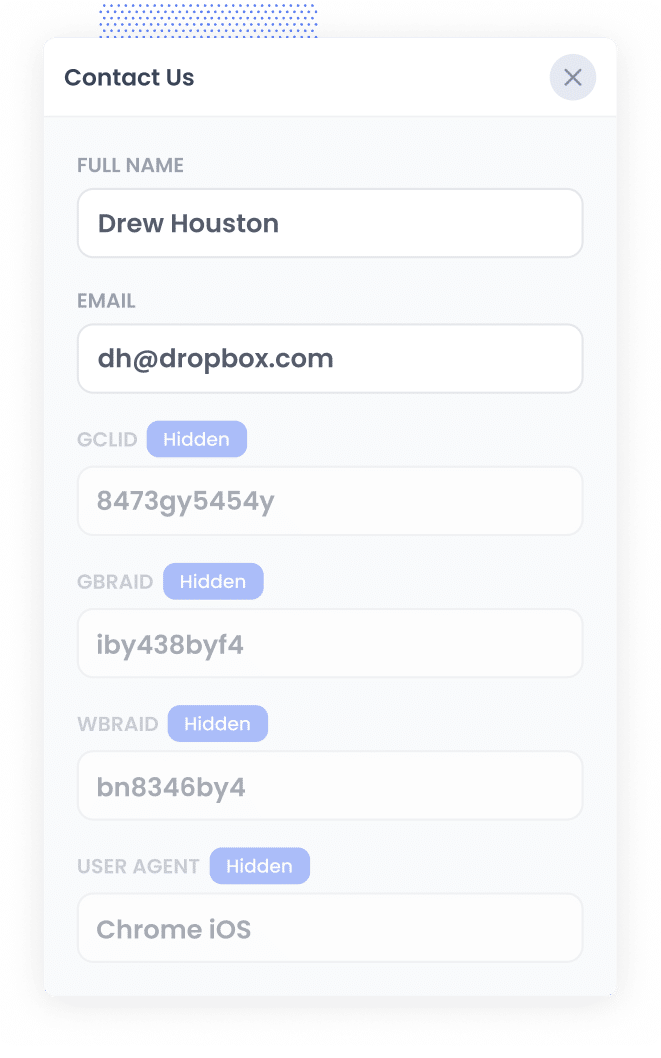
Once Attributer is live on your site, it picks up the GCLID when someone arrives from a Google Ad and stores it in the visitor’s browser. This ensures it is remembered even if they browse a few pages before converting (or if they leave and come back to the site later on).
When that visitor eventually submits your Fillout form, Attributer passes the stored GCLID through with the form submission.
3. GCLID is captured with each new lead
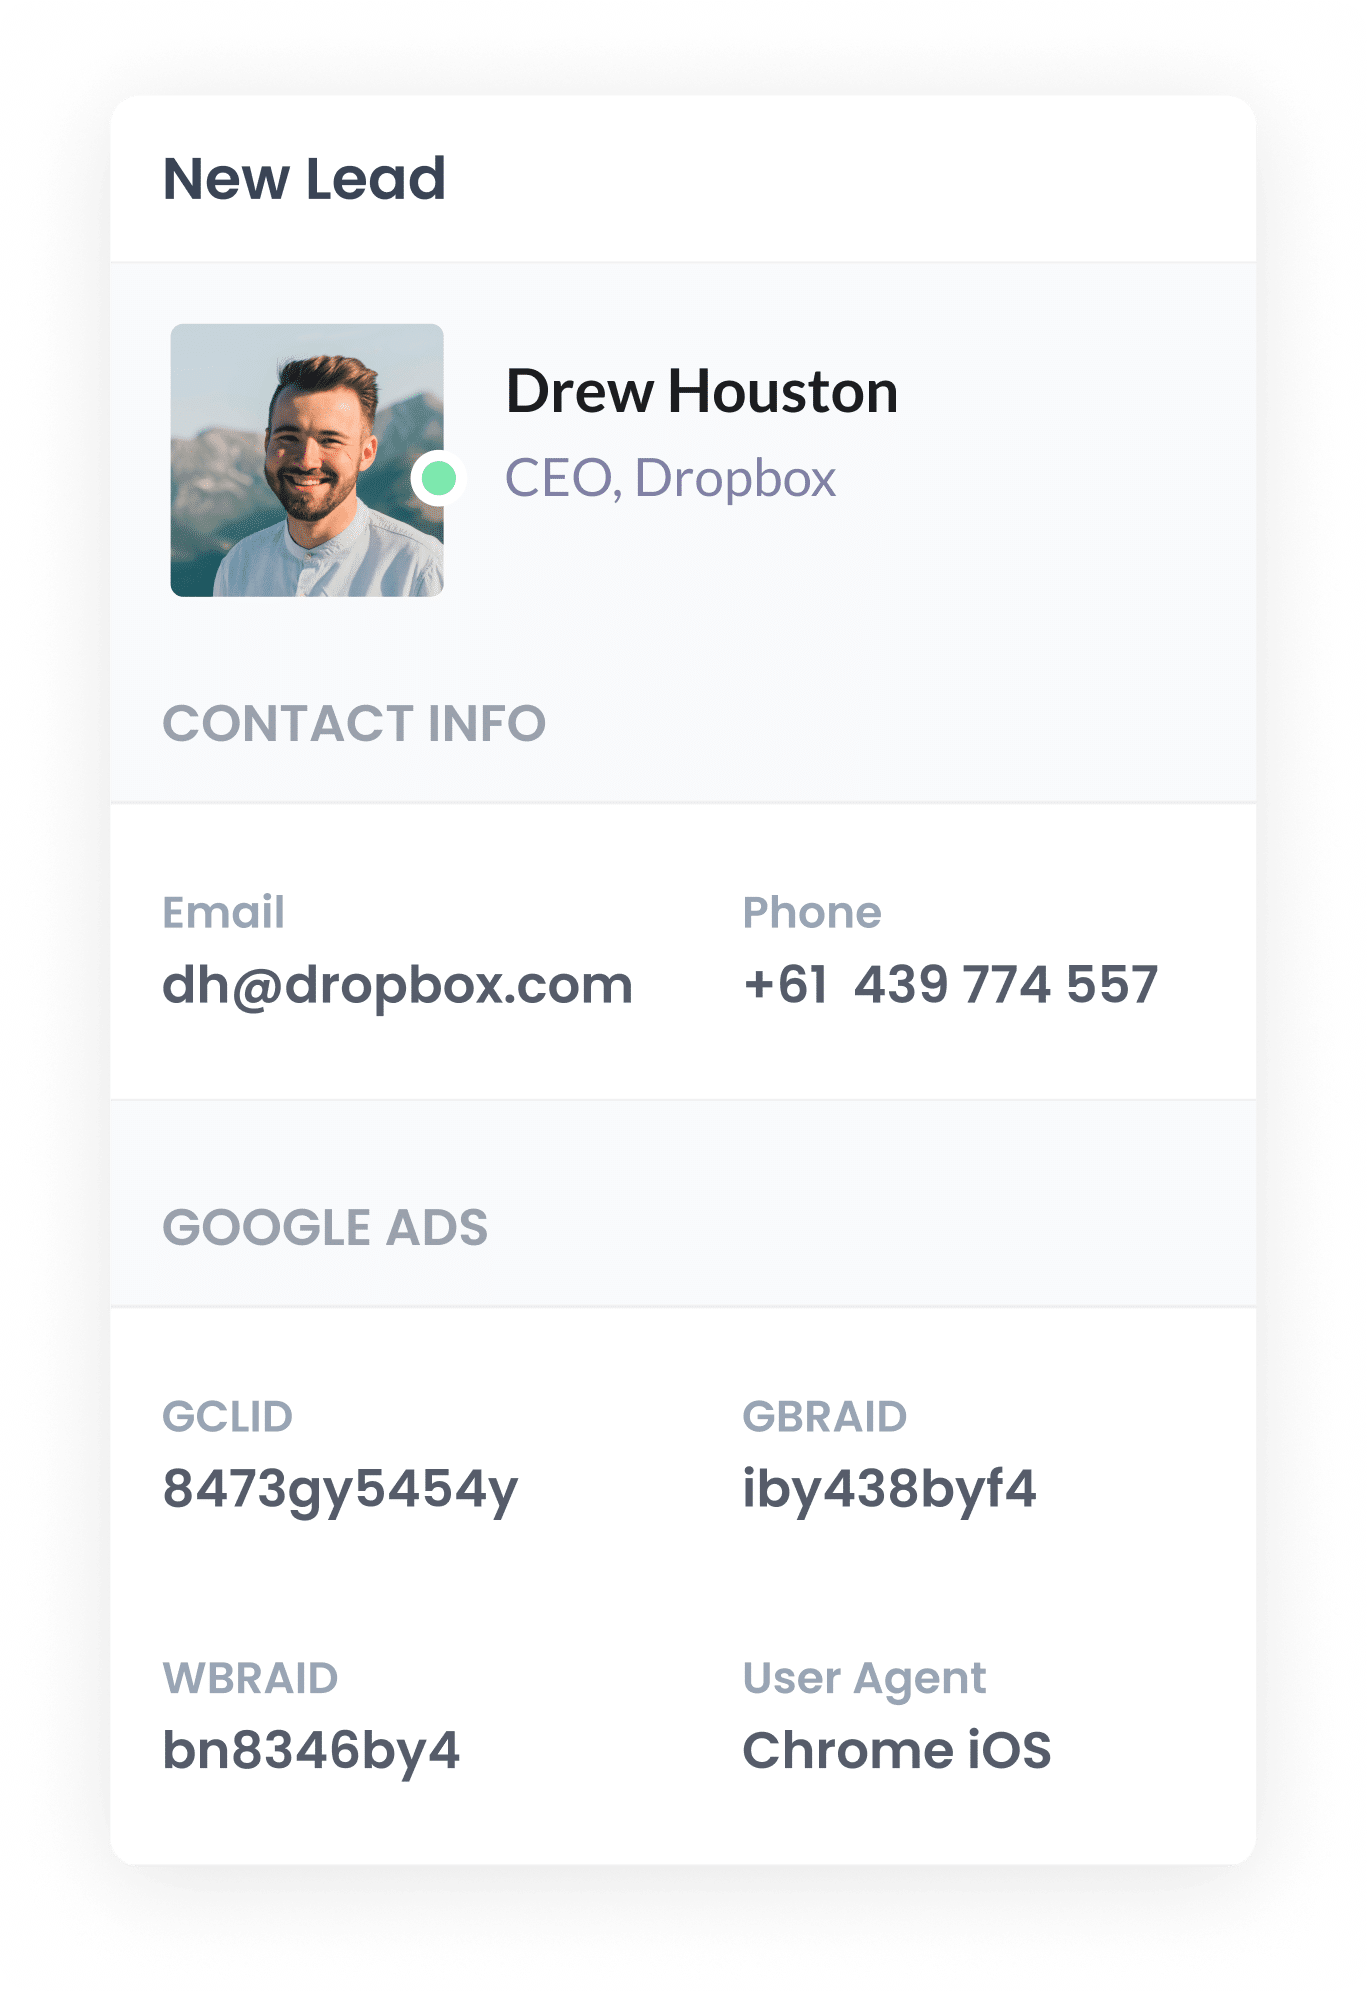
From there, the GCLID shows up on the form submission alongside everything else the lead entered, like their name, email, phone, and so on. You can see this with each submission in your Fillout account, and then you can use Fillout's native integrations or a tool like Zapier to send the GCLID over to your CRM with each new lead (where it sits on the contact record waiting to be used).
4. Send the data to Google Ads
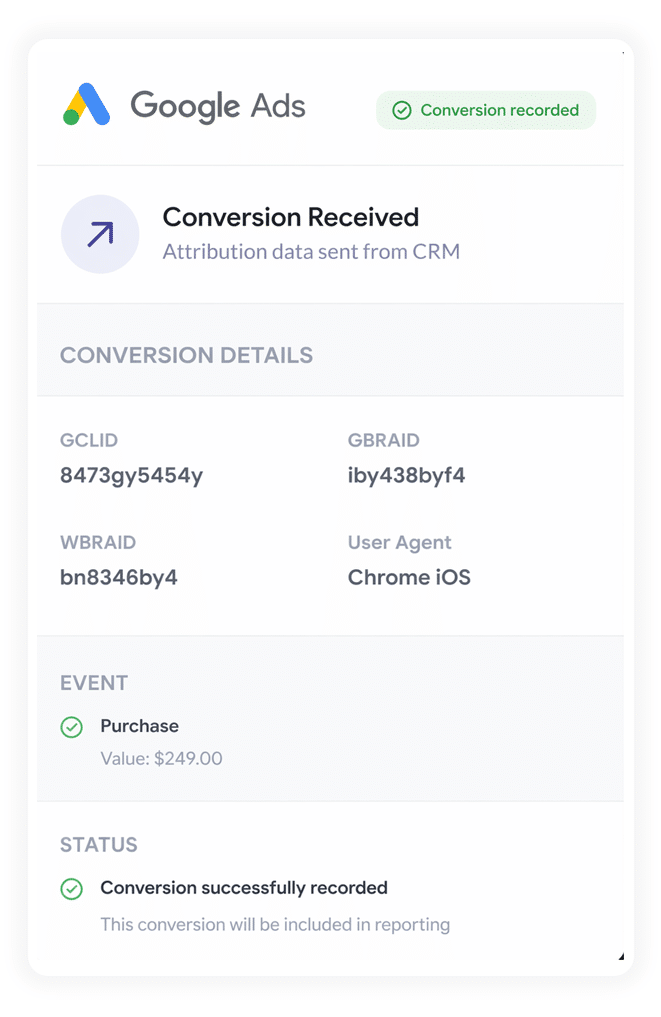
Whenever that lead hits a milestone worth reporting on (a deal is opened, or they become a customer), you've got everything you need to send the conversion back to Google Ads.
Since most CRMs don't talk to Google Ads natively, you’ll need to use a tool like Zapier. Simply connect your CRM to it and then set up a Zap to send a conversion to Google Ads at whatever stage in the sales process makes sense for your business (like when a deal is created, when it’s closed, etc). Zapier will then give you a simple field mapping screen, which makes it easy to map the GCLID from your CRM to the correct field in the Google Ads Data Manager API. That's it, you're done!
A note on volume
Most ad platforms, like Google Ads, Meta Ads, etc. need a reasonably high number of conversions to be sent to them in order for their algorithms to learn what an ideal customer looks like for you (and to then serve your ads to similar people).
Google Ads official documentation says their smart bidding strategies (like Maximise Conversions, Target CPA, etc) need about 50 conversions per month per campaign to start working.
So even though it might seem like a good idea to only send conversions back to ad platforms when a person becomes a customer, unless you're getting a high volume of new customers each month, you likely won't have enough conversion data to make it worthwhile.
That's why it's usually better to send the conversion when the form is submitted (which is usually when the lead is first created), as it’s better to send more conversions at an earlier stage than fewer conversions at a later stage in the sales cycle.
Why server-side conversions are the better approach for Google Ads
Regardless of when you decide to send the conversion, here's why the server-side approach is best:
1. Overcomes Ad Blockers
Older tracking methods, like measuring thank you page visits through Google Tag Manager, rely entirely on a script loading in the visitor's browser, but ad blockers and privacy-focused browsers regularly stop that from happening.
In fact, current estimates put ad blocker usage at over 30% of internet users, so it’s a serious number.
Fortunately, server-side tracking skips the browser altogether and sends the conversion straight to Google's servers, so ad blockers and privacy settings can't get in the way, and every lead gets counted.
2. Bypasses Safari & iOS Privacy Limitations
Apple's Intelligent Tracking Prevention (which is present in Safari and iOS) wipes tracking cookies within a day or two of a visit, which means Google Ads struggles to match the conversion back to a real person and the original ad they clicked if it doesn't all happen on the same day.
Again, this isn’t an issue with server-side tracking. By sending the lead's name, email, phone, Google Click ID, etc to Google Ads directly, you give Google's matching algorithms everything they need to tie the conversion back to the original click (no matter how much time passed in between).
3. Works across devices
It's pretty common for a lead to click your ad on one device (like their phone for example), then come back later on a laptop or desktop and actually fill out your form.
Browser tracking can't connect those two visits because they happen on completely separate devices. But because you’re sending the lead's details (name, email, phone, etc) straight to Google with server-side tracking, you’re giving Google what it needs to tie those two sessions back to an individual person, and therefore tie the conversion back to the original ad they clicked.
3 reports you can build once you're sending conversions to Google Ads from Fillout Forms
Over my 15 years of running marketing teams and spending millions on Google Ads, I've built a lot of reports trying to understand what was really generating leads for the business and what wasn’t.
The three reports below are ones I keep coming back to over and over, and they're available to you once you start sending proper server-side conversions to Google Ads.
1. Conversions by Keyword
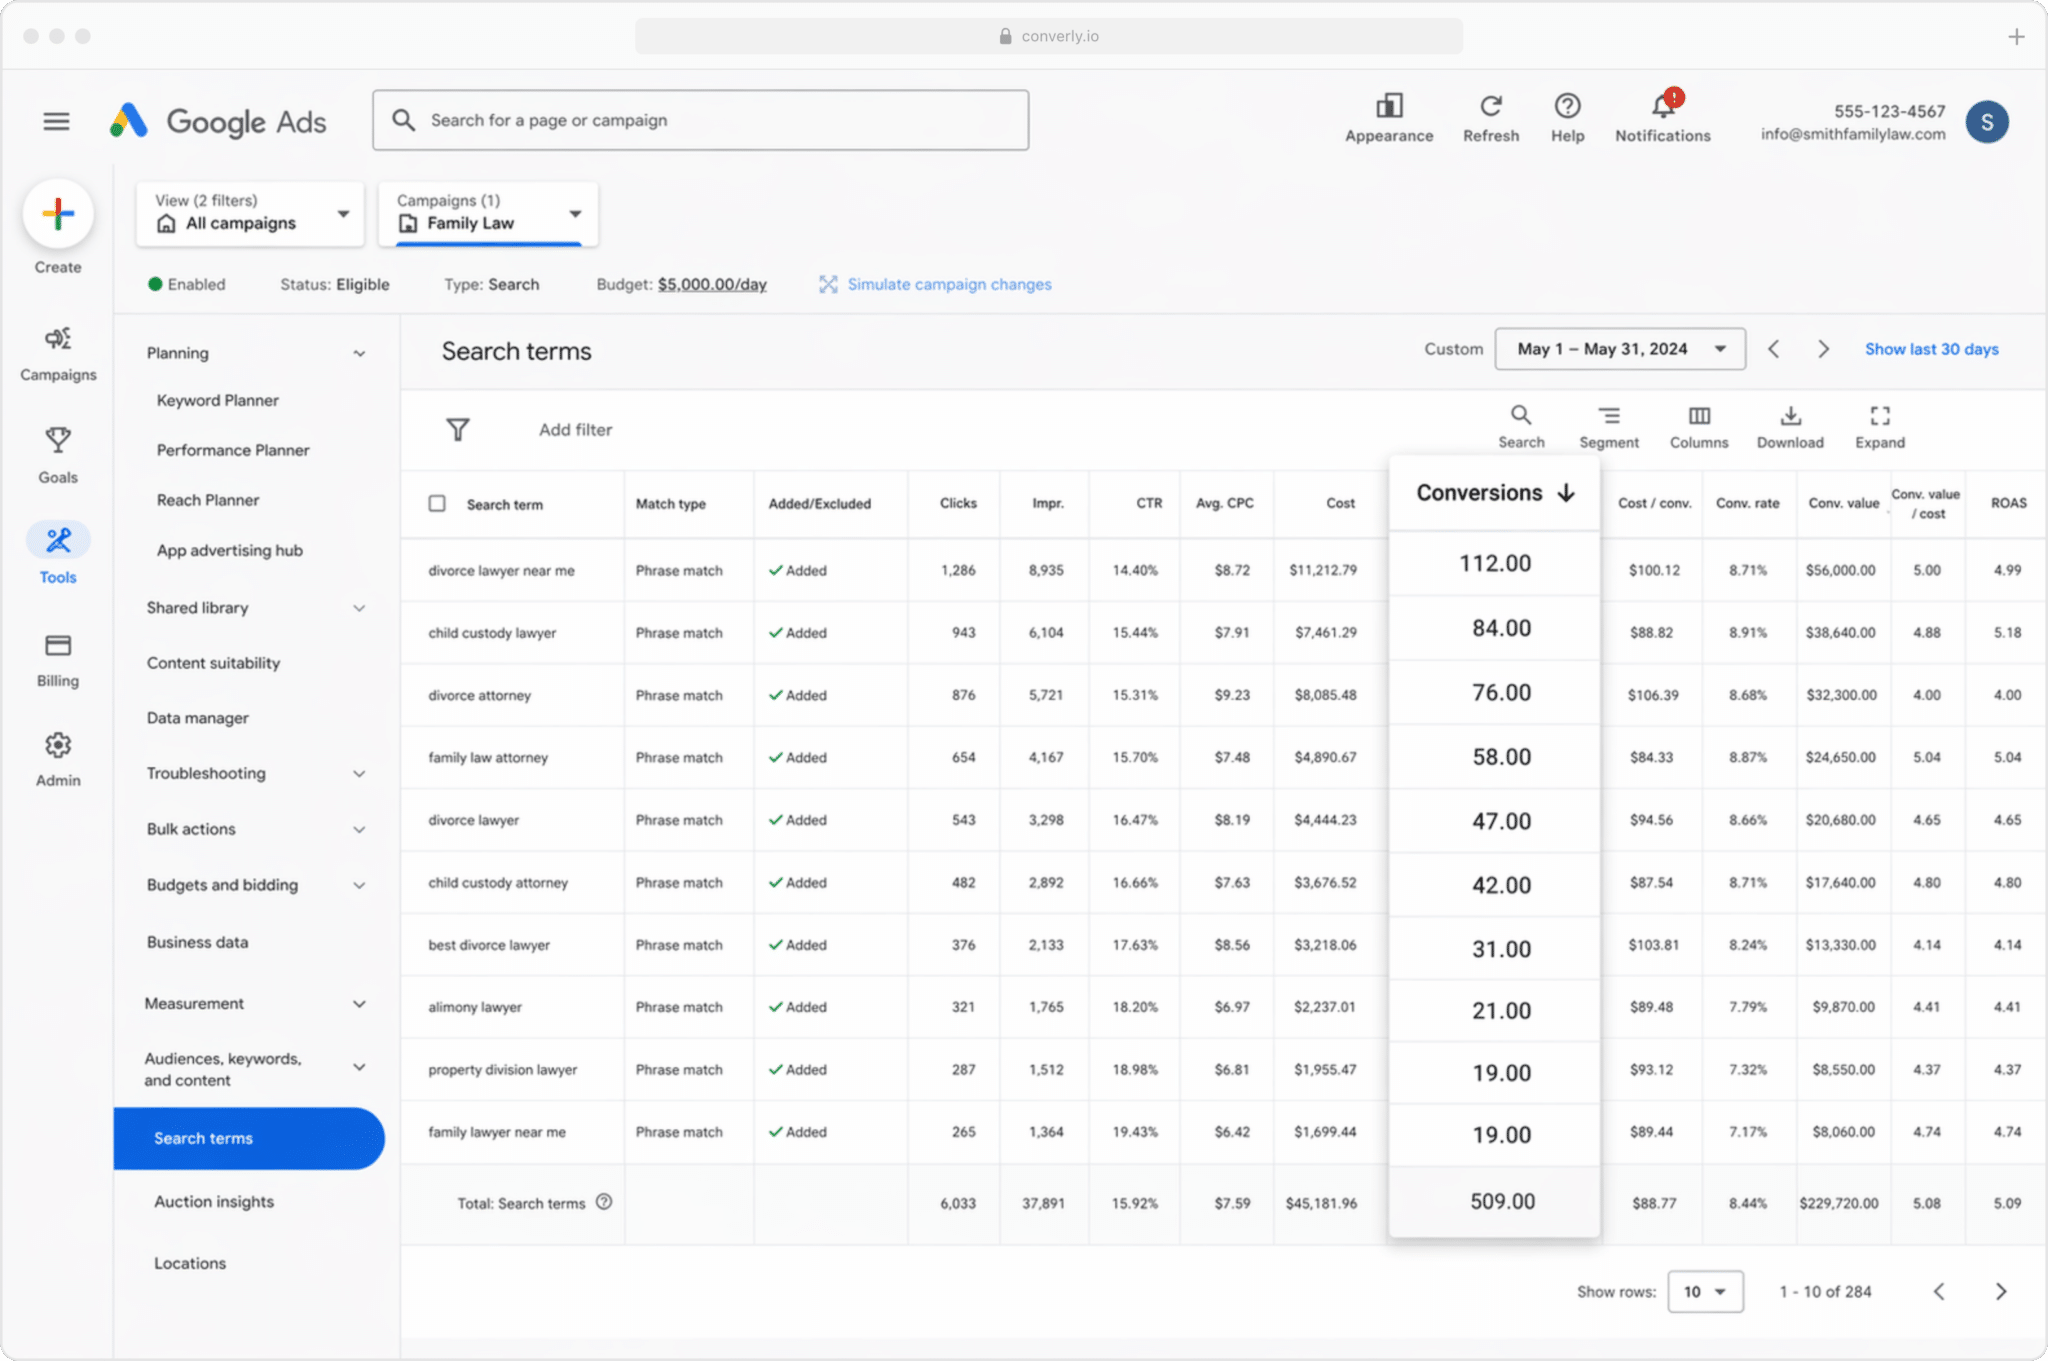
Most businesses spread their budget across several campaigns and dozens of keywords, often split by service line (a recruitment agency might bid on 'executive search firm' in one campaign and 'temp staffing agency' in another).
This report shows you which keywords are turning into real conversions for your business, rather than just generating impressions and clicks that go nowhere.
Running a report like this makes it easy to see which keywords are pulling their weight and which ones aren't, so you know where to put extra budget to actually generate more leads.
2. Conversion Value by Campaign
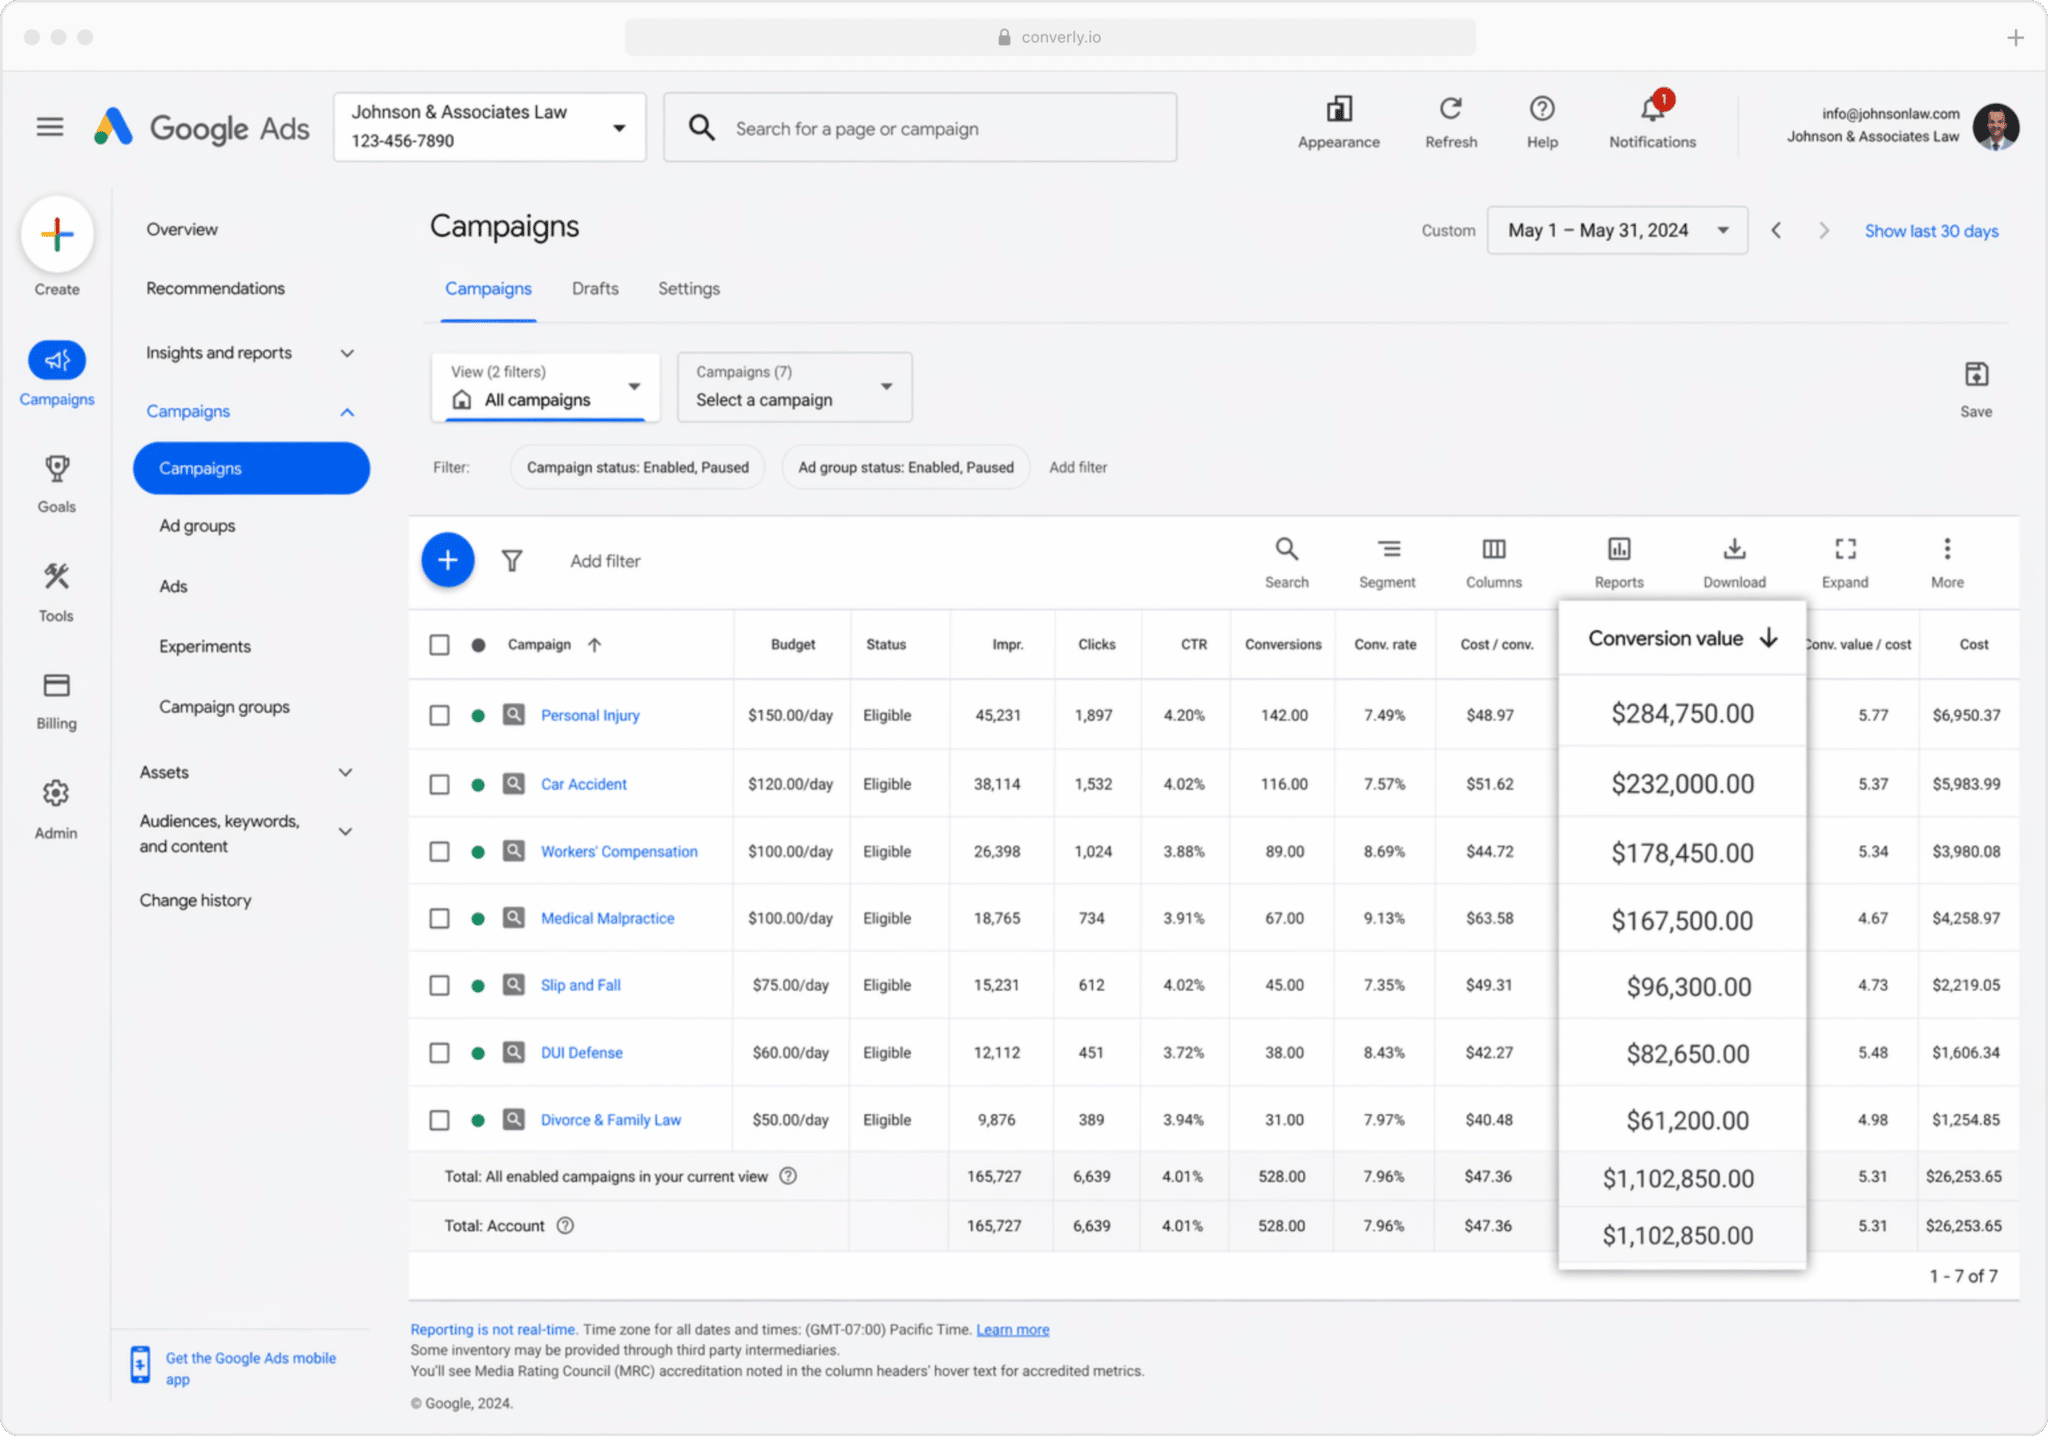
Once conversions are being sent back to Google Ads from your CRM, you can attach a dollar value to each one (typically pulled straight from the deal record for that customer).
This is important because not every lead is worth the same. For a recruitment agency, a placement sourced through their 'temp staffing agency' campaign might be worth a fraction of one that came through the 'executive search firm' campaign.
By sending the conversion value back to Google Ads, you are able to see, for example, that one campaign generated $2,000 in placements while another brought in $20,000. From there, shifting budget to the campaign that's actually paying off is an easy call.
3. Conversions by Geography
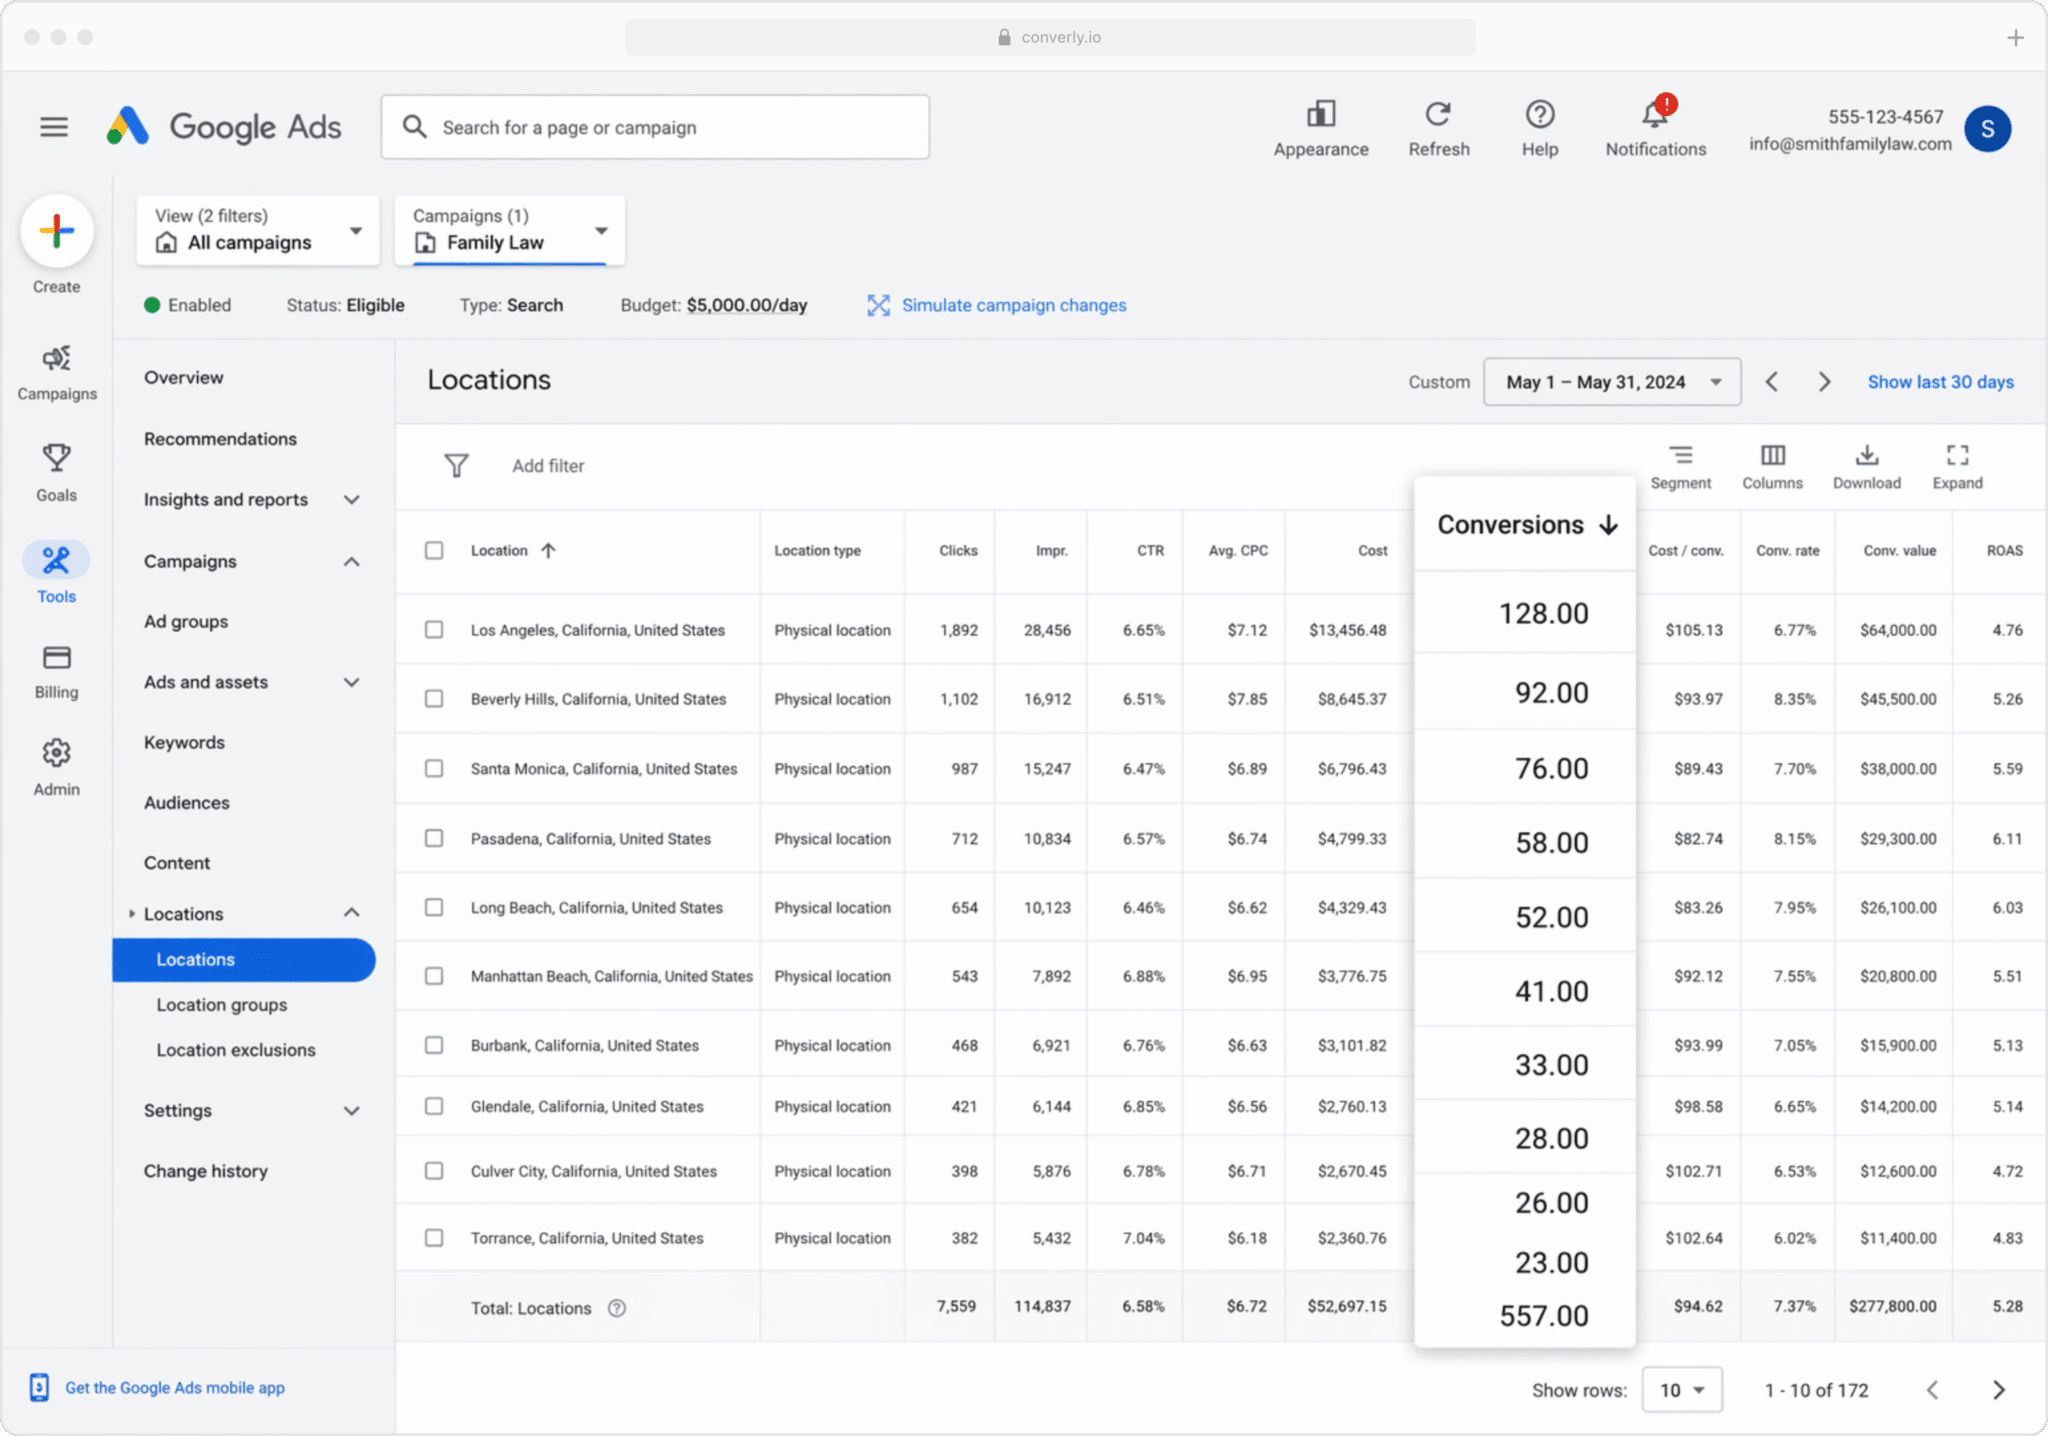
If your business depends on winning clients in specific regions (like boutique law firms, financial advisors, accountants, etc), this report breaks your conversions down by where they came from.
You can zoom out to the country or state level, or drill all the way down to a single postcode. Either way, it tells you whether your leads are coming from the areas you serve, or whether you're spending money getting leads from areas you don’t.
Google Ads' Location Bid Adjustments then let you act directly on that. Push bids up in the postcodes converting well so that your ads display more prominently, and pull back or cut off spend entirely in the ones generating clicks that never turn into leads or customers.
Wrap Up
Solid conversion tracking in Google Ads is critical for getting quality leads at a reasonable cost.
It tells you where you can optimise your campaigns (like which keywords or locations deserve more budget) and it feeds Google's automated bidding the data it needs to actually work.
But none of that holds up if the underlying conversion data is off. Counting thank you page visits or firing events through Google Tag Manager leaves you with shaky numbers, and your results will suffer for it.
So whichever setup you choose, and whenever you decide to fire that conversion (when a form is submitted, once the lead becomes a customer, etc.), sending it server-side is what gets you the best results.
Get Started For Free
Start your 14-day free trial of Attributer today!

About the Author
Aaron Beashel is the founder of Attributer and has over 15 years of experience in marketing & analytics. He is a recognized expert in the subject and has written articles for leading websites such as Hubspot, Zapier, Search Engine Journal, Buffer, Unbounce & more. Learn more about Aaron here.