
Track Fluent Forms submissions as conversions in Google Ads
Track your Fluent Forms submissions the right way and capture up to 23% more conversions in Google Ads.

Use Attributer to capture the GCLID and the other Google Ads identifiers with each of your Fluent Forms submissions, then send them back to Google Ads as a conversion. You can fire it the moment the form is submitted, or hold off until the lead becomes a paying customer in your CRM.
Google Ads is a great way to bring in new leads and customers for your business, but setting up conversion tracking properly is hard.
Tools like Google Tag Manager require you to write custom code to listen for form submissions, then configure triggers, tags, variables, and a whole lot of other complicated stuff on top.
And basic approaches like tracking thank you page visits can result in up to 30% of your conversions being missed, thanks to things like ad blockers, privacy features built into modern browsers (Safari being the worst offender), and people clicking your ad on their phone but converting later from their laptop.
So what are you supposed to do?
In this article, we'll show you how to set up proper conversion tracking in Google Ads when someone submits a Fluent Forms form on your website. The approach is known as server side tracking.
Why server side tracking in Google Ads matters
Common approaches to tracking conversions in Google Ads, such as tracking thank you page visits or firing events through Google Tag Manager, have some serious flaws. In fact, studies show that these methods can result in missing up to 30% of your actual conversions.
This happens for a number of reasons:
- Ad blockers: Ad blockers prevent the Google Tag from firing on your website, which means it can't track anything users do once they're on your site.
- Privacy features in browsers: Web browsers like Safari have built in technologies that block the Google Tag from tracking visitors for more than a day or two. So if a person clicks your ad and then converts 3 days later, it won't be tracked.
- Using multiple devices: People might click your ad on their work computer but later convert on their home computer (or on their mobile device), which means their original ad click can't be tied to their later conversion.
This is why you need to be doing server side tracking. Instead of relying on things to happen in the browser (like the user visiting a thank you page) and hoping the Google Tag can track it, you send the conversion data directly to Google's servers, which ensures the information isn't blocked by ad blockers or privacy settings.
This has been proven to work significantly better. In fact, Google's own data shows that using server side tracking typically results in a 23% average increase in total recorded conversions and a 10% reduction in cost per conversion (because Google's algorithms have more accurate conversion data to learn from and can better serve your ads).
How to track Fluent Forms submissions in Google Ads using server side conversion tracking
There are two ways to do this, and the choice between them comes down to timing: should the conversion fire on form submission, or later in the sales cycle when the lead actually becomes a customer?
Option 1: When a lead submits the form
If you want the conversion to fire the moment a lead hits Submit, the easiest path is a tool like Converly. It's purpose built for sending server side conversions to Google Ads every time someone submits a Fluent Forms form on your site.

You pick a trigger (a Fluent Forms submission on your site, in this case) and pick the action you want to follow it (a conversion sent to Google Ads).
From there, Converly automatically detects when a form is submitted, pulls out the user's name, email, phone number, and so on, secures it with SHA 256, and sends it through to Google Ads. It also captures a heap of additional context about the user and their visit (GCLID, GBRAID, WBRAID, User Agent, and more) and bundles all of that in with the conversion. The more context Google has, the better its odds of matching the conversion back to the exact campaign, ad, and keyword the lead originally clicked.
What you end up with is all the benefits of server side tracking (a 23% average increase in total recorded conversions, a 10% reduction in cost per conversion) without ever needing to write custom code, learn what SHA 256 actually does, or figure out how to send events to Google's API yourself.
Option 2: When a lead becomes a customer
If you generate leads from your website via Fluent Forms and send them to a CRM like Salesforce, HubSpot, or Pipedrive, then you can also send conversions back to Google Ads later in the sales cycle (when a lead becomes a paying customer, for example).
You can do this by capturing some extra information with each form submission and sending it through to your CRM, then firing a conversion back to Google Ads when the right milestone is hit. Here's how it works:
1. Install Attributer on your website and add a hidden field
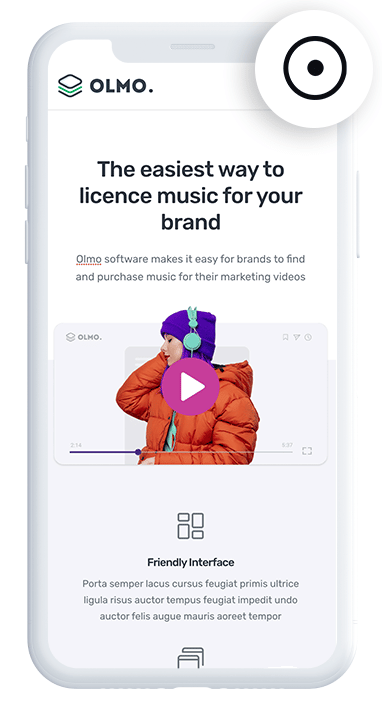
First, sign up for a 14 day free trial of Attributer. You'll get a small snippet of code to drop onto your website (it goes in the head section, the same way you'd install Google Analytics).
Once that's in place, jump into Fluent Forms and add a few hidden fields to the forms you use to capture leads. The four you need are:
- GCLID
- WBRAID
- GBRAID
- User Agent
To add them, open the form in the Fluent Forms editor and drag a Hidden Field onto the form for each one. You'll find Hidden Fields listed under the Advanced Fields section in the field menu on the right. And unlike some other form plugins, Hidden Fields come with the free version of Fluent Forms (no Pro license required). For each field, set the Default Value to the value Attributer expects (the exact names are listed in the Attributer help docs).
2. Attributer writes data into the hidden fields
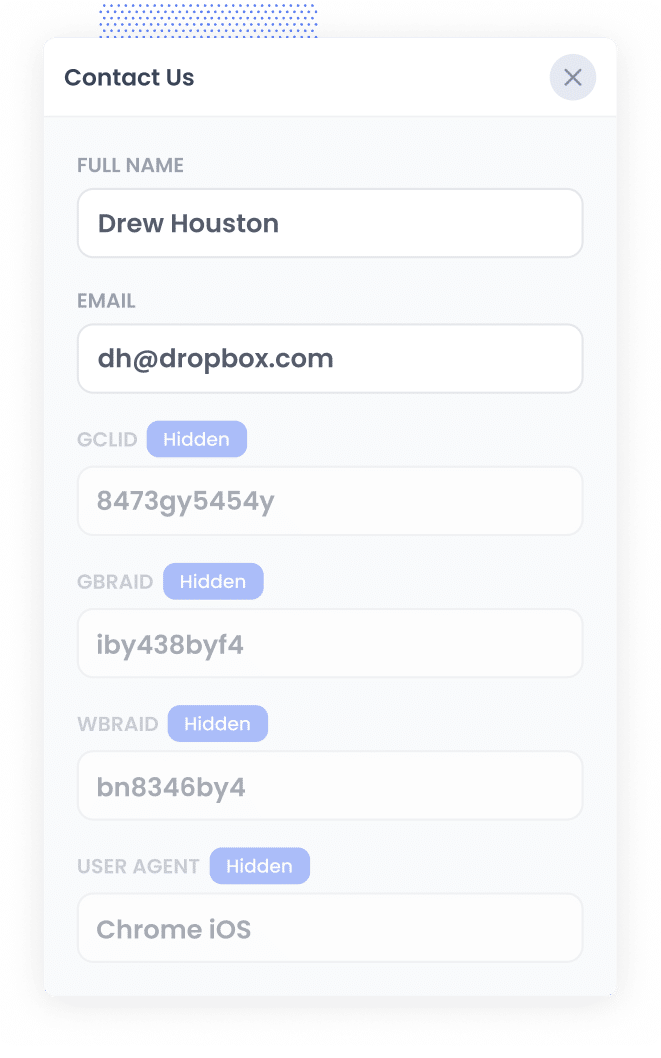
Once Attributer's code is on your site, it'll start watching where every visitor is coming from automatically.
When a visitor lands on your site from one of your Google Ads, Attributer captures all the data Google Ads needs for a server side conversion (GCLID, GBRAID, WBRAID, User Agent, and so on) and stores it in the visitor's browser.
Then when they complete a Fluent Forms form on your website, Attributer writes the data into the hidden fields you added to your form, and it gets captured with the form submission.
3. Data is sent to your CRM
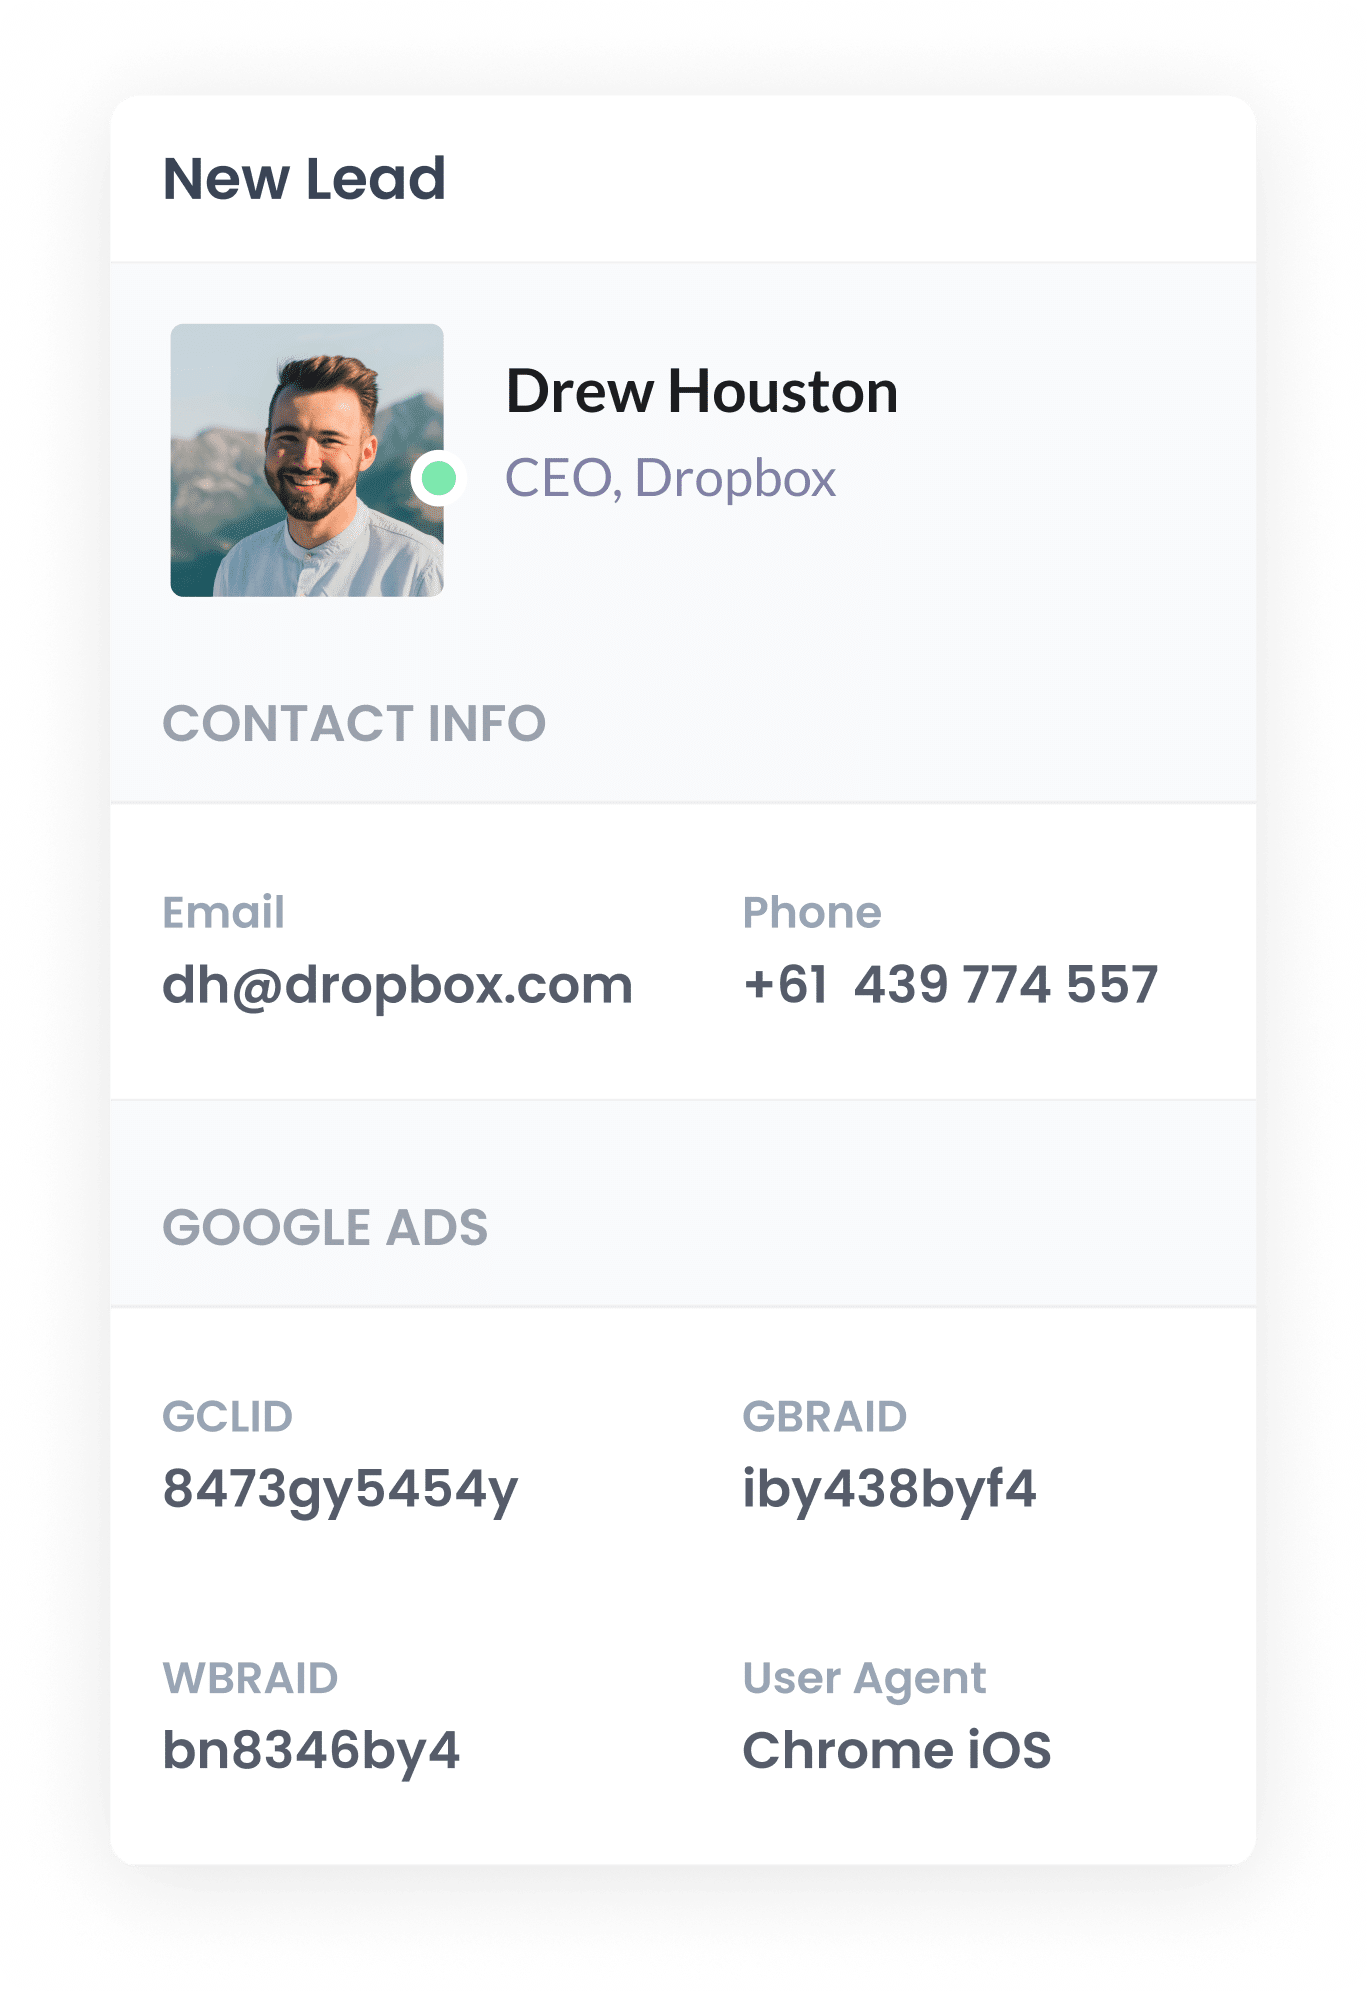
Once the data is captured with the form submission, you can send it through to your CRM alongside the lead's name, email, phone number, and any other information they entered into the form.
Fluent Forms Pro ships with native integrations to most major CRMs (HubSpot, Salesforce, Pipedrive, ActiveCampaign, Zoho, and more), and a Zapier integration as a fallback for everything else.
The data is then stored on the contact/lead record in your CRM, ready to be used when it's time to fire the conversion back to Google Ads.
4. Send the data to Google Ads
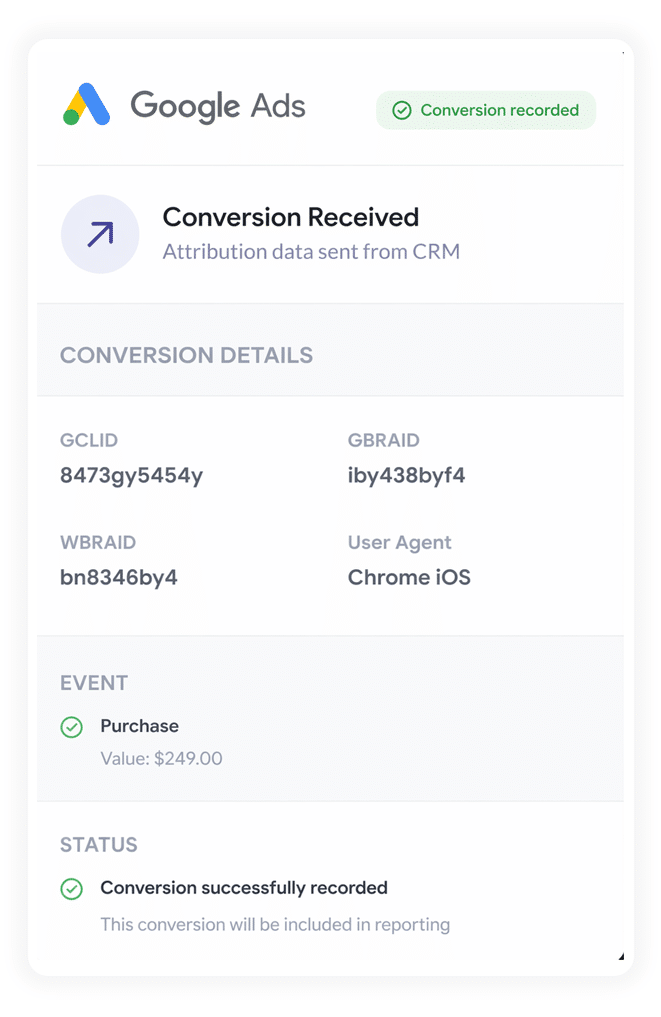
Whenever the lead reaches a meaningful milestone (a new deal getting created, an opportunity being marked closed won, the lead actually paying you, etc), that's when you fire all the captured data back to Google Ads as a conversion.
Zapier and Make are the obvious tools for this part of the flow. Both connect to almost any CRM, and you can configure them to trigger a Google Ads conversion at whichever point in the sales cycle makes the most sense for your business. They also give you a clean visual mapping screen for matching the values Attributer captured (GCLID, GBRAID, WBRAID, User Agent, and the rest) to the right destination fields on the Google Ads side.
Why sending server side conversions to Google Ads is the best approach
At a high level, server side tracking gives you much more accurate results than client side tracking (which is just a fancy way of saying browser tracking).
With client side tracking, the conversion event has to fire inside the visitor's web browser, which is a chaotic environment full of ad blockers, privacy settings, and device switches you don't control. Server side tracking sends the conversion event straight to Google's servers, where none of that interferes.
Here are the 4 main reasons it's the most effective way to track conversions:
1. Overcomes ad blockers
Traditional tracking methods (like firing a Google Tag Manager event or relying on the standard Google Ads conversion pixel) all depend on scripts loading inside the visitor's browser, but Ad blockers regularly stop those scripts from running in the first place.
And the share of users running an ad blocker isn't small. Recent research puts it at over 30% of internet users.
Server side tracking sidesteps this whole issue. The conversion data is sent straight to Google's servers, where ad blockers can't get in the way, and every lead ends up accurately counted.
2. Bypasses Safari & iOS privacy limitations
Apple's Intelligent Tracking Prevention (ITP) clears tracking cookies after a couple of days. So if a lead clicks your ad on Monday but doesn't convert until the following Friday, the link between the click and the conversion has already been wiped.
Server side tracking handles this differently. Instead of relying on a fragile cookie, it uses the lead's email as a stable identifier that ties them back to their original ad click no matter how much time has passed in between.
3. Works across devices
It's pretty common for a lead to first come to your website on one device (like their phone) but wait until they're at a computer to actually fill out a form.
Traditional browser tracking can't connect these two sessions because they happen on different devices, but sending identity data (name, email, and so on) directly to Google allows it to "stitch" these different visits together and give your ads the credit they deserve for starting the journey.
4. Eliminates duplicate and messy data
On top of all the above, browser based tracking is prone to other errors like double counting from page refreshes, missing data due to slow load times, or lost events when the visitor's connection drops mid load.
Tracking from the server is much more precise because it triggers a conversion when a form is successfully submitted (not when a thank you page happens to load), so the conversion counts you see in Google Ads end up matching your real lead numbers in your CRM much more closely.
3 reports you can run when you properly send conversions to Google Ads from Fluent Forms
Across 15 years of running marketing for various businesses, I've spent millions of dollars in Google Ads and built hundreds of reports trying to figure out which campaigns were actually pulling their weight.
Out of all of them, here are the 3 reports I've found most consistently useful:
1. Conversions by Keyword
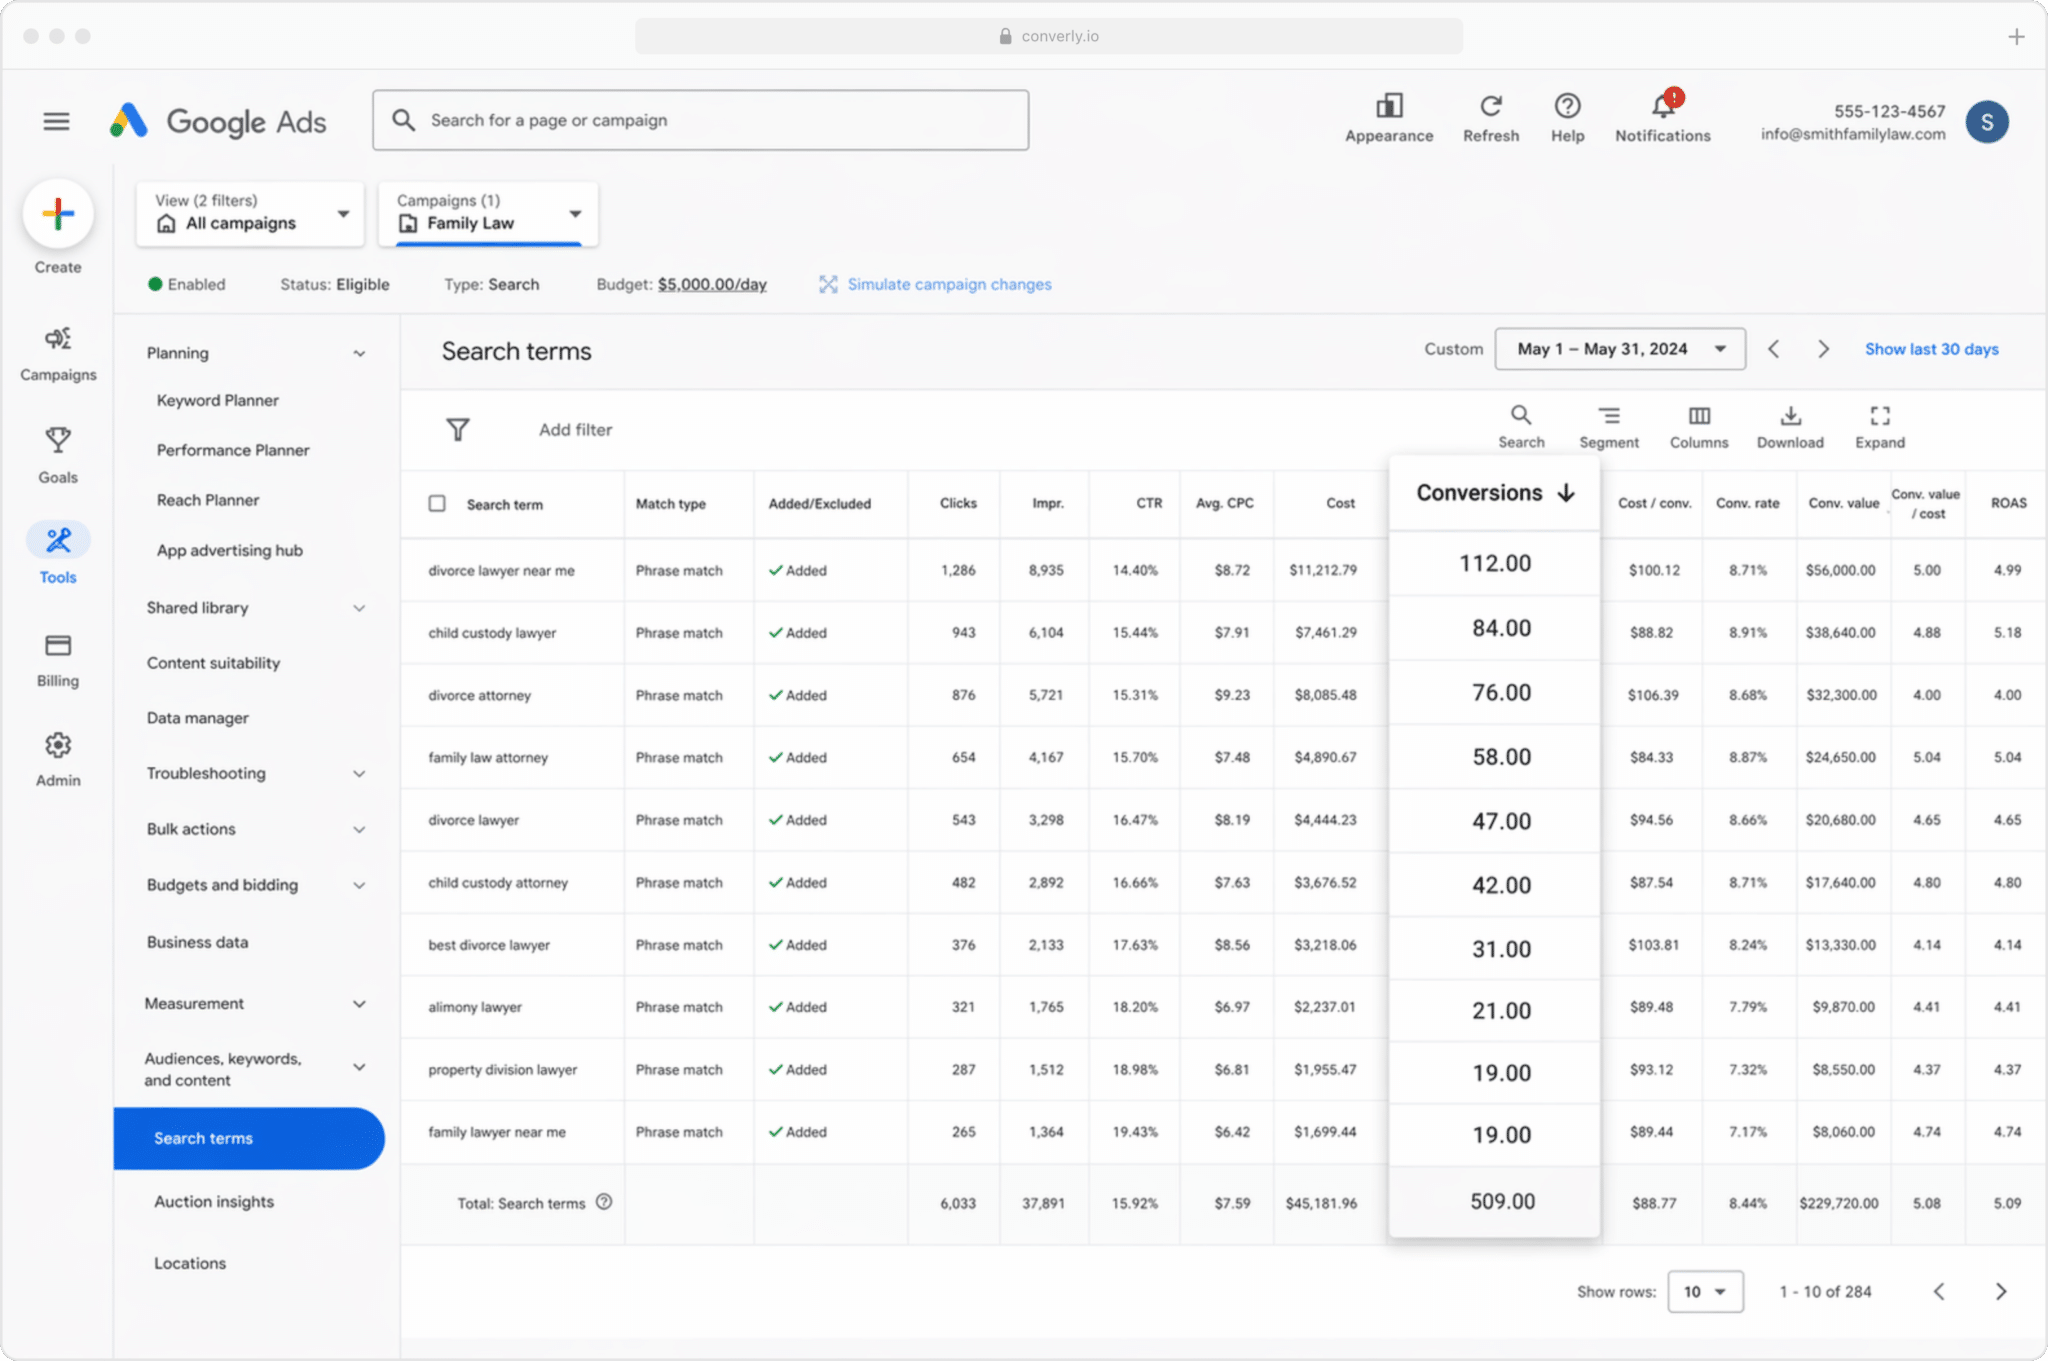
Like most businesses running Google Ads, you're probably bidding on a handful of keywords across multiple campaigns (often mapped to the different services you offer, like a tax preparation campaign and a separate CFO advisory campaign if you were an accounting firm).
This report shows which of those keywords are actually generating conversions for your business, rather than just impressions and clicks that never turn into real leads.
It's the fastest way to figure out which keywords are profitable and which ones aren't, so you know where to put more budget for the best return.
2. Conversion Value by Campaign
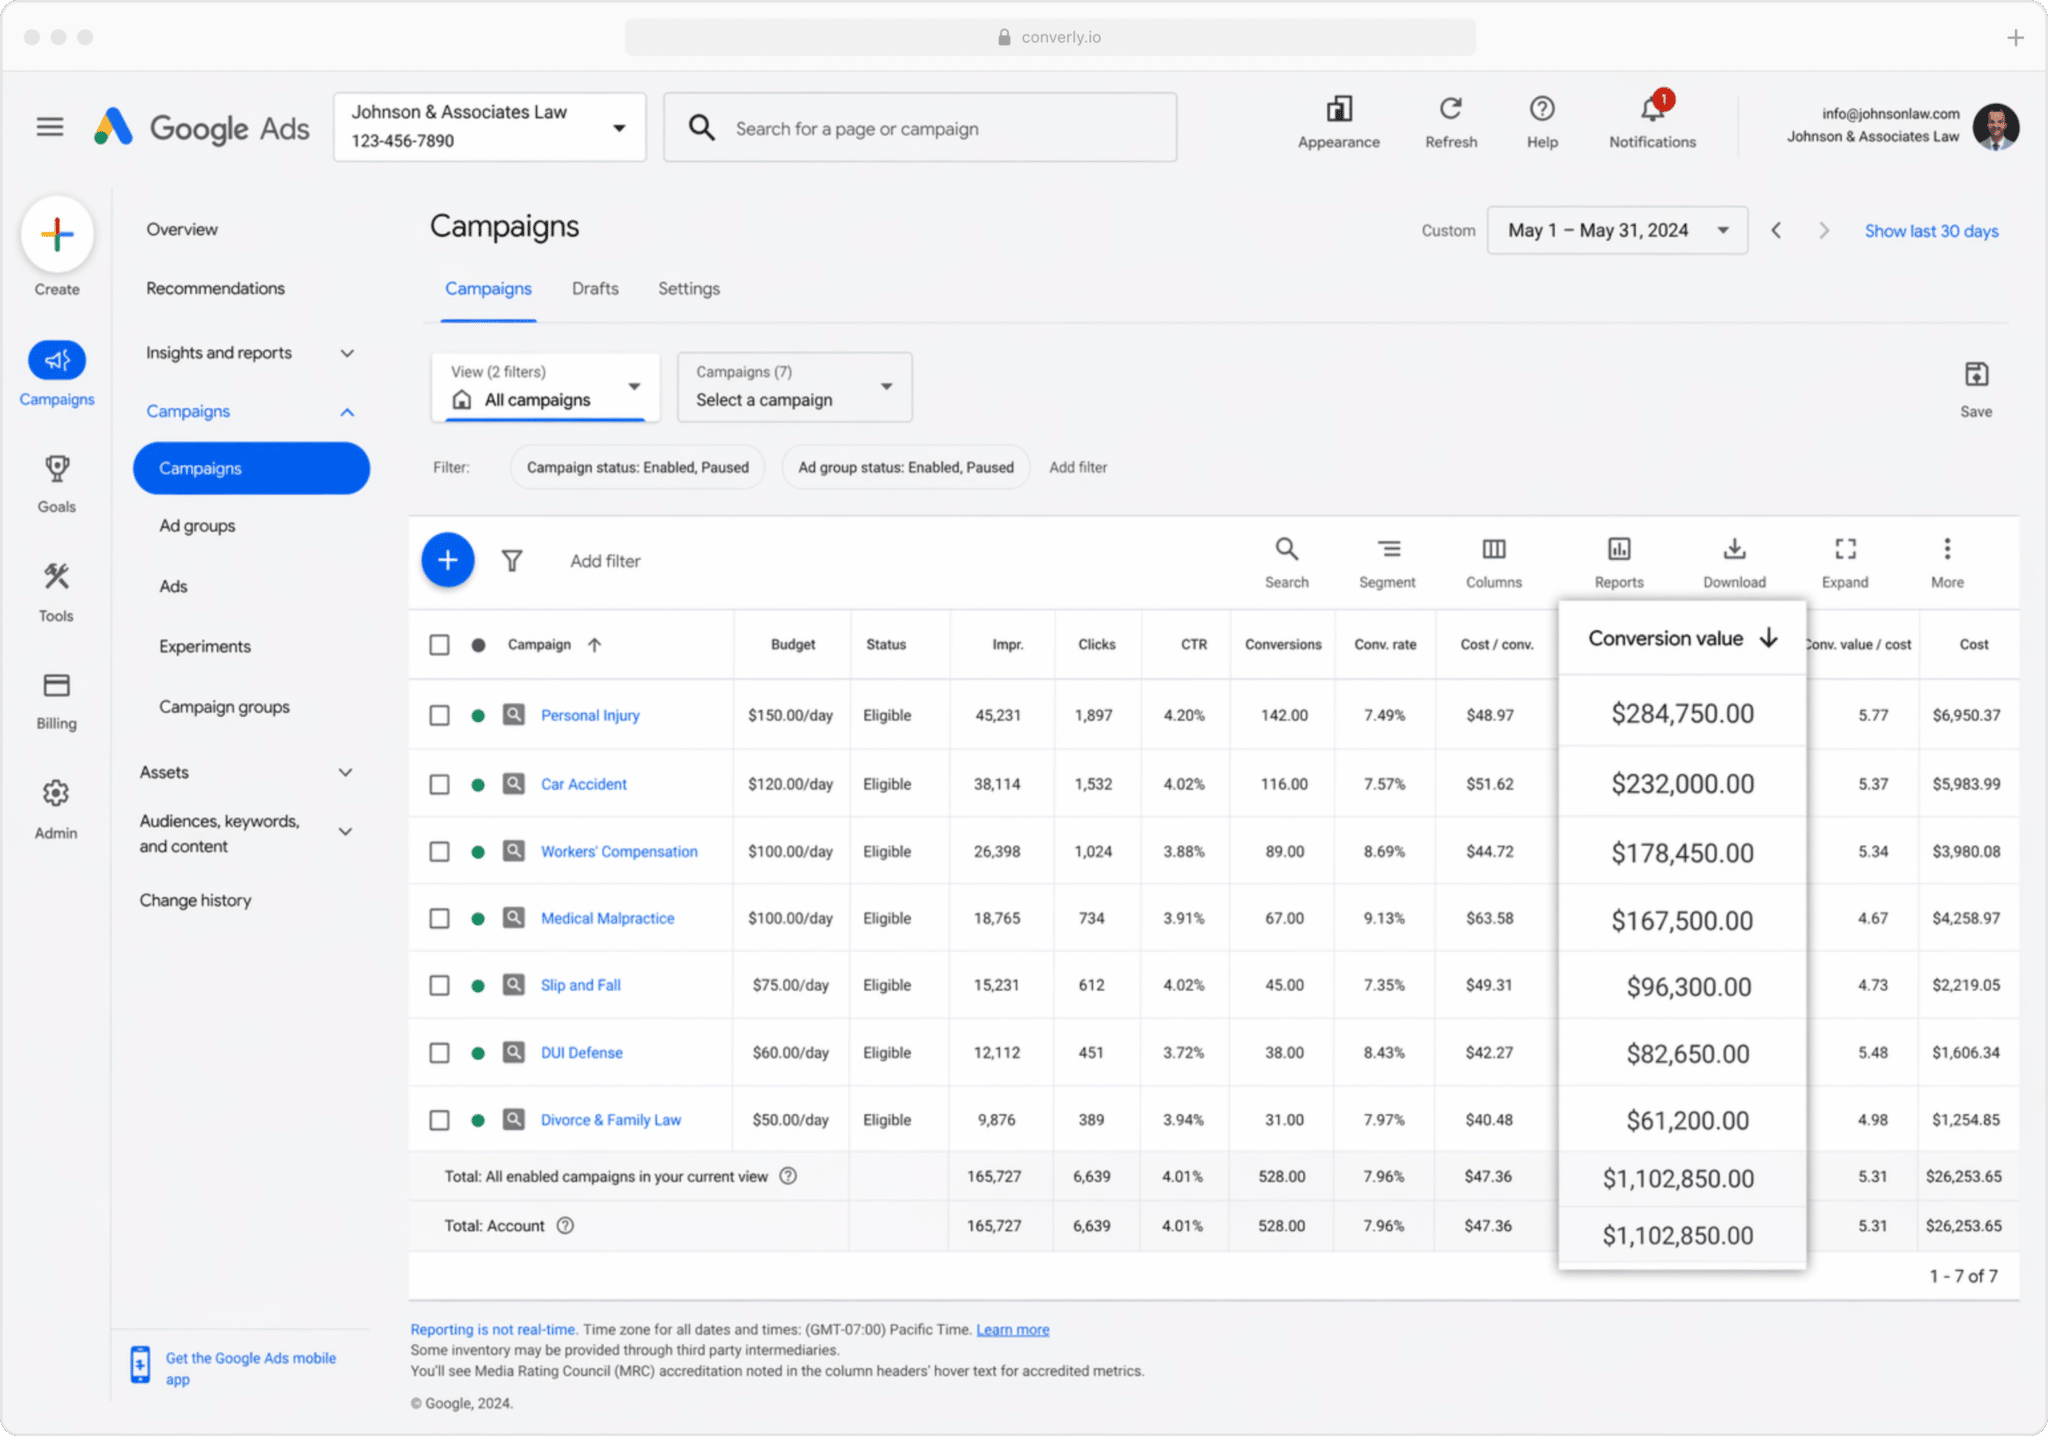
When conversions are flowing back from your CRM, you can also pass through the value of each one (typically pulled from the deal or opportunity value attached to the lead in your CRM).
This matters because customers aren't all worth the same. For an accounting firm, a new client from a 'tax filing' campaign is usually a tiny fraction as profitable as a client from a 'CFO advisory' campaign, so treating the two as equivalent paints a misleading picture.
Once that value is flowing through to Google Ads, you can run reports showing actual revenue generated by each campaign. The question of where to put your next dollar starts to get a lot clearer.
3. Conversions by Geography
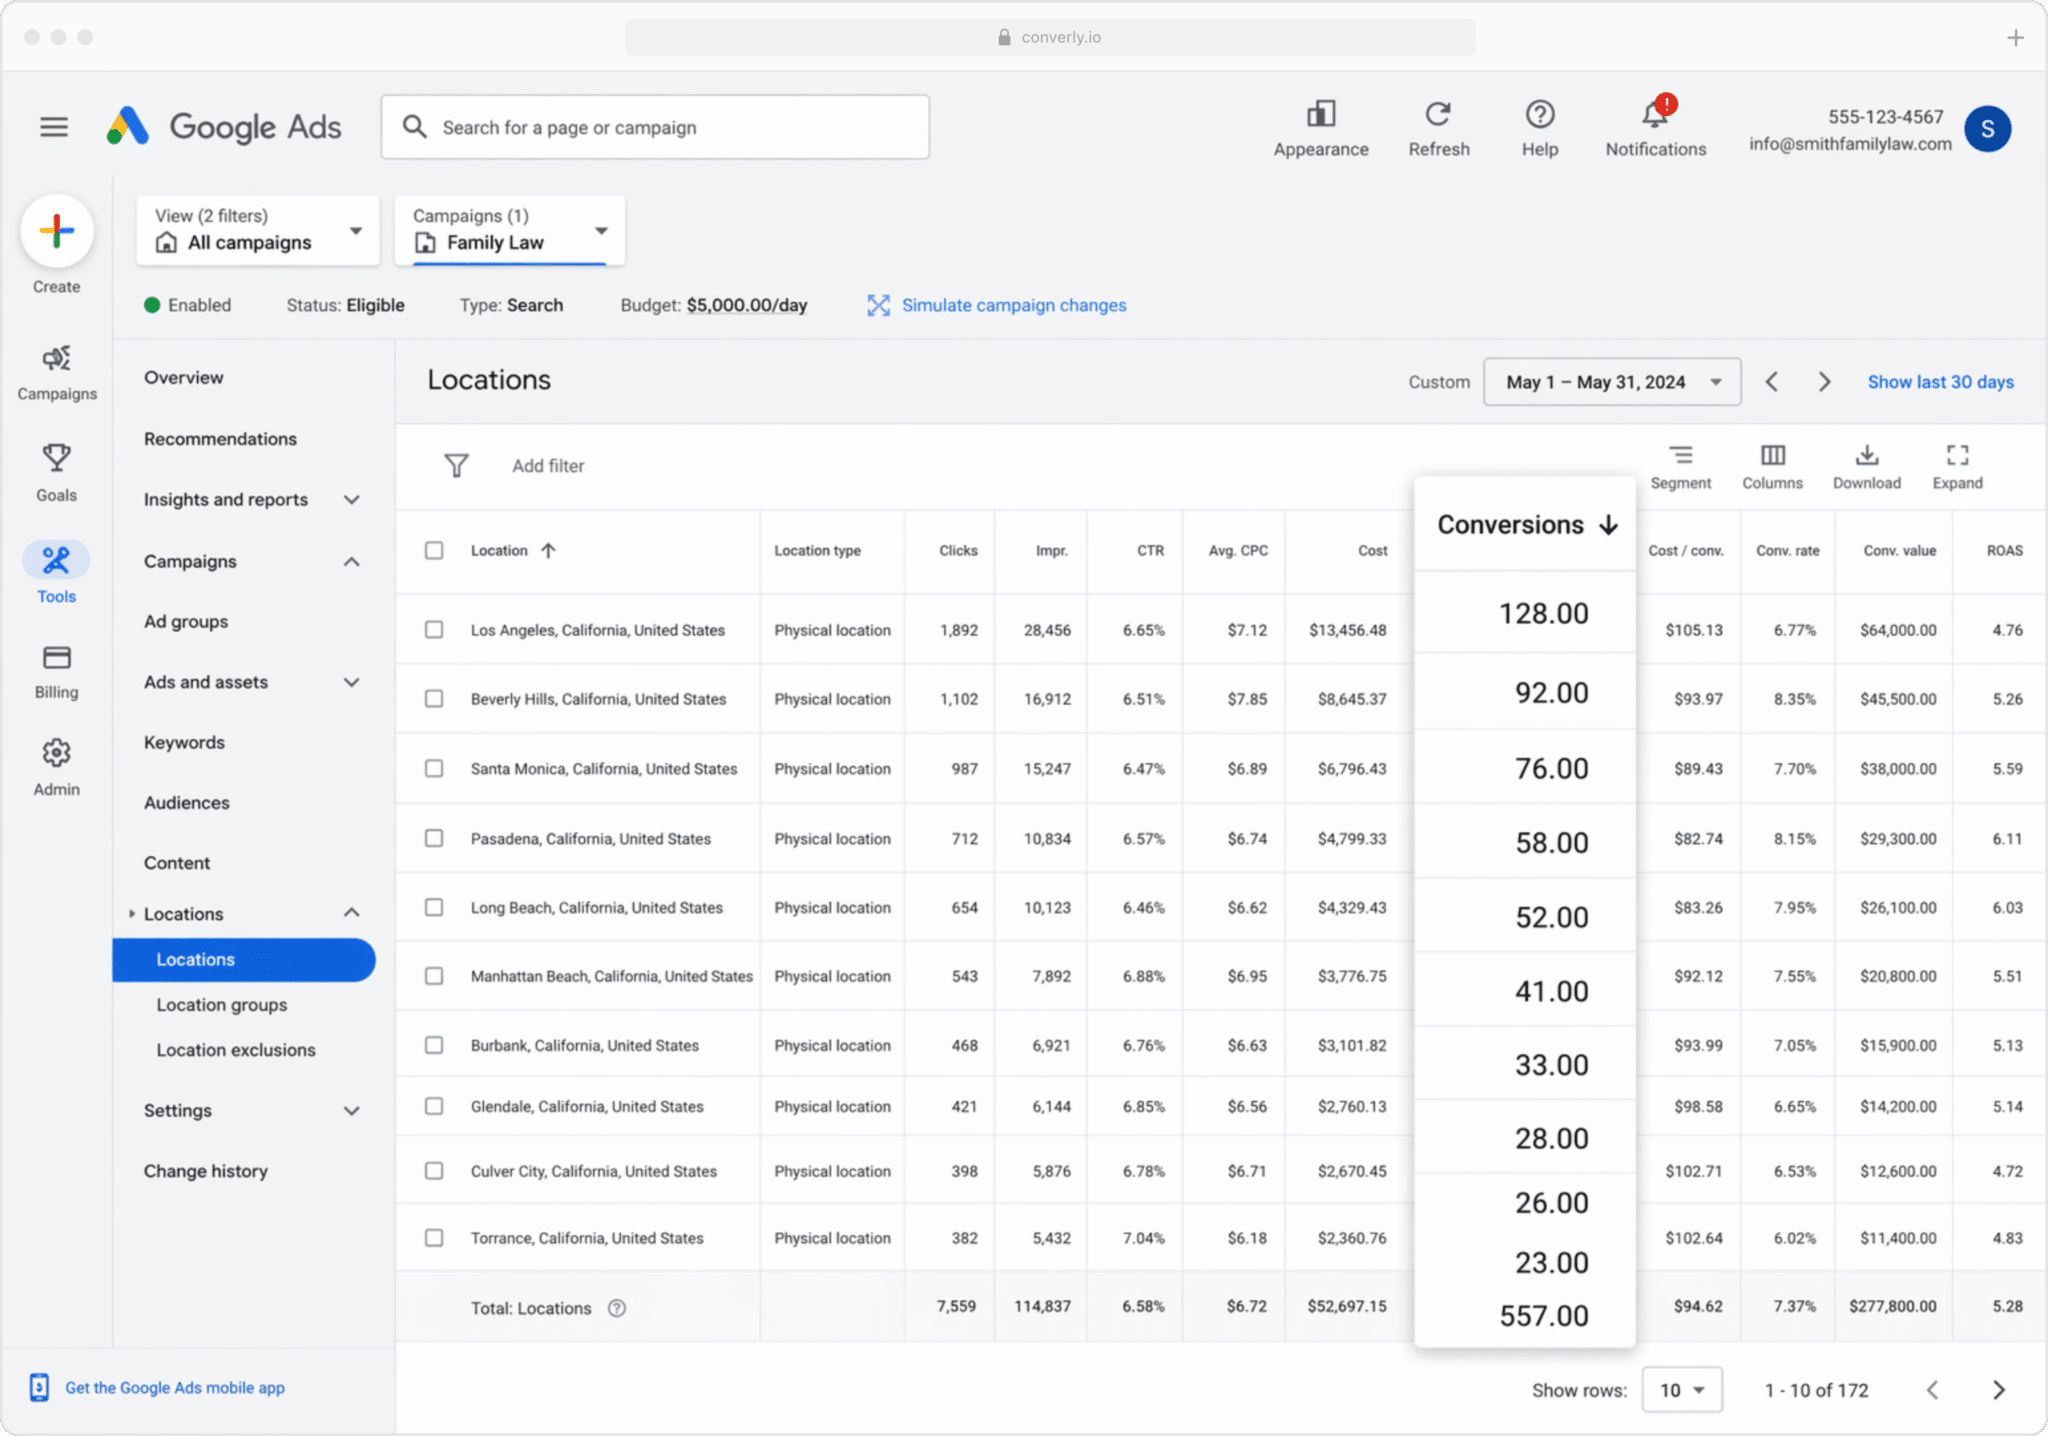
This one is particularly useful for businesses that earn most of their revenue locally (HVAC contractors, fencing companies, residential movers, dental practices, and so on). It breaks your conversions down by geographical region.
You can view the numbers at a high level (country, state, or city) or drill all the way down to a specific postcode. That tells you whether your leads are clustered inside your target service areas, or whether you're paying for clicks from suburbs too far out for you to profitably serve.
From there, Google's Location Bid Adjustments give you a way to act on it. Tell Google to bid more aggressively in the postcodes that consistently produce paying customers, and pull bids back (or cut them entirely) in the areas that generate clicks but never produce filled out forms.
Wrap up
Sending server side conversions to Google Ads can really improve the results you get. It gives you the data you need to make manual adjustments (like bidding higher on certain keywords or geographical areas), and it gives Google's algorithms the data they need to make smarter automated bidding decisions for you.
But it only works well if you are sending accurate conversion data. If you're doing things like tracking thank you page visits or sending events in the browser through Google Tag Manager, then you're not really sending proper data, and your Google Ads performance will drop as a result.
So whether you fire the conversion the second the form is submitted (using Converly) or wait until the lead becomes a paying customer (using Attributer + your CRM + Zapier), make sure you're sending conversions server side to get the best results.
Get Started For Free
Start your 14-day free trial of Attributer today!

About the Author
Aaron Beashel is the founder of Attributer and has over 15 years of experience in marketing & analytics. He is a recognized expert in the subject and has written articles for leading websites such as Hubspot, Zapier, Search Engine Journal, Buffer, Unbounce & more. Learn more about Aaron here.