The best way to add UTM parameters to your Facebook Ads
Learn how to use a feature called URL Dynamic Parameters to add UTM parameters to your Facebook Ads
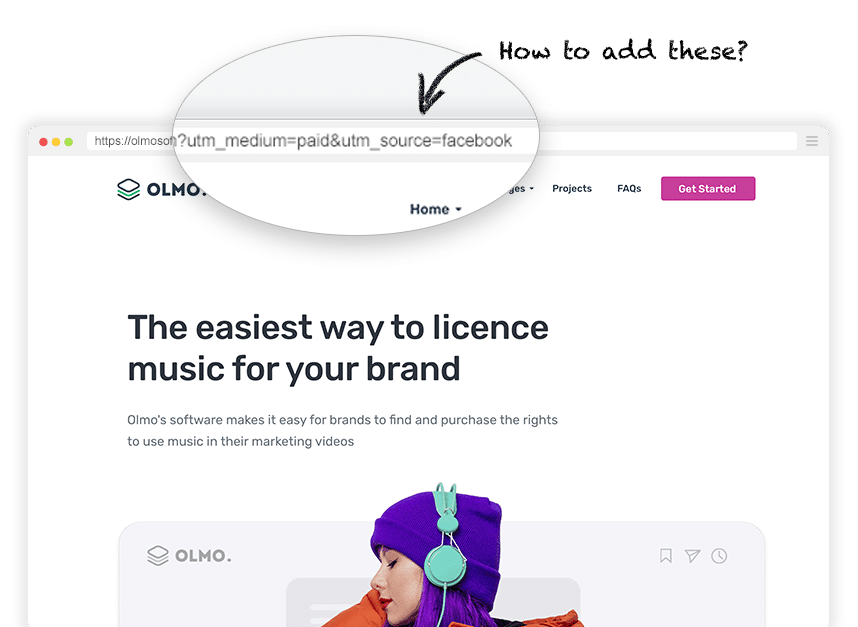
Facebook is the third-most visited website in the world, with over 3 billions active users. It’s a relatively cheap platform to advertise on as well, with a recent study showing the average cost per click is just $0.83.
But if you are doing Facebook Ads, how do you track how many visits, leads & customers you’re getting from them?
The answer is UTM parameters.
In this article, we’ll show you the best way to add UTM parameters to your Facebook Ads as well as how to run a few reports in your analytics tools that show how many website visitors, leads & customers they have generated for you.
The best method for adding UTM parameters to your Facebook Ads
The best way to add UTM parameters to your Facebook Ads is to use a feature called URL Dynamic Parameters.
URL Dynamic Parameters are basically a template you create that tells Facebook Ads how to add UTM parameters to your ads. An example might look a bit like this:
utm_medium=paid&utm_source={{site_source_name}}&utm_campaign={{campaign.name}}&utm_term={{adset.name}}&utm_content={{ad.name}}
If I added this to the Facebook Ads account for Attributer and someone clicked an ad from the agencies campaign I am running, they would get sent to this URL:
https://attributer.io?utm_medium=paid&utm_source=fb&utm_campaign=agencies-campaign&utm_term=crm-adset&utm_content=red-ad
As you can see from the example above, URL Dynamic Parameters are essentially variables that you place in your tracking URL which then get replaced with the real data (I.e. the real campaign name or the real ad set name).
Facebook offers a number of these URL dynamic parameters and the full list can be seen below:
- {{site_source_name}} - This will be replaced with the name of the social network the ad was clicked on. It will either be ‘fb’ for Facebook, ‘ig’ for Instagram, ‘msg’ for Messenger or ‘an’ for the Audience Network.
- {{campaign.name}} - This will be replaced with the name of the Campaign that the ad the user clicked belonged to
- {{adset.name}} - This will be replaced with the name of the Ad Set that the ad the user clicked belonged to
- {{ad.name}} - This will be replaced with the name of the Ad the user clicked
- {{placement}} - This will be replaced with the place where the ad was clicked, like the Desktop Newsfeed, Mobile Newsfeed, Instagram Mobile Feed, etc.
- {{campaign.id}} - This will be replaced with the name of the Campaign that the ad the user clicked belonged to. It will be a long string of numbers and isn’t overly useful.
- {{adset.id}} - This will be replaced with the name of the Ad Set that the ad the user clicked belonged to. It will be a long string of numbers and isn’t overly useful.
- {{ad.id}} - This will be replaced with the name of the ad the user clicked. It will be a long string of numbers and isn’t overly useful.
Ultimately, using URL Dynamic Parameters allows you to define your UTM structure once and then apply it to all campaigns, ad sets, etc. Facebook Ads will then replace the parameters with the information about the ad the user clicked.
Using URL Dynamic Parameters has a number of benefits, including:
- Easier to implement - Defining your UTM parameter structure once and then placing it behind each ad makes it much quicker and easier to add UTM parameters to your ads.
- More consistent data - By defining the UTM structure and then having Facebook automatically fill in the details for each ad, you ensure someone doesn’t accidentally include the wrong information in the wrong parameter (like putting the name of the ad set in the UTM Campaign parameter).
- Easier, more insightful reporting - Ultimately when you have consistent, reliable data coming in to your analytics tools, it much easier to run reports and understand which campaigns, adsets, ads, etc. are generating you the most visitors, leads & customers.
4 simple steps for adding UTM parameters to your Facebook Ads
Now that you understand what URL Dynamic Parameters are, let’s walk through how to set them up in your Facebook Ads account.
1. Define what information you want to include
The first step in building your UTM parameters is to figure out what information you want to capture in your analytics tools.
This largely comes down to your business goals, Facebook Ads campaign structure, etc. but here’s what we generally recommend:
- UTM_Medium=paid
- UTM_Source=[Name of social network]
- UTM_Campaign=[Name of your campaign]
- UTM_Term=[Name of your ad group]
- UTM_Content=[Name of Ad]
2. Build your tracking template
Now that you understand what information you want to include in your UTM parameters, it’s time to build your tracking template.
The best way to do this is to open some sort of text editor (Google Docs, Microsoft Word, etc) and start writing it out.
You can use our own tracking template as a starting point:
utm_medium=paid&utm_source={{site_source_name}}&utm_campaign={{campaign.name}}&utm_term={{adset.name}}&utm_content={{ad.name}}
Simply copy the above, paste it into your text editor, and change any parts of it you need to.
3. Add your tracking URL to your Facebook Ads
To add your tracking template, open up your Facebook Ads account and navigate to one of the ads you are currently running.
Open the ads editor and scroll down to the Tracking section where you will see a field called 'Tracking URL'
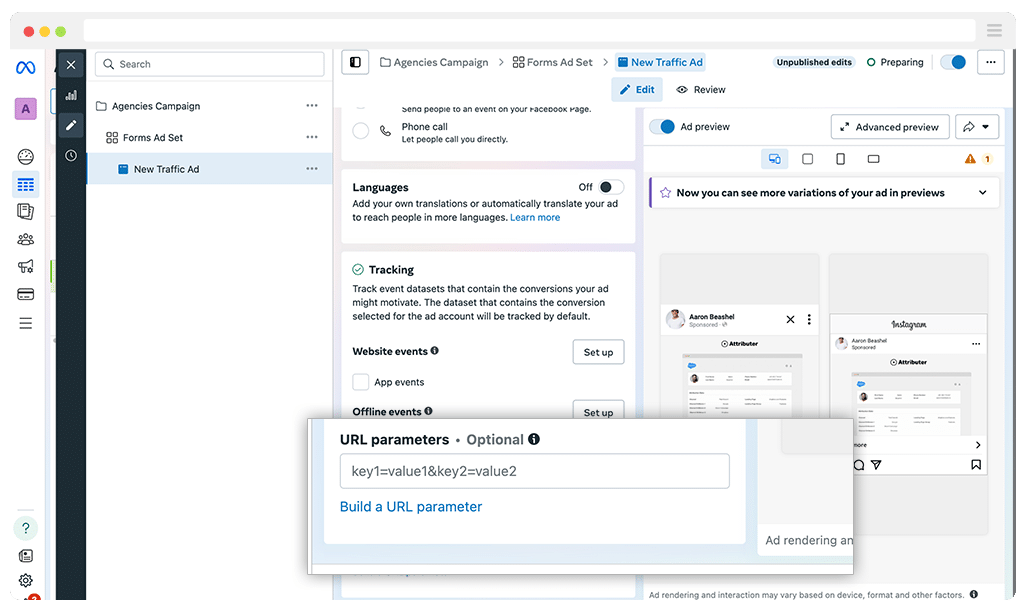
Paste your Tracking URL in there and click Save. It should ultimately look a bit like this:
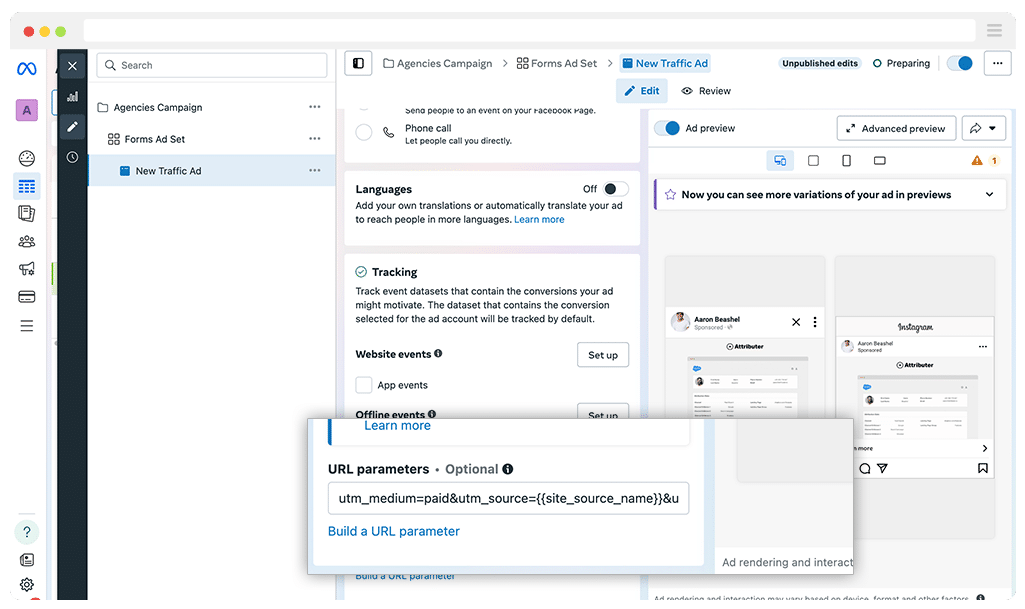
Finally, repeat this same process for all the other ads in your account.
How to test it's working
Now that you have everything set up, the last thing you need to do is test it’s working.
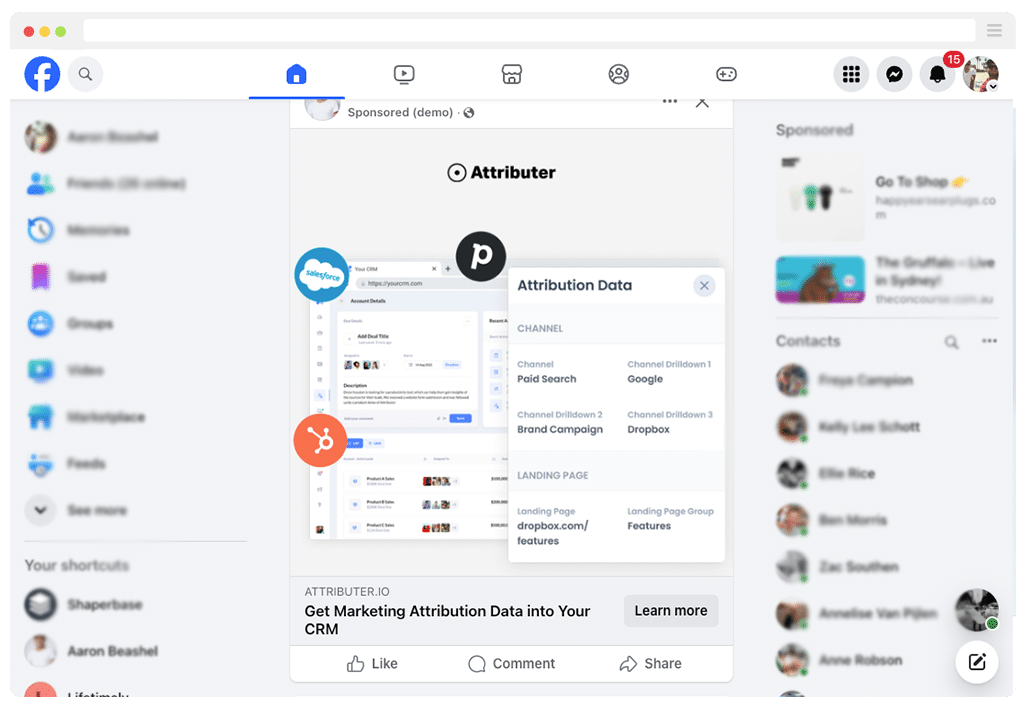
The easiest way I have found to do this is to preview the ad on your Facebook Newsfeed, and then click on it.
To do that, you need to select the ‘View on Facebook Desktop Feed’ option from the Share menu.
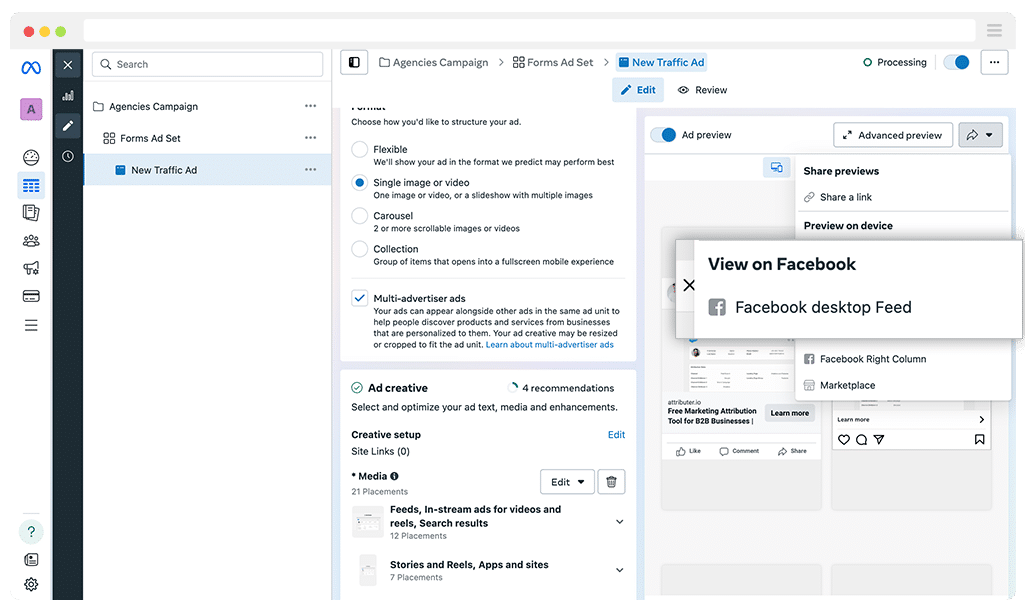
Once clicked, you will be taken to your Facebook Newsfeed and if you scroll down you’ll see your ad.
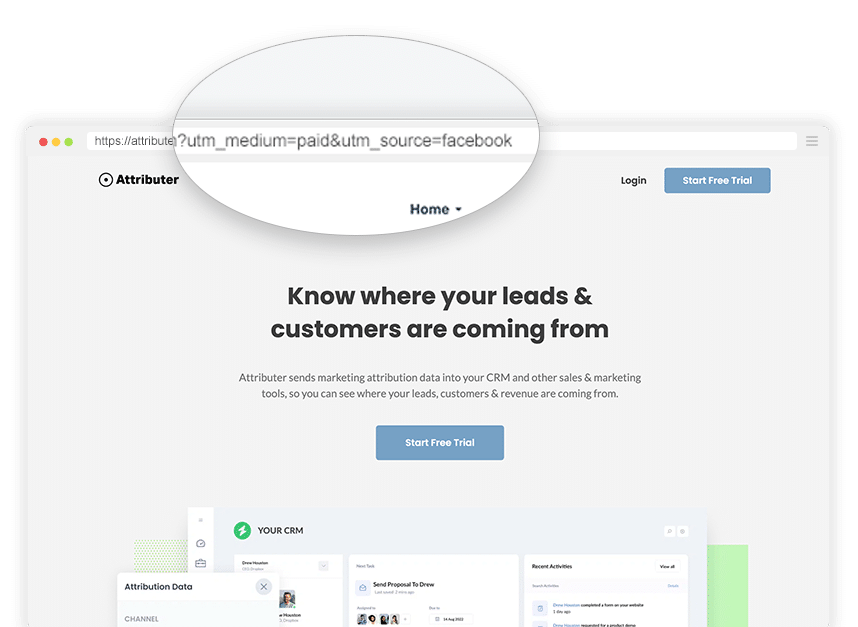
If you click your ad, you’ll be taken to the website URL behind your ad and you should see the UTM parameters in the URL.
How to use these UTM parameters to track how many visitors, leads & customers you get from your Facebook Ads
Now that you've added the UTM parameters to your Facebook Ads, it's time to start reviewing them in your analytics tools to understand how many visitors, leads & customers you've gotten from your ads.
Here's how:
Visitors
You can find out how many website visitors you got from your Facebook Ads by looking in whichever web analytics tool you have installed on your website.
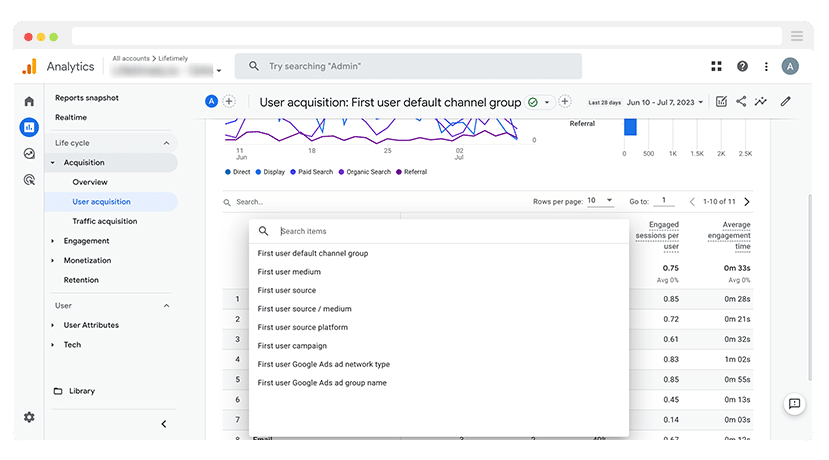
If you are using Google Analytics, you can see this data in the User Acquisition report.
By default, you’ll see your users grouped into high-level Channels (Like Paid Search, Paid Social, etc). Google Analytics uses the UTM parameters you put behind your ads to categorise visitors into these different channels.
If you want to go deeper, you can do so by adding Secondary Dimensions. Simply select the + icon and then choose either First User Medium or First User Source. It looks a bit like this:
Leads
If you’re like most businesses, the majority of your leads come from completing forms on your website.
In this case, the easiest way to track the number of leads you’re getting from your various campaigns is to capture the UTM parameters with each form submission.
That’s where tools like Attributer come in.
When a user lands on your site from one of your Facebook Ads (with UTM parameters), Attributer stores the UTMs in the visitor’s browser. This ensures that they are remembered as the user browses around your website (or if they leave and come back later).
Then, when that visitor completes a form on your website, Attributer automatically writes the UTM parameters into a series of hidden fields you add to your form.

Finally, when the visitor submits the form, the UTM parameters are captured by your form tool along with the information the lead manually entered into the form (like their name, email, phone, etc).
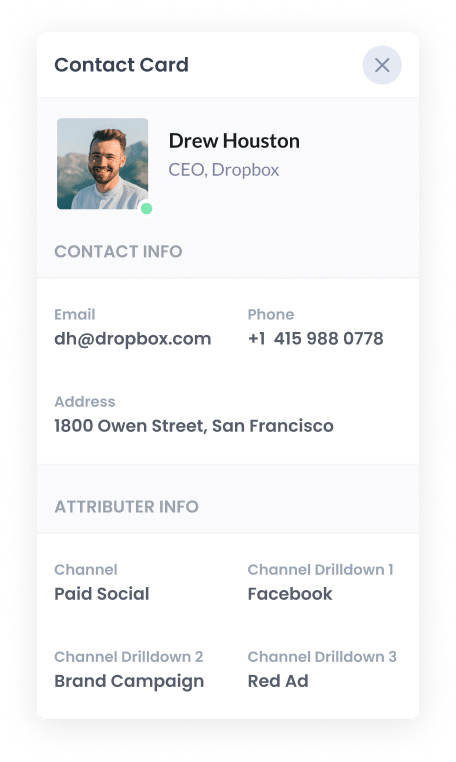
You can then see this information in the submissions table of your form builder, include it in the new lead notification emails that your form tool sends, or send it over to your CRM or other sales & marketing tools to run reports.
Customers
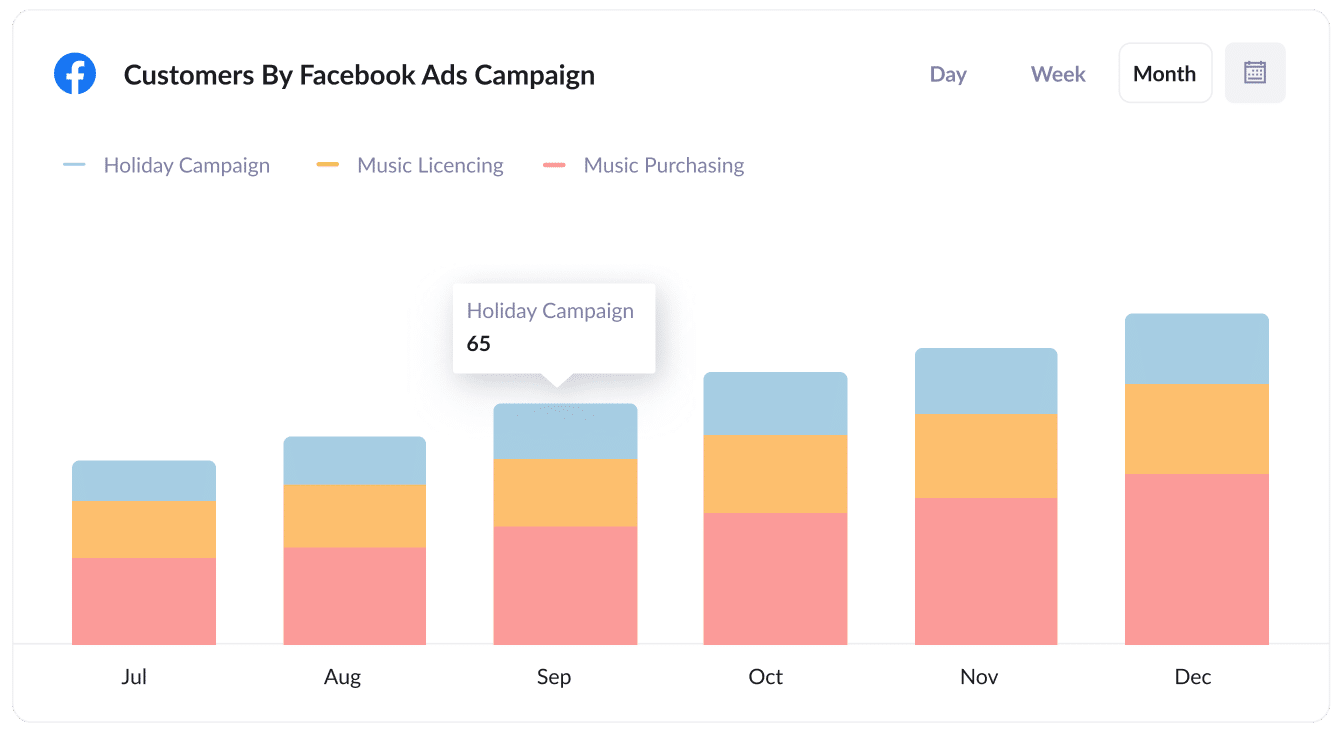
If you’re using a tool like Attributer to capture the UTM parameters with each form submission, and you’re sending it to a CRM (or something similar where you track which leads became customers, how much revenue the deal was worth, etc), then you can easily run reports that show how many new customers you’ve gotten from your Facebook Ads.
Wrap Up
If you're running Facebook Ads to promote your business, and need to add UTM parameters behind your ads, then using URL Dynamic Parameters is the best way to do it.
It's much quicker and easier to set up, and helps ensure you have accurate, consistent data coming in to your analytics tools.
So go ahead and implement this in your Facebook Ads account today!
Need to capture UTM parameters in your CRM?
Start your 14-day free trial of Attributer today!

About the Author
Aaron Beashel is the founder of Attributer and has over 15 years of experience in marketing & analytics. He is a recognized expert in the subject and has written articles for leading websites such as Hubspot, Zapier, Search Engine Journal, Buffer, Unbounce & more. Learn more about Aaron here.
