The best way to add UTM parameters to your Google Ads
Learn how to use Tracking Templates to add UTM parameters to all your Google Ads in one go

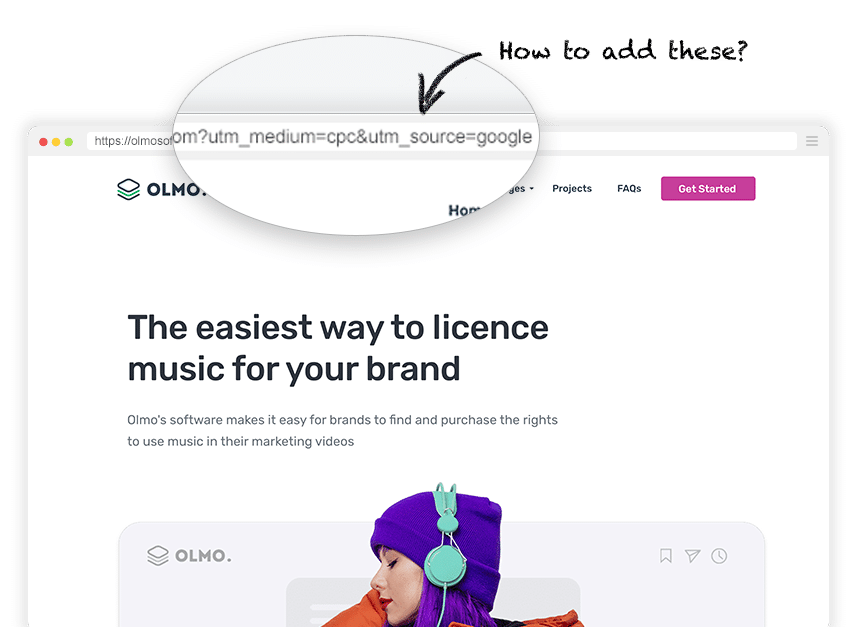
Are you trying to figure out how to add UTM parameters to your Google Ads?
It’s hard because there are so many different ways to do it. The simplest way is just to append them to the end of the URL you put behind your ads, but that can be time-consuming and error-prone (particularly if you have a bunch of different campaigns & ads)
Fortunately though, there is a solution.
In this article, we’ll show you how to use a feature called Tracking Templates to add UTM parameters behind each of your Google Ads in one go.
The best method for adding UTM parameters to your Google Ads
The best way to add UTM parameters to your Google Ads is to use Tracking Templates.
A Tracking Template is basically a template you create that tells Google Ads how to add UTM parameters to your ads. An example Tracking Template might look a bit like this:
{lpurl}?utm_medium=cpc&utm_source=google&utm_campaign={_campaign}&utm_term={keyword}
If I added this to the Google Ads account for Attributer and someone clicked an ad from the brand campaign I am running, they would get sent to this URL:
https://attributer.io?utm_medium=cpc&utm_source=google&utm_campaign=brand-campaign&utm_term=attributer
As you can see from the example above, the tracking template essentially defines what UTM parameters get added to the URL when someone clicks the ad.
You may have also noticed that there is some strange text in the curly brackets in the tracking template. Let’s look at what each of these are:
- {lpurl} = This stands for landing page URL. You would almost always put this at the beginning of your tracking template as it tells Google Ads to send people to the URL you place behind each of your ads (I.e. https://attributer.io).
- {_campaign} - This is a Custom Parameter. You can place Custom Parameters in the tracking template and they are then swapped out for whatever value you specify. In the above example, if I was setting this tracking template at the account level I could then use the {_campaign} custom parameter to define the name of each campaign. Custom Parameters will always start with an underscore.
- {keyword} - This is a ValueTrack parameter. They are similar to Custom Parameters in that they get swapped out for other information, but instead of you defining the value Google Ads does. So by using the {keyword} parameter in my tracking template, it would automatically get swapped out for whatever keyword the user searched for before clicking my ad. ValueTrack parameters do not have the underscore at the start.
Google Ads allows you to add Tracking Templates at the Account, Campaign or Ad Group level. We generally recommend adding them at the Account level as it saves you from having to add UTM parameters behind each of your ads, ensures you never forget to add them and helps keep the data structured and consistent (which ultimately makes for more accurate reporting in your analytics tools).
4 simple steps for adding UTM parameters to your Google Ads
1. Define what information you want to include
The first step in building your Tracking Template is to figure out what information you want to include in your UTM parameters.
It’s obviously completely up to you, but we’d generally recommend the following structure:
- UTM_Medium=ppc
- UTM_Source=google
- UTM_Campaign=[Name of your campaign]
- UTM_Term=[Name of your ad group]
- UTM_Content=[The keyword the user searched for]
It may be helpful to check out this list of the different ValueTrack parameters that Google Ads provides. You can capture information like what type of device the user is on (mobile, tablet, desktop) or what the match type was (exact match, phrase match, broad match), but the ValueTrack parameter I really find useful is the keyword.
2. Build your tracking template
Now that you understand what information you want to include in your UTM parameters, it’s time to build your tracking template.
The best way to do this is to open some sort of text editor (Google Docs, Microsoft Word, etc) and start writing it out.
You can use our own tracking template as a starting point:
{lpurl}?utm_medium=cpc&utm_source=google&utm_campaign={_campaign}&utm_term={keyword}
Simply copy the above, paste it into your text editor, and change any parts of it you need to.
One thing to note here is that if you want to capture the name of your campaign or ad group, then you’ll need to use Custom Parameters to define them. For whatever reason, Google Ads doesn’t offer ValueTrack parameters for campaign name or ad group name. There are ones for campaign ID and ad group ID, but these are just long strings of numbers that would be completely meaningless to you.
3. Add your tracking template to Google Ads
To add your tracking template, open up your Google Ads account.
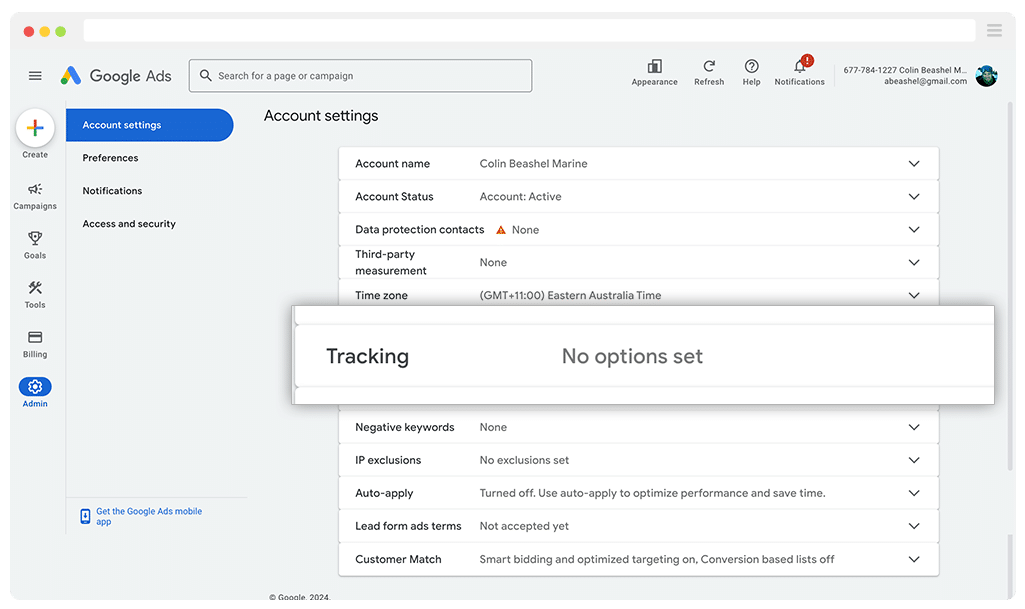
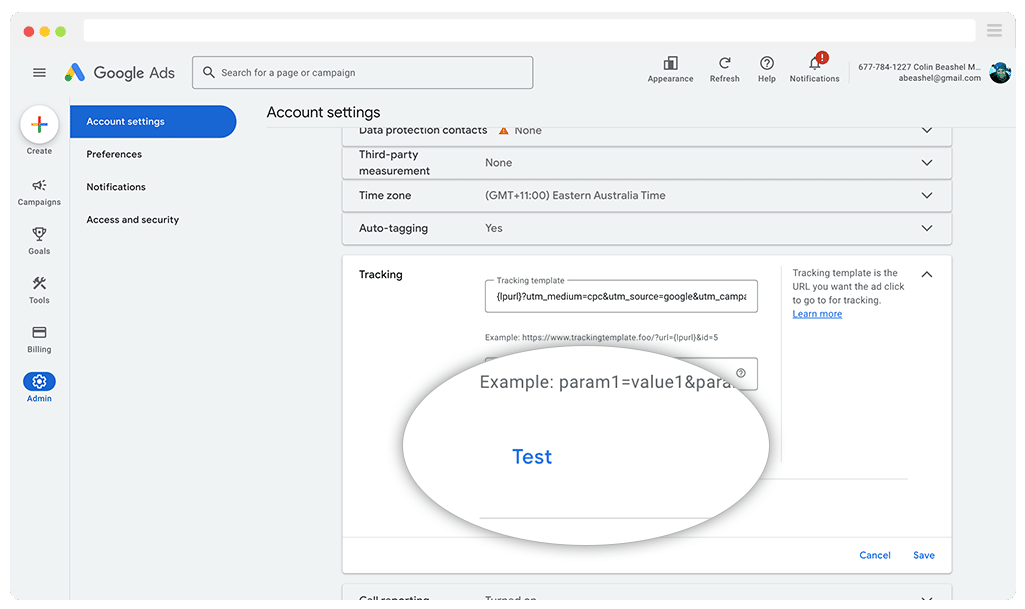
Assuming you want to add it at the Account level, you can then select the ‘Settings’ option from the left-hand menu bar and then click the Tracking Options dropdown.

In the dropdown area that appears, paste your tracking template into the box and then click Save.

4. Define your custom parameters (optional)
If you have used Custom Parameters in your Tracking Template, you’ll need to define the values for each one.
To do this, navigate to the Campaign or Ad Group you want to define them in and click the ‘Settings’ option in the top right.

In the panel that appears, select the ‘Campaign URL options’ dropdown.

And then in the Custom Parameters section, write the name of the custom parameter you want to define and then write the value.

You’ll need to do this for each of your campaigns or ad groups (depending on what custom parameters you are using in your Tracking Templates).
How to test it's working
Now that you have everything set up, the last thing you need to do is test it’s working.
To do this, navigate back to where you added the Tracking Template at the account level (Admin - Account Settings - Tracking) and click on the ‘Test’ link.

This will then show a popup that contains all the links from the ads in your account. You will be able to see the exact URL each ad is sending people to, including the UTM parameters.

You should just be able to review this table and make sure the UTM parameters are being added correctly.
How to use these UTM parameters to track how many leads & customers you get from your Google Ads
Tools like Google Analytics make it easy to track how many website visitors you get from your Google Ads, but how do you track how many leads & customers you get?
That’s where tools like Attributer come in.
When a user lands on your site from one of your campaigns (with UTM parameters), Attributer stores the UTMs in the visitor’s browser. This ensures that they are remembered as the user browses around your website (or if they leave and come back later).
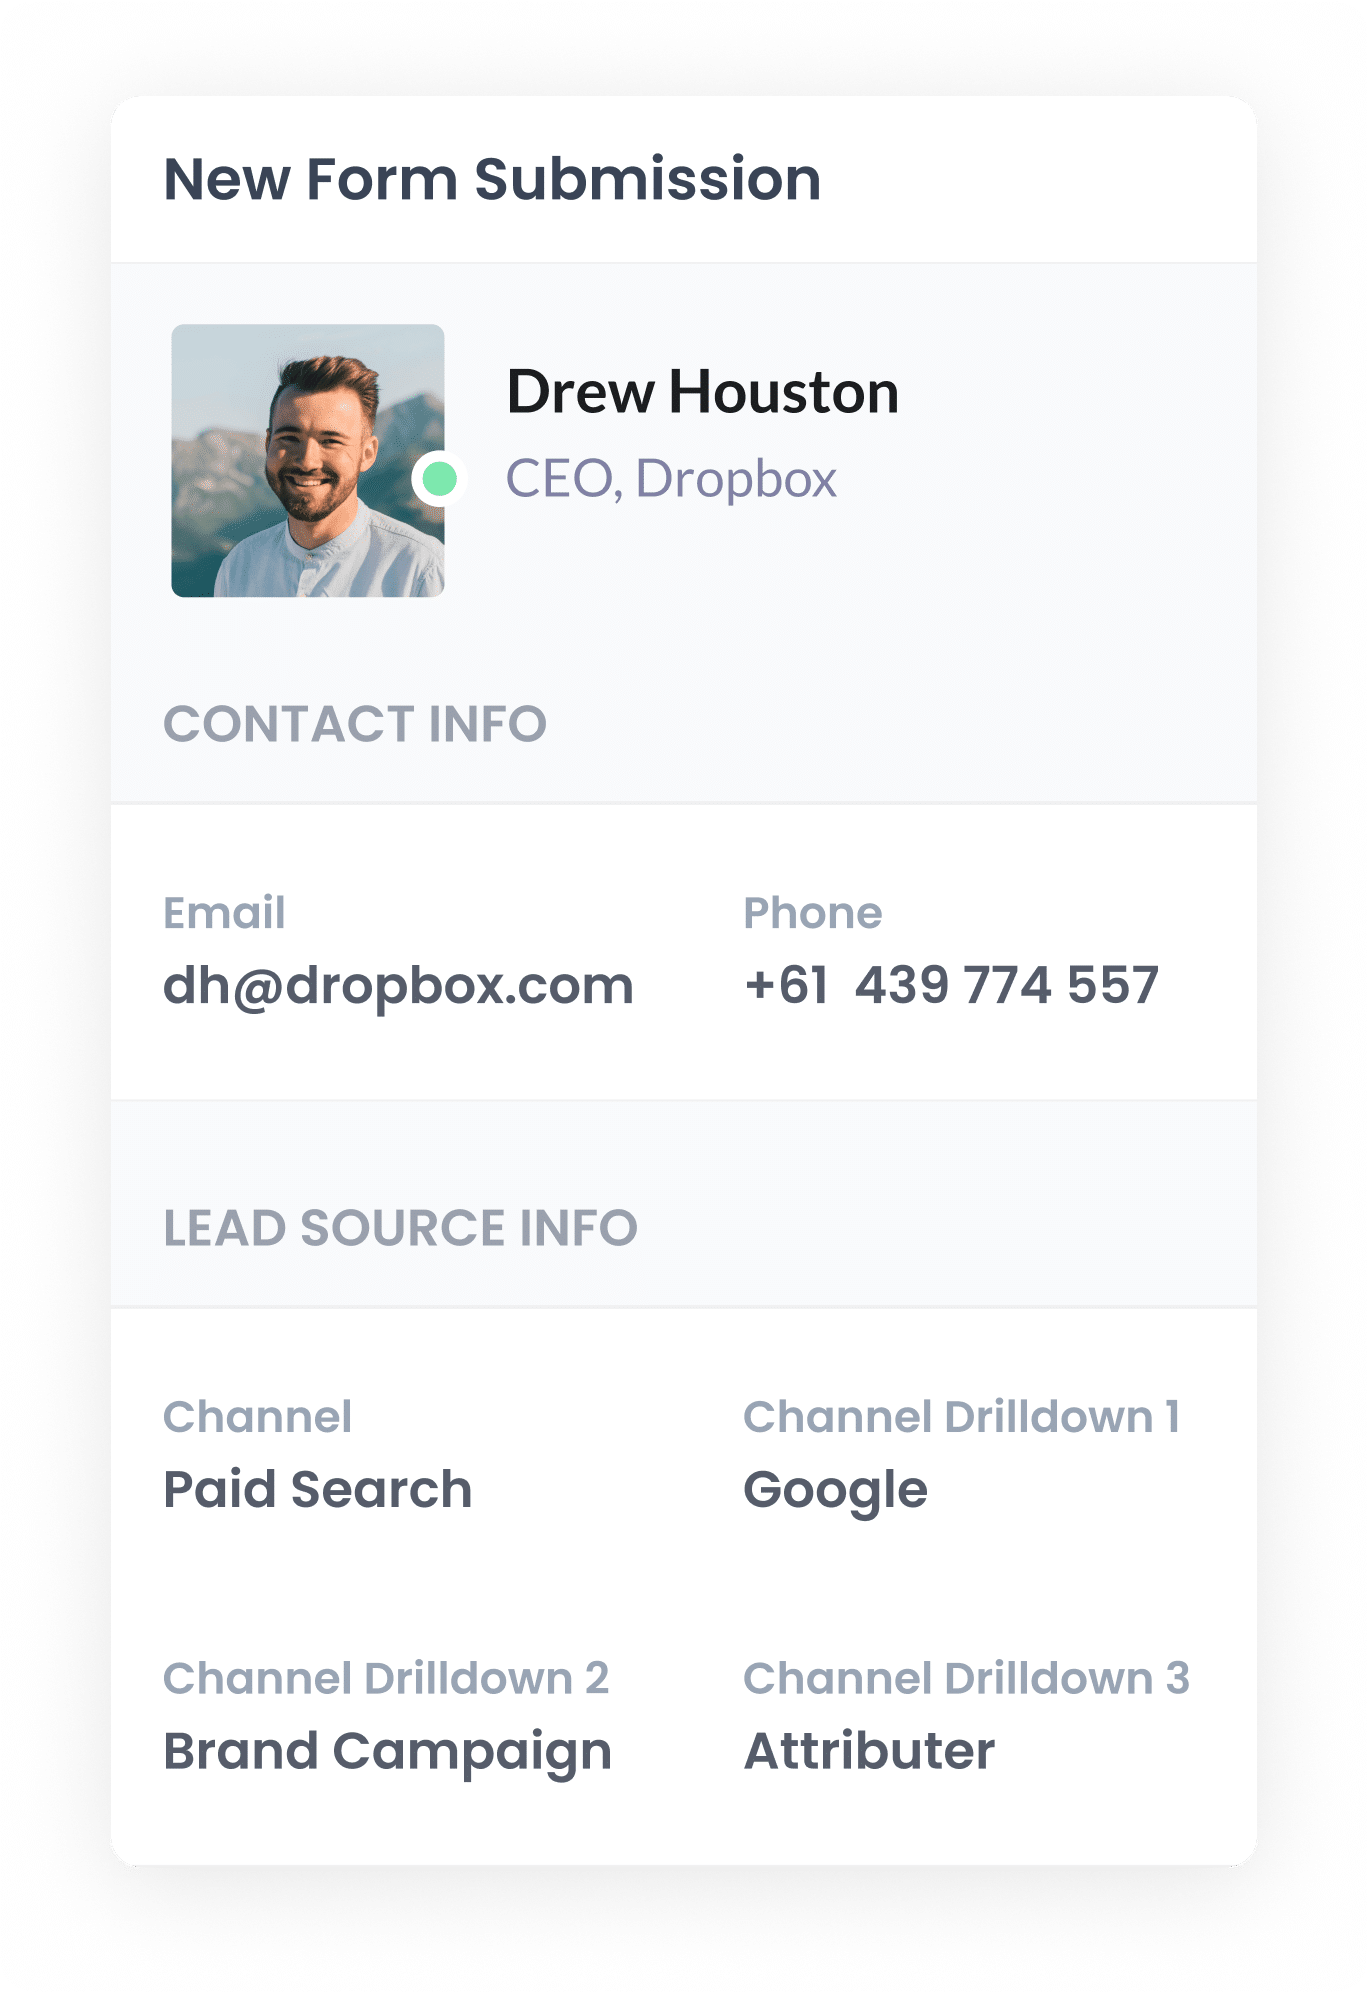
Then, when that visitor completes a form on your website, Attributer automatically writes the UTM parameters into a series of hidden fields you add to your form.

Finally, when the visitor submits the form, the UTM parameters are captured by your form tool along with the information the lead manually entered into the form (like their name, email, phone, etc).

You can then see this information in the submissions table of your form builder, include it in the new lead notification emails that your form tool sends, or send it over to your CRM or other sales & marketing tools to run reports.
Wrap Up
If you've been looking for the best way to add UTM parameters to your Google Ads, then using Tracking Templates with Custom Parameters and ValueTrack parameters is most likely it (particularly if you have a decent number of campaigns & ads).
Adding them this way (as opposed to placing them in the URL of each ad) saves set-up time, ensures you never forget to add them and helps keep the data structured and consistent (which ultimately makes for more accurate reporting in your analytics tools).
So go ahead and implement this in your Google Ads account today!
Need to capture UTM parameters in your CRM?
Start your 14-day free trial of Attributer today!

About the Author
Aaron Beashel is the founder of Attributer and has over 15 years of experience in marketing & analytics. He is a recognized expert in the subject and has written articles for leading websites such as Hubspot, Zapier, Search Engine Journal, Buffer, Unbounce & more. Learn more about Aaron here.
